beginner-tutorial
FIXME This page is not fully translated, yet. Please help completing the translation.
(remove this paragraph once the translation is finished)
Beginner tutorial
This tutorial will help you to begin to use GDevelop: You will create a very simple game where enemies are moving toward the player, and we can shot the enemies which is going to explode. 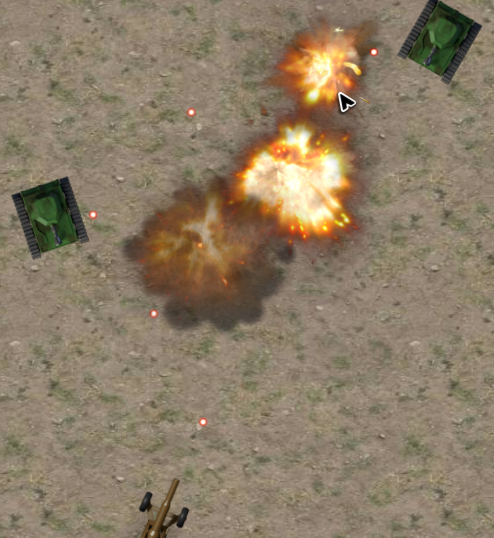
To get an overview of the software I recommend to read the page first.
Download GDevelop
If you do not have GDevelop, download it from the official website : Compilgames.net Always download GD from this page to be sure to have the latest version. Ounce you have GDevelop installed and launched, the start page is displayed: 
Download the source
You can download the finished project from here so you can see how it done in case you get stuck or don't understand something.
Create a new project
Click create new project on the start page. Next you have the option to create a new project using an example or create an empty project.  In this case we need an empty project but before select it, we need to choose a folder on the bottom of this page to select where our project is going to be stored.
  To select a custom location, we need to click the choose folder button and browse the file system of our computer to find the folder we want to use.
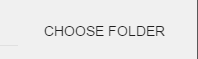
Once we have a folder selected, just click the blank project option in the list. ![]()
Create a new scene
The first thing we want to do is create a new scene. Just click the add scene button in the Project manager 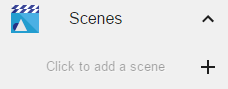
Next, click on the NewScene we have just created and it should open the scene editor.
Get the images and resources
Before going further, we'll need some images for our game. You can download them here : Download images
Once you have downloaded this file, extract its content in the folder where you created the project.
Create the player turret
The player will be controlling a turret to shot on the enemies. In the Objects editor choose Add a new object. 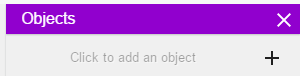 A window pop up so as to choose the type of the object to create:
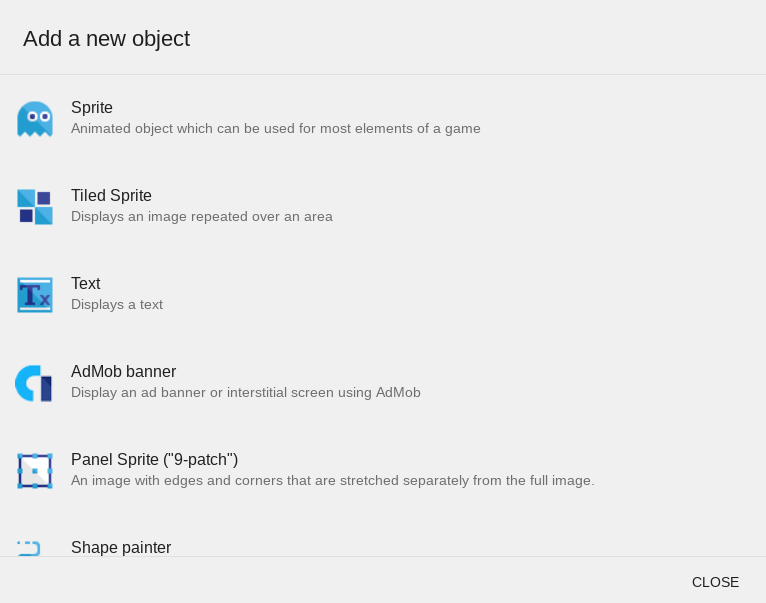
We want to create a sprite object so let select that one from the list. Next, the object properties panel should be displayed by default. If it not, just right click on the NewObject in the Object editor and select Edit object from the list.
Next we want to add an animation to the object so let click the add animation button in the properties window. 
Now we should see the animation properties of the object. 
Next we want to add the turret image as an animation, so let click the big plus symbol and browse our project folder for the image aaguntopdown.png. Next the image should be displayed in the window. 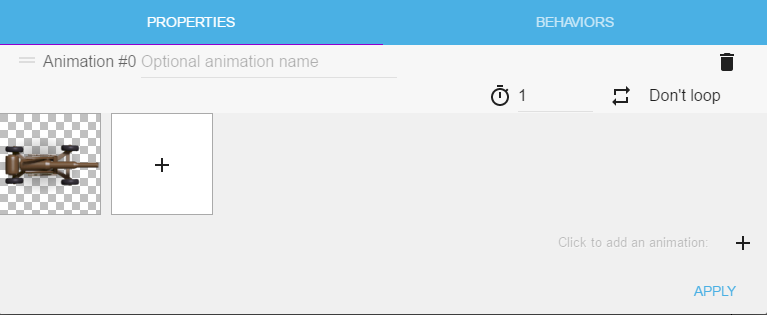
Finally, just click apply to save the changes.
Next, let rename the object if we haven't done it already. Right click on the turret object in the Object editor and select Rename from the list and type the name turret in place so later we can refer to this object using the name turret. 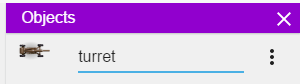
Add turret to the scene
To add the turret to the scene, select the turret in the Object editor then click in the scene editor. It should create a turret in the scene that we can select, move around and rotate. 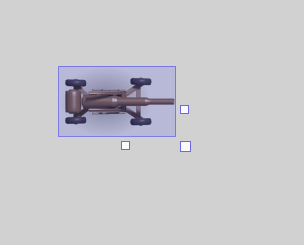
First events
We are going to create the events used to animate the whole game. First, the turret must be turned toward the player mouse.
Go to the events editor by clicking on the events tab: 
Than, on the top click the add event button to create a new event. 
The event is created, with an empty list of condition ( on the left part ) and an empty list of actions ( on the right ). Put your cursor over the action list and click add action: 
The first action will turn the turret toward the mouse: In the next window, choose the action Common action for all objects > Angle > Rotate toward position. 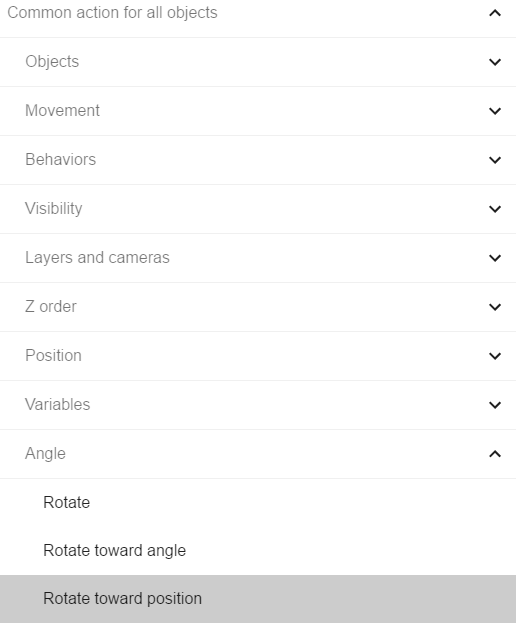 When selected, the right part of the window show the name of the action as well as the parameters. Fill the first parameter by clicking the parameter and select turret from the available objects.
 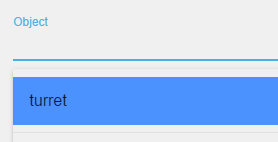 For the next parameters, enter MouseX() and MouseY() so that the object turns toward the mouse position. When the game will be launched, these two expressions will get the current X and Y position of the mouse. For the angular speed 0 means immediate rotation which is what we need in this case. But in case you want the turret to slowly rotate toward the position of the mouse, you may want to enter a small value here, something like 100.
At this point the parameters of this event should look like this: 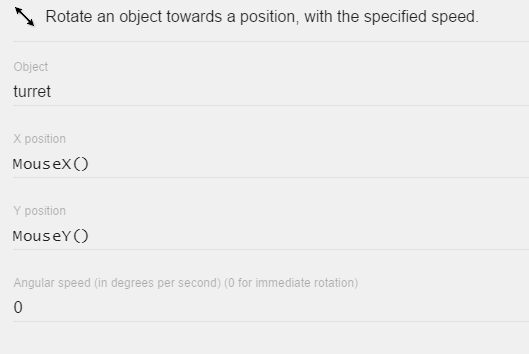 To save the changes, press OK at the bottom right corner of this page.
Now we can run preview by pressing the preview button on the top. 
If we did it right, our turret should rotate toward the position of the mouse. 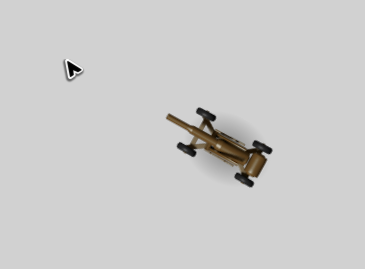
Shoot bullets with the turret
The player must be able to shoot some bullets on the enemies. First, we need a bullet object: In the objects list on the right, make a right click on the turret object and choose Add a new object or click the add new object button. 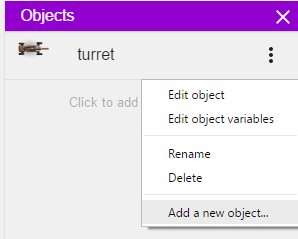 Next choose a Sprite, then add an animation and select the bullet.png image, finally rename the object to bullet. Just the way we did with the turret before.
What we want to do next is create the bullets when the left mouse button is pressed. Go to the events tab, and add a new event just the way we did with the turret. The first action will be a Create a new object action, which is available in Common actions for all objects > Objects category. 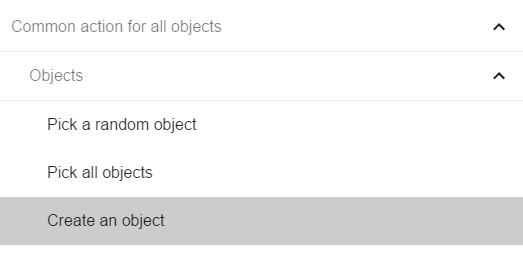 On the right side the first parameter must be bullet, as we want to create a bullet object. The other parameters are the position of the turret: Enter Turret.X() and Turret.Y() in the 2nd and 3rd parameters.
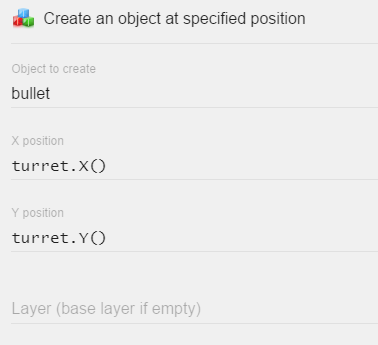
The layer parameter is not required in this case as we have only one layer in our game. Click on Ok to finalize the action.
Then add another action after this first action. Do not create another event only click Add action below the first action!  This time, choose the action called Common action for all objects > Movement > Add a force ( Angle ).
 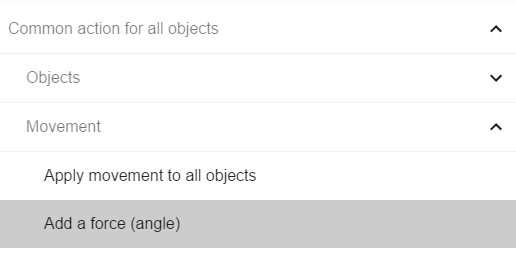 GDevelop provide a built-in forces system allowing to easily move the objects. This action will be used to move the bullet toward the mouse when fired. As the first parameter, enter bullet so that GDevelop will move the bullet just created in the last action. As of angle of movement we are going to use the direction of the turret so enter turret.Direction() in the 2nd parameter. For the 3rd parameter, enter 400 so that the bullet will move with a speed of 400 pixels per seconds. Finally, enter 1 in the last parameter so the force is constantly applied to the bullet and the bullet will keep moving after the moment started.
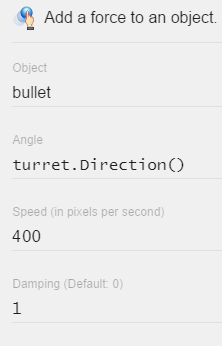
Our two actions must be launched only when the player is firing ( i.e: Pressing the left button of the mouse ). To do that, we need to add a condition to the event, click the Add condition in the event. 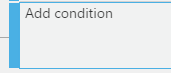
Choose the condition Mouse and touch > Mouse button pressed or touch held. 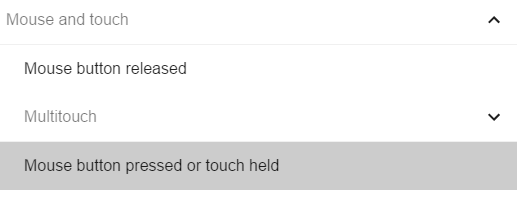 On the right side click the Button to test parameter and select Left from the list
 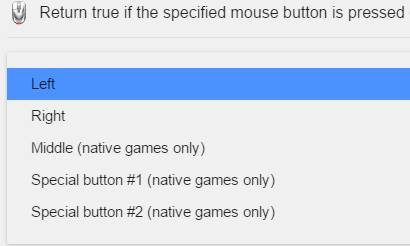 Finally, close the window by clicking the OK button. The condition is now added to the event.
If you preview the game now, you'll see that we have two problems: The bullet are fired too fast, and the appear at the object's origin, which is not very realistic.
To address the first issue, we're going to use a timer: Add a second condition to the last event we've created. Choose the condition Timers and time > Value of a timer 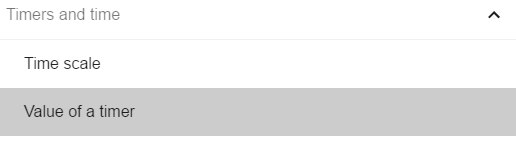 On the right side, enter 0.25 in the first parameter which the elapsed time in seconds, and “firerate” in the second parameter, which is the name of the timer we're going to use ( Do not forget the quotes around the timer's name! ).
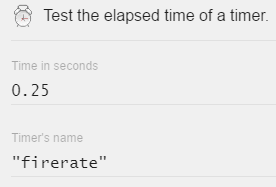
But we are not done yet, as we want to shoot bullets every 0.25 seconds, we need to reset the timer to start from 0 after rich 0.25. So let add an action Timers and time > Reset a timer just below our movement action in the same event. 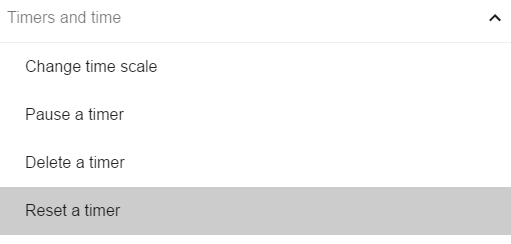 Enter “firerate” as parameter which is the name of our timer ( again, beware of the quotes! ).
 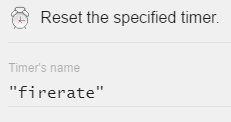 This pair of condition and action will ensure that the actions used to fire the bullet are repeated when at least 0.25 seconds is elapsed since the last bullet creation :
We must now ensure that the bullets are fired from the canon of the turret.
In order to do that, we are going to add a custom point to our turret object and create the bullets in position of that point. Let open the object properties by right clicking the turret object on the right side and select Edit object from the list. It brings up the window where we can add animations to our objects and we should see button called EDIT POINTS. 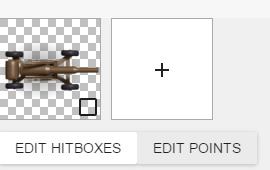
After clicking the button, we can see that our object currently has 2 points by default, the Origin point and the Centre point. 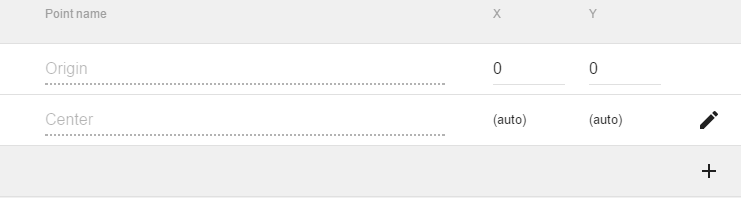 We can not rename these points but we can change their default position if we need to. But what we are here for is to add one more point to the object.
Let click the add button (plus symbol) to add a custom point to our turret object. We immediately see the new point added to the list with the name Point and position 0,0. Let rename this point to Canon and set the X position to be 110 and the Y position to be 35 
Now in the preview on the top we should see our custom point is located at the end of our canon  Now we can close the window and apply the changes we made.
The only thing is left to do is to tell GDevelop to fire the bullets from the Canon point of the turret. So in our create bullet action we need to change turret.X() and turret.Y() expressions, to turret.PointX(Canon) and turret.PointY(Canon). We can change them by clicking the expressions inside the editor. 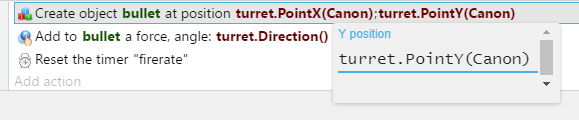 Don't forget the capital C in Canon as the name of the points are case sensitive.
If we run the preview now, our bullets should be fired from the canon of the turret.
Creating enemies attacking the turret
First, we must create the objects used for the enemies: Add an object to the object list ( Right click on an existing object > Add an object. Choose a Sprite object as before. ). Name it enemy.
Edit the object (right click in the list and select Edit object from the list) next add an animation to the object and two images: tank2fr1.png and tank2fr2.png. 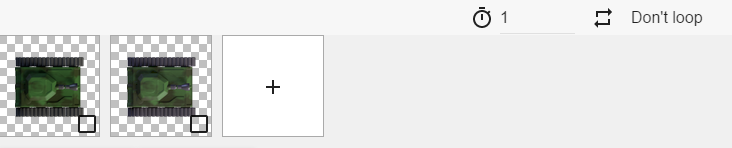 Then, change the time between the images to 0.05 and change the animation to Loop to make the animation repeat.
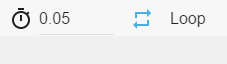
Click Apply when you done.
Stop! Save time!
Before going any further, remember to save frequently: Click File and then Save to save your project. 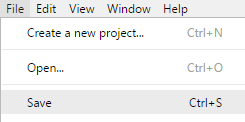
Enemy AI
Let's go back to the game. We want the enemies moving toward the turret: Go to the event editor and add a new event. What we want to do is creating an enemy every second: Let add a condition Timers and time > Value of a timer. Enter 1 in the first parameter and “EnemyCreation” for the name of the timer. Don't forget the quotes when you enter the name of the timer.
Next let add the action to create an enemy object: Add an action Common action for all objects > Objects > Create an object. Select enemy in the first parameter. For the second parameter, the X position of the new object to be created, enter the expression Random(800): This will return a random number between 0 and 800, so that each enemy we create will have a different position when they are created. For the Y position, enter -50. This will create the enemy outside the screen, so that the player won't have the feeling that an enemy tank just appeared from nowhere.
Finally, let add the action to reset the timer ( Timers and time > Reset a timer with “EnemyCreation” as parameter ). Again, don't forget the quotes when you enter the name of the timer. At this point, our event should look like this: 
If we run a preview now, probably we won't notice anything as the enemy is created outside the screen. Let move the enemies toward the player. Add another event without any condition and choose the action Common action for all objects > Movement > Add a force to move toward an object.  On the right side, for the first parameter, select enemy, and select turret for the second parameter. Enter 150 pixels per second for speed, and damping is 0, as the force will be continuously applied.
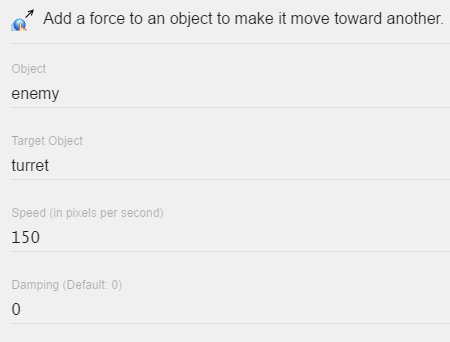
Now if we run a preview we should see that our enemies are moving toward the turret, but you may notice that they don't actually rotate toward the turret so let do something about that. Let add a second action after the movement which is the Common action for all objects > Angle > Rotate toward position and for the first parameter on the right select enemy as we are rotating the enemy and for the X and Y position we are going to use an expression to get the Centre point of the turret and make the enemies rotate toward that point and the angular speed is 0 so it is going to rotate immediately. 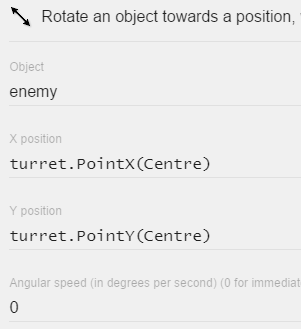 At this point our enemy event should look like this:
If we run the preview now, our enemies should move and rotate toward the turret. 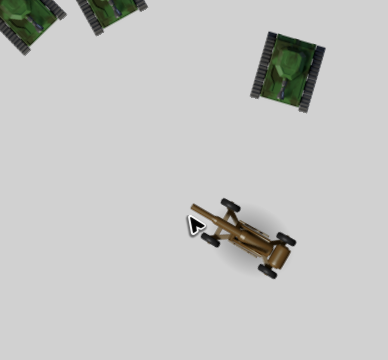
Adding explosions
It time to destroy the tanks. The first thing we want to do is create an explosion in position of the tanks when they are collided with the bullet. So let add a new sprite object, name it explosion and add all the images to an animation beginning with Explosion_ 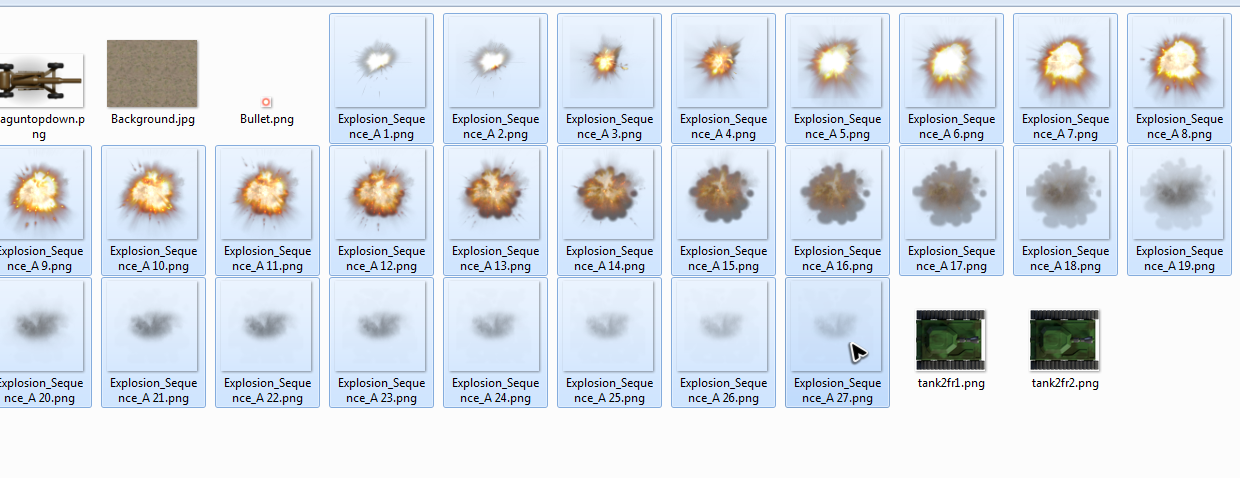
After all the images are added to the animation, set the time between the images to 0.01 seconds. 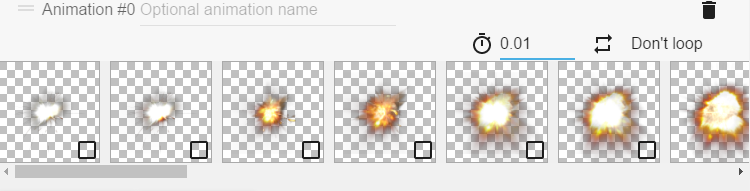
Save it by clicking Apply.
Next, we want to create the explosion when the bullet is in collision with the enemy. Let add a new blank event and add the condition Common conditions for all objects > Collision > Collision  And on the right side for the first parameter select bullet and the second parameter select enemy
When it done, let add an action to create the explosion object just the way we have created the bullets and the enemies before but for X and Y position let use the expression enemy.X() and enemy.Y() which is going to get the X and Y position of the enemy object that is in collision with the bullet. 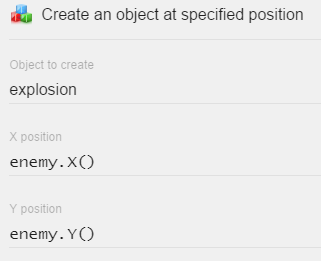
Finally, add the action after creating the explosion Common actions for all objects > Object > Delete an object and on the right side for parameter select the object enemy as we want to delete the enemy. Add the same action again, to also delete the bullet right after the enemy is deleted. At this point our event should look like this 
If we run a preview now, we should notice a few problems. Our explosion objects are not created exactly in the position of the enemy and once it created the explosion object remain in the scene. To solve the second problem, let delete the explosion object after the animations is finished. Add a new empty event and the condition Sprite > Animations and Images > Animation finished 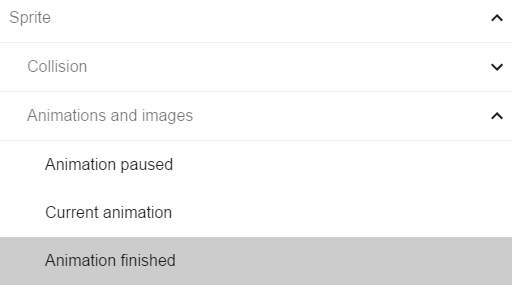 For the parameter on the right select the explosion object as we want to do something if the animation of the explosion object is finished.
 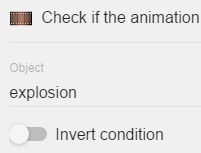 And what we want to do is delete the explosion object so next let add the action, delete the explosion object.
To solve the first problem we need to understand what is the cause of the problem. When we create the explosion object by using the expression enemy.X() and enemy.Y() we are creating the objects at the origin point of the enemy object which is the top left corner of the enemy and we also creating the explosions from their origin point which is the top left corner of the explosion object.
To solve the problem, what we need to do is, change the position of the Origin point of the explosion to be in the middle of the object. Let edit the explosion object by right clicking the explosion object and select Edit object from the list. In the next window, select EDIT POINTS. Next we want to change the X and Y position of the Origin point to 120 which is right in the middle of the image 
Next, what we want to do, instead of creating the explosion object at the Origin point of the enemy, we want to create the object at the Centre point. So let change the expression in the create explosion action from enemy.X() to enemy.PointX(Centre) and form enemy.Y() to enemy.PointY(Centre) 
If we run a preview now, our enemies should explode and it should also look right. 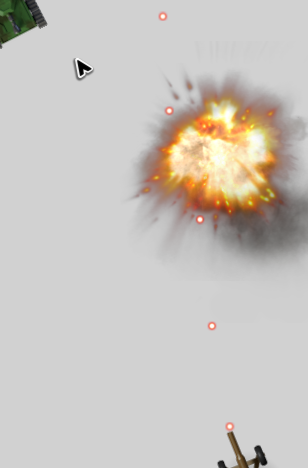
Adding more explosions and a Game Over
Until now, the player could not die. We want the player's turret to be destroyed when an enemy tank is hitting it. First, add a new event, and do as we did for the event used to destroy the enemies: Add a condition testing for a collision between a tank and the turret. Then create an explosion at the turret position. Finally, add an action to destroy the turret: 
It would be also interesting to display a “Game Over” text when the turret is destroyed: Add an object to the object list. This time, choose a Text object and name it GameOver. 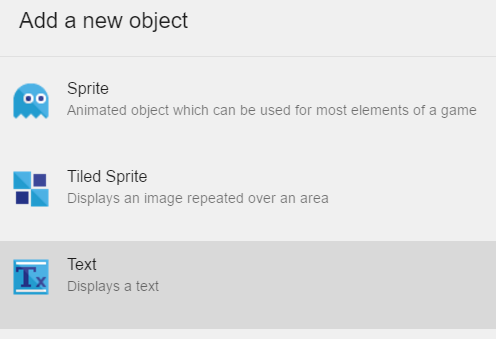
Edit the object by right clicking on the object and and select Edit object from the list. Let change the text to Game Over, the text color to red and the text size to 40. 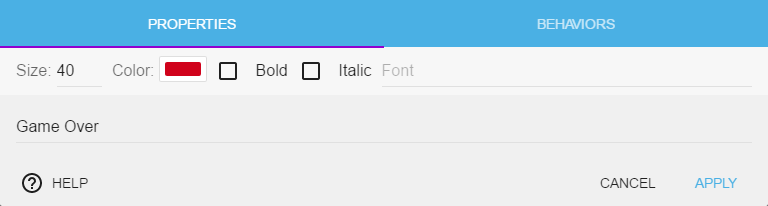 Finally, let add a text object to our scene.
What we want to do next, is hide the text object and display it if there is no turret in the scene meaning the turret is destroyed. Let add a new blank event and add the condition Scene > At the beginning of the scene 
This condition has no parameters because the only thing it does is execute the action only once at the beginning of the scene. Next, add the action to the same event Common Actions for all objects > Visibility > Hide 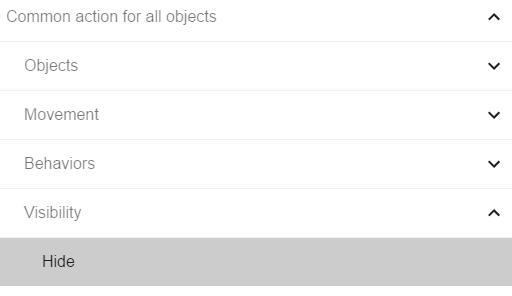 For parameter select the GameOver object as we want to hide this object
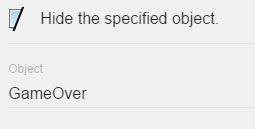
Now what we want to do is show the text object if there is no turret in the scene Add a new empty event and add the condition Common conditions for all objects > Objects > Objects count 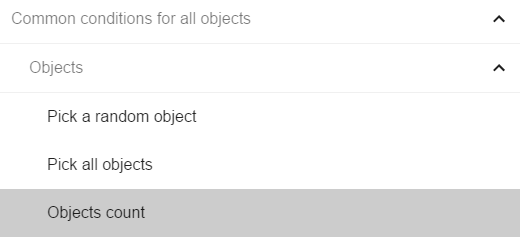
For the first parameter on the right side select the turret object, for sign of test select the equal sign and for value of test enter 0 as we want to test if the number of turret in the scene is 0. 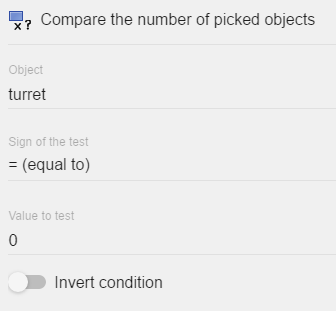
And what we want to do is show the text GameOver if there is no turret in the scene, so add the action Common action for all objects > Visibility > Show and for parameter we want to select the GameOver object. 
Finally, an interesting effect is to stop the game and display Game Over with a little delay. Add a second condition Timers and time > Value of a timer for time parameter enter 0.1 and for name parameter enter "GameOver". Then, add a second action: Timers and time > Change time scale and enter 0 as parameter to stop the game and display the Game Over text after 0.1 seconds.
This is what all the events should look like at this point. 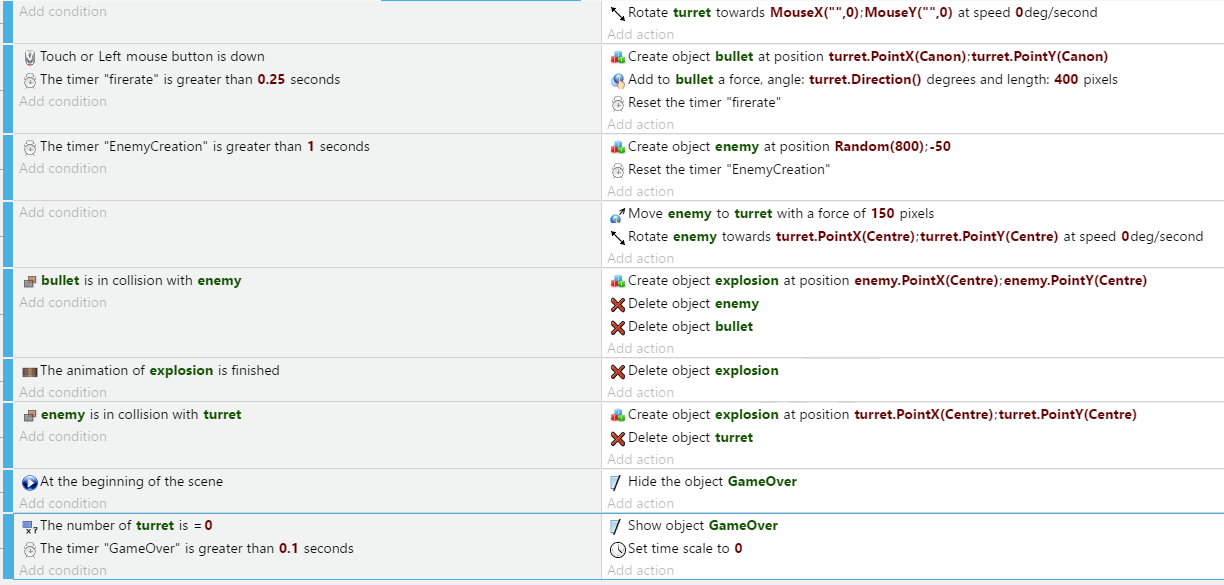 You can preview the game and should see that once the turret is destroyed, with a little delay the Game Over text is displayed and the game is stopped.
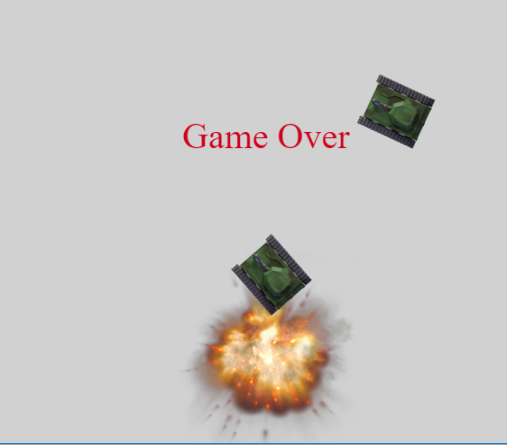
Optimizing the game
When a bullet get outside the screen, we no longer need that bullet but we still apply movement to it and we are checking collision between the bullet and the tank. Every device has limited resources such as memory and processing power and we are wasting this valuable resources that we need to address otherwise our game may slow down, crash and become unplayable when it rich the limit of the device we are playing our game on. You want your game to be playable on as many devices as possible so you always need to optimize your game and one way to do that is to delete objects that no longer required in our game and this way limit the amount of memory and processing power used by the game.
We could add an event to destroy the bullets when they are too far from the turret, that is quite easy. But we can also use a behavior. A behavior in GDevelop is adds a certain behavior and feature to an object, in this case we are going to add the Destroy outside screen behavior to the bullets so they get destroyed outside the screen.
Make a right click on the object in the object list and choose Edit object from the list. In the next window on the top, click the Behaviors tab, this tab going to display all the behaviors we have added to our object. It is empty now. 
Click on the add behavior button 
Next select from the list the Destroy outside screen behavior 
Next you are going to see the behavior is added to the list. Normally if the behavior has any parameters it is also display here so you can change it, but this behavior has no parameters as the only think it does is destroy the object when it outside the screen. Click Apply and we are done.
If you run the preview now, probably you won't notice any difference as the game is very simple and you most likely using a device with at least 2GB of RAM and a dual core CPU. So there is plenty of resources for our simple game but in case we would create hundreds and thousands of bullets that you are free to try you may notice a little slow down after a while without destroying them.
Adding a background
One last thing to make the game good looking is to add a background.
Add a Sprite object, name it background and add the background.jpg image to the object. Next, you can add the object to the scene as usual and make sure it fills the entire scene. To make it easier, you can enable the grid using the button on the top and it should help with positioning the object.  But you may notice the background object cover all the other objects, to solve this problem we need to change the Z-order of the object. While the background object is selected, on the left you should notice the object properties. In case you have closed this tab, you can re-open it using the button on the top.
  We can change all kind of properties here such as the positon, angle and size of the object but what we are interested in is the Z-order.
 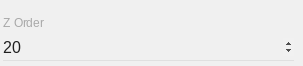 Change the value of the Z-order to a low number, in this case we need a negative number something like - 1. The reason for the negative value is that when we are creating the bullets, enemies and explosions we are creating them at Z-order 0 by default and so we need to position the background below 0 otherwise we won't see anything but the turret in our game. An other way to fix it is to tell GDevelop to position the tanks and explosions and bullets on a higher Z-order so we can position the background at 0 but it is something that you the developer need to decide for your self how you want to do it. Every problem can have number of different solutions.
And we are done. The game is complete and ready to be shared.
Add comments
So, our game is done and playable but what if you want to share the source with someone else? Let say you are working in a team and someone else would like to make modifications to the game. How that person know where to look for the events for enemies, bullets, the turret? Of course it may sound silly to you as most of the events in GDevelop are self explaining and our game is simple enough to see it through but imagine the situation you have a game made out of hundreds and thousands of events. This is where comments come in handy as we can leave reminders in our game for others and also for our self. Trust me, even though you are the one who made it, in a big complex game, even you won't remember where to find different things especially months later. So always use comments regardless how small or big your project is.
To add comments, you can simply click the add comment button on the top.  After you should see a yellow box in the events editor, by clicking in the box you can start writing a comment
You can change the position of each event and comment by moving the mouse over the blue edge on the left and drag it up and down. Once you done it, you should have something like this: 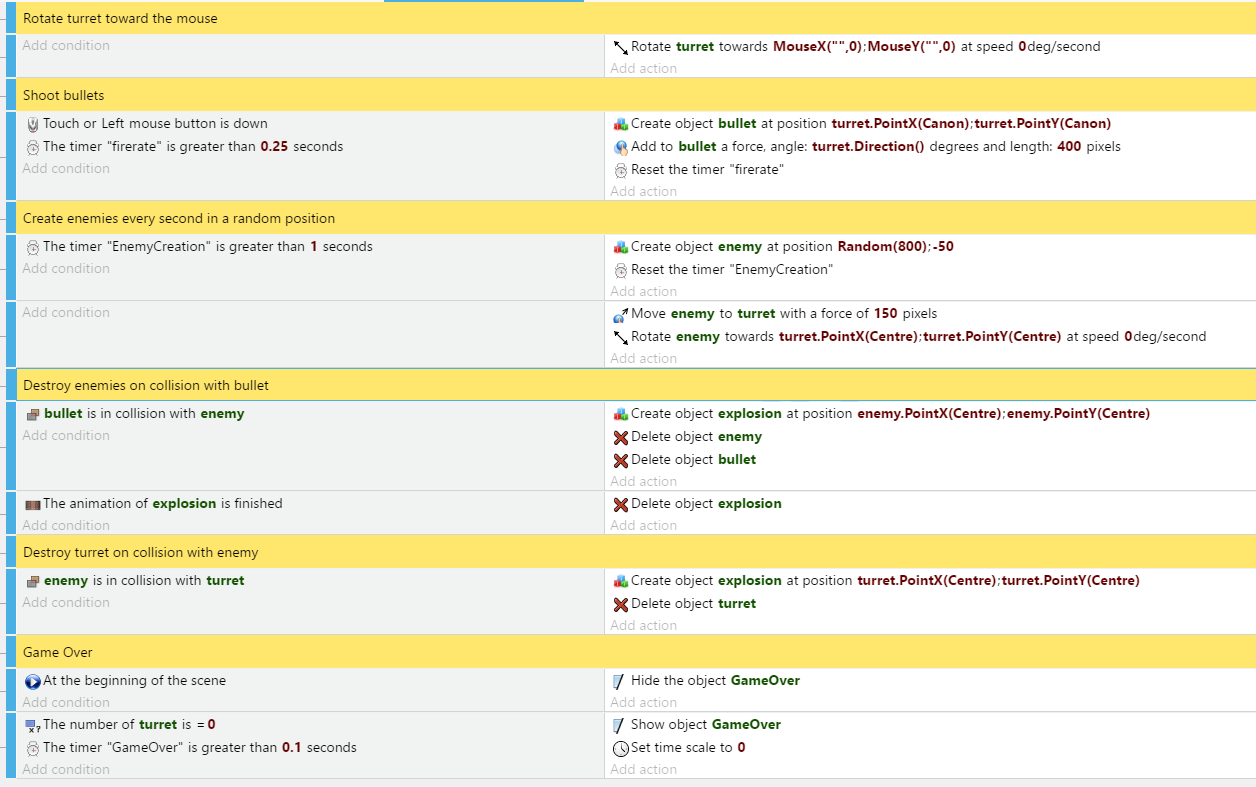
Let's discover GDevelop by yourself
You can browse the other and read the page. There is also lots of examples and templates bundled with GDevelop and you can find more by visiting: gametemplates.itch.io And you can also ask questions on the official forum