Gameplay tests
Warning
Gameplay tests are an experimental feature. The interface and the testing functions may still change, and some games or behaviors may not be fully testable yet. Starter games and examples will be progressively updated to include gameplay tests, so you can learn from real, working examples.
A gameplay test plays your game like a player would: it presses keys, moves the mouse, touches the screen, then checks that what should happen actually happens — the coin is collected, the score goes up, the enemy hurts the player. Tests run in a preview of your game, usually much faster than real time, and report a clear result: passed or failed.
Gameplay tests are useful to:
- Catch regressions: after changing events or objects, re-run your tests to make sure nothing broke.
- Verify AI work: when the AI builds a mechanic for you, it can write and run a gameplay test to prove the mechanic works.
- Check performance: measure how long frames take with many objects on screen and catch slowdowns early.
Creating a test
In the Project Manager, find the Gameplay tests section and click Add a gameplay test. Gameplay tests can also be added to an extension, next to its functions and behaviors — useful to verify a behavior keeps working in a small test scene.
Opening a test shows two parts:
- The code editor, where the test script is written.
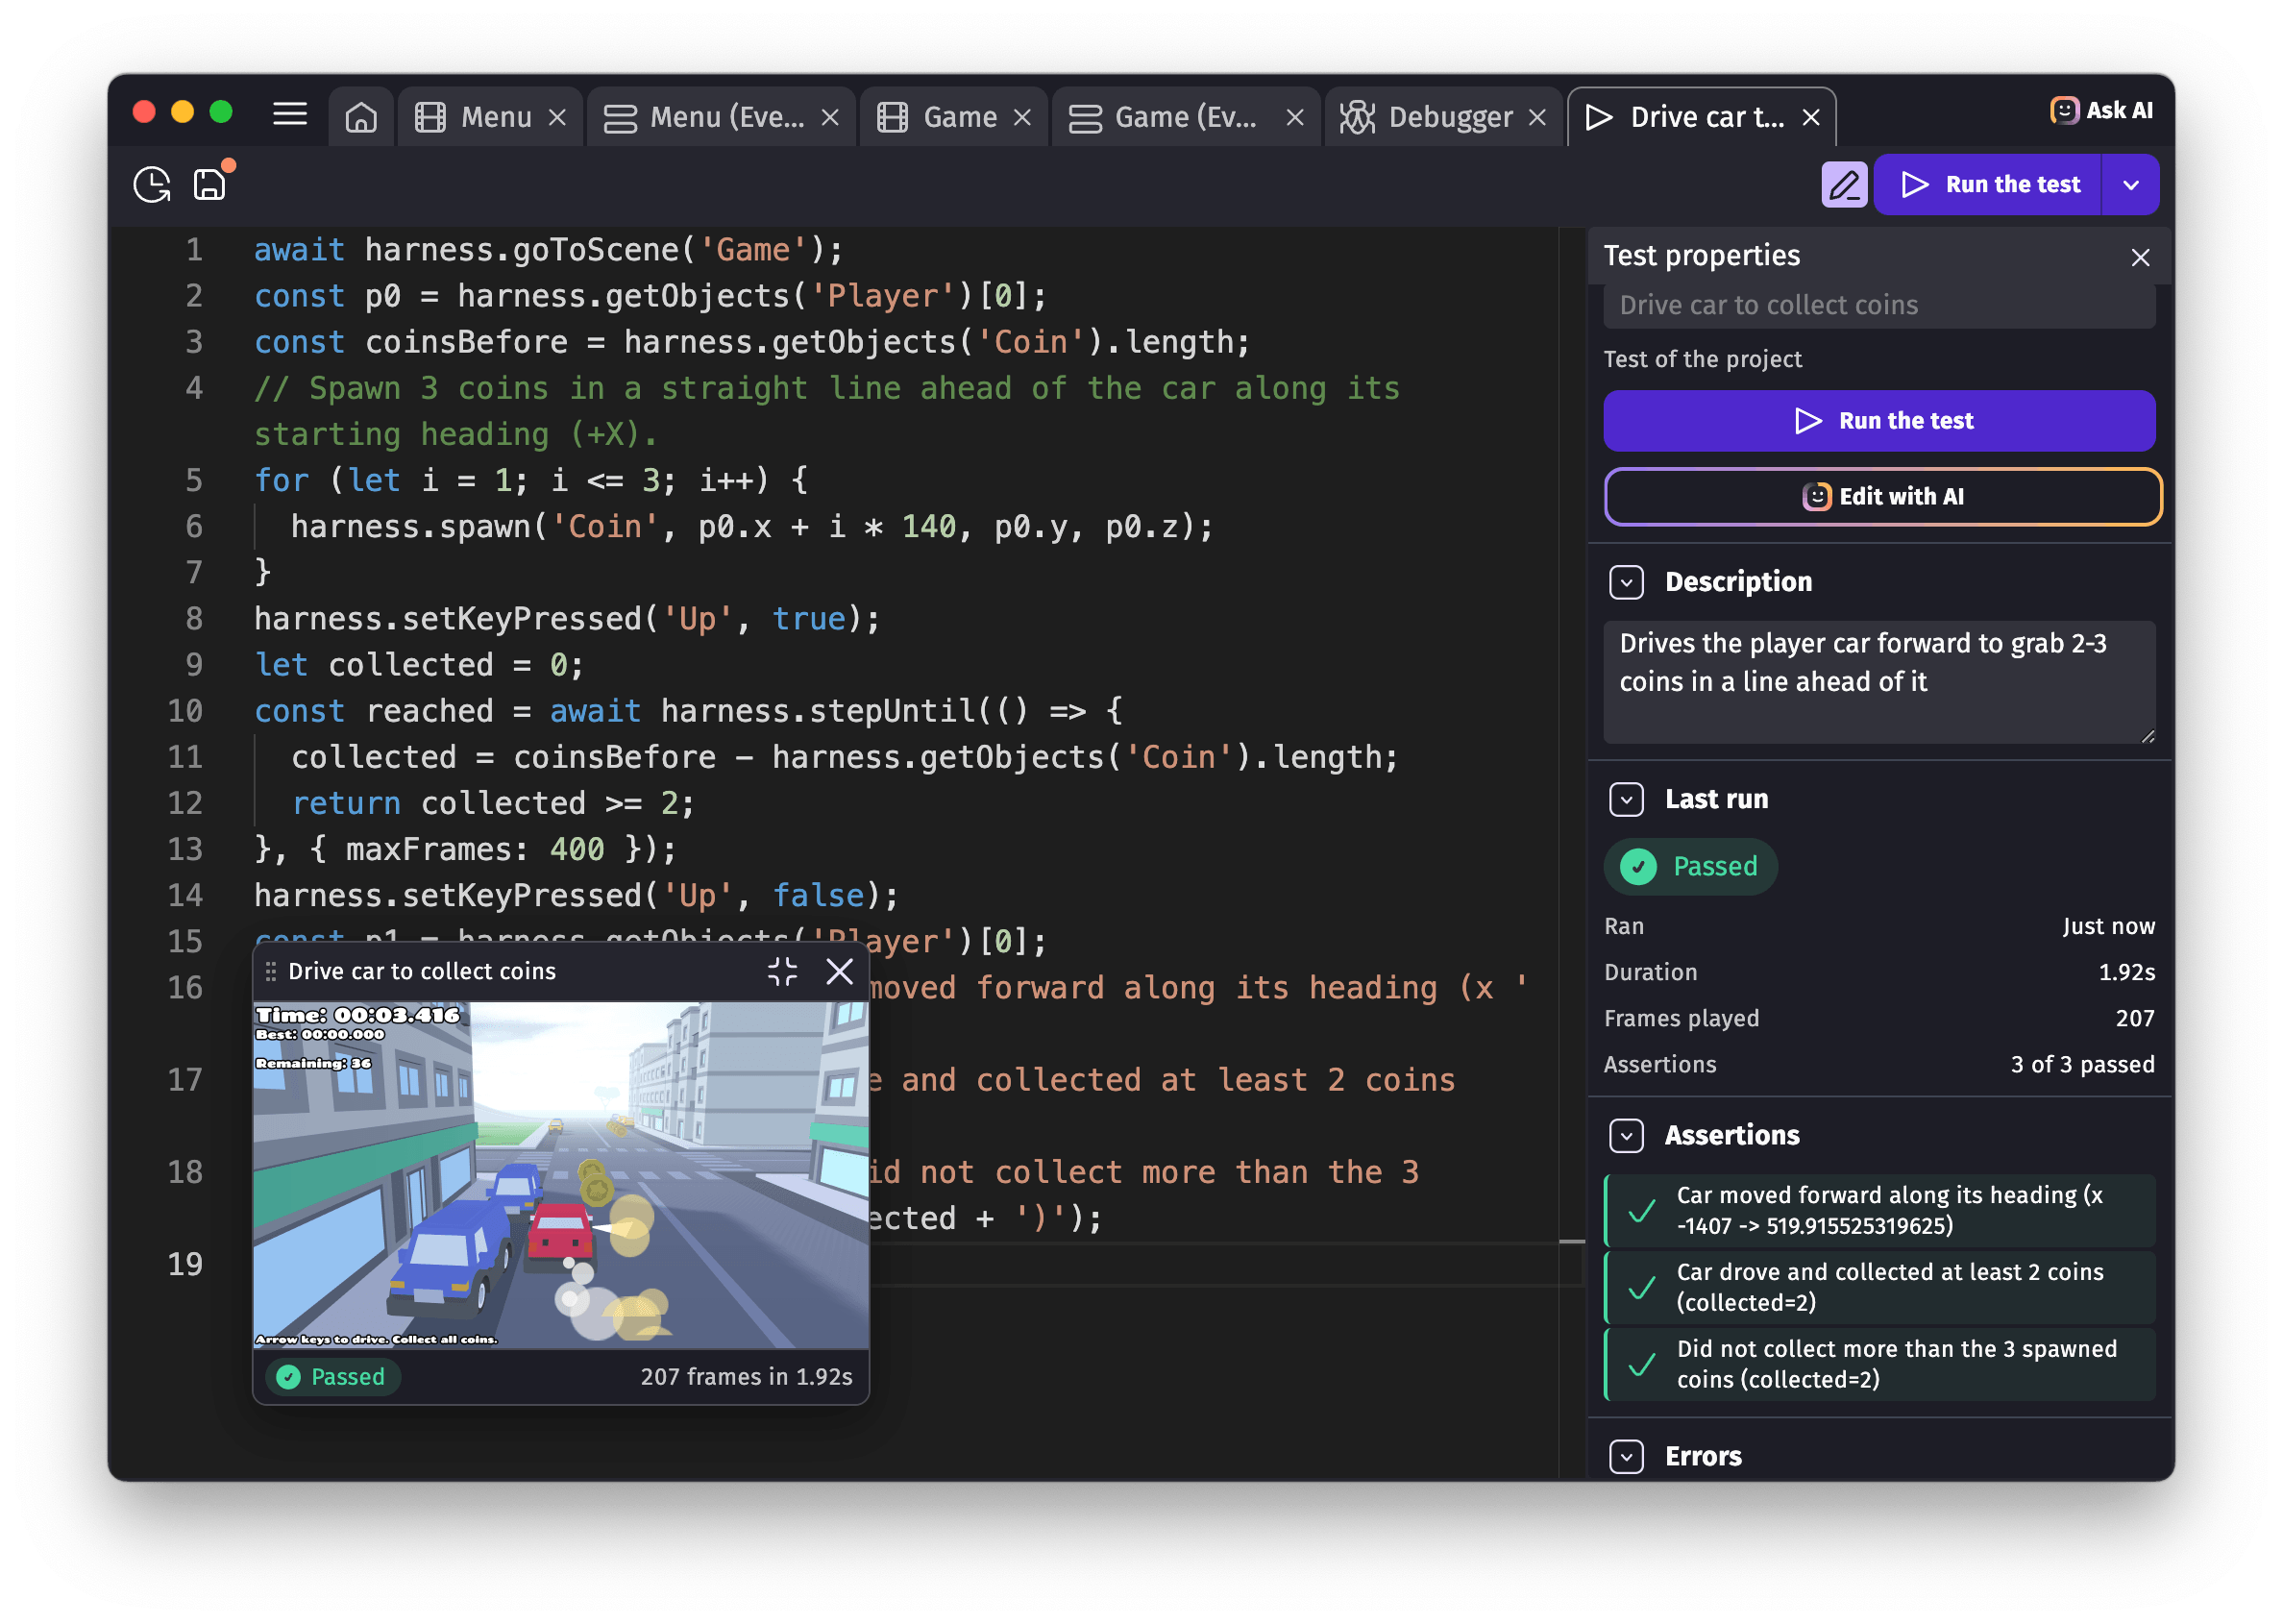
- The properties panel, with the test's description and the results of the last run: assertions (the checks the test made), errors, logs and screenshots.
You don't have to write tests by hand: click Edit with AI and describe what the test should verify — the AI writes the script for you. Reading the scripts it produces is also a good way to learn.
Running a test
Click Run the test. The game starts in a preview and the test plays it. By default the test runs as quickly as possible — usually a few seconds even for a long scenario. The arrow next to the button offers two more choices when you want to watch what the test is doing:
- Run at 4x speed: fast, but visible.
- Run at normal speed: the game plays exactly like for a player.
A run ends with one of these statuses:
- Passed: the script completed and all its checks succeeded.
- Failed: a check (
harness.assert) was not true — the game doesn't behave as the test expects. - Error: the script itself crashed (for example, a typo in an object name).
- Timeout: the test exceeded its frame or time budget — often a sign the test waited for something that never happened.
After the run, the properties panel shows every assertion, the logs (console.log output), the screenshots taken, and a timeline of notable events (scene changes, test inputs...).
Tests can also be run without opening the editor manually — for example in continuous integration: see Run gameplay tests from the command line.
Writing a test
A test is JavaScript code with access to a harness object that drives the game. The game only advances when the test asks for it, one frame at a time (a fixed 1/60th of a second per frame), so tests are deterministic: the same test on the same game always gives the same result.
The most useful functions:
| Function | What it does |
|---|---|
await harness.goToScene('Level 1') |
Start a scene, fresh. |
await harness.stepFrames(60) |
Play 60 frames (1 second of game time). |
await harness.stepUntil(condition, { maxFrames: 300 }) |
Play until a condition is true (or give up). |
harness.setKeyPressed('Right', true) |
Press (or release, with false) a key. |
harness.getObjects('Player') |
Snapshots of all instances of an object: position, size, hidden, variables, behavior state... |
harness.getSceneVariable('Score') |
Read a scene variable (.value holds the value). |
harness.spawn('Enemy', 200, 100) |
Create an instance — to arrange a situation to test. |
harness.assert(condition, 'message') |
The heart of a test: check something, fail the test if it's not true. |
await harness.takeScreenshot('label') |
Attach a screenshot to the result. |
Two rules to keep in mind:
- Always
awaitthe functions that play the game (stepFrames,stepUntil,goToScene...): a missingawaitends the test after a single frame. - Arrange, then assert: it's fine to use
spawnorsetSceneVariableto set up the exact situation to test, but never use them to fake the very thing the test then checks.
Examples
1. The player can jump
Press the jump key, and check the player actually went up.
await harness.goToScene('Level 1');
// Let the player land on the ground first.
await harness.stepFrames(30);
const before = harness.getObjects('Player')[0];
harness.assert(!!before, 'The player is in the scene');

harness.setKeyPressed('Space', true);
await harness.stepFrames(10);
harness.setKeyPressed('Space', false);

const after = harness.getObjects('Player')[0];
harness.assert(
  after.centerY < before.centerY - 20,
  'The player moved up after pressing Space'
);
2. Collecting a coin increases the score
Arrange a coin next to the player, walk into it, and watch the score.
await harness.goToScene('Level 1');
await harness.stepFrames(30);

// Arrange: put a coin right in front of the player.
const player = harness.getObjects('Player')[0];
harness.spawn('Coin', player.centerX + 50, player.centerY);
const scoreBefore = harness.getSceneVariable('Score')?.value || 0;

harness.setKeyPressed('Right', true);
const scored = await harness.stepUntil(
  () => (harness.getSceneVariable('Score')?.value || 0) > scoreBefore,
  { maxFrames: 120 }
);
harness.setKeyPressed('Right', false);

harness.assert(scored, 'The score increased after touching the coin');
harness.assert(
  harness.getObjects('Coin').length === 0,
  'The coin disappeared once collected'
);
3. Touching an enemy hurts the player
Spawn an enemy on the player and check the health goes down — with a screenshot as evidence.
await harness.goToScene('Level 1');
await harness.stepFrames(30);

const player = harness.getObjects('Player')[0];
const healthBefore = harness.getSceneVariable('Health')?.value;
harness.assert(healthBefore > 0, 'The player starts with some health');

// Arrange: spawn an enemy right on the player.
harness.spawn('Enemy', player.centerX, player.centerY);
await harness.stepFrames(30);

const healthAfter = harness.getSceneVariable('Health')?.value;
harness.assert(
  healthAfter < healthBefore,
  'The player lost health when touching an enemy'
);
await harness.takeScreenshot('after the hit');
4. Pressing Escape opens the pause menu
Menus and dialogs are usually shown by making a layer visible — check the layer, not the objects.
await harness.goToScene('Level 1');
await harness.stepFrames(10);

const pauseLayer = harness.getRuntimeLayer('PauseMenu');
harness.assert(pauseLayer !== null, 'The PauseMenu layer exists');
harness.assert(!pauseLayer.isVisible(), 'The pause menu starts hidden');

// Press Escape once: press, play a frame, release.
harness.setKeyPressed('Escape', true);
await harness.stepFrames(2);
harness.setKeyPressed('Escape', false);
await harness.stepFrames(2);

harness.assert(
  pauseLayer.isVisible(),
  'The pause menu is shown after pressing Escape'
);
5. The game stays fast with 100 enemies
Performance test: spawn a horde, profile 2 seconds of gameplay, and check the average frame time.
await harness.goToScene('Level 1');
await harness.stepFrames(10);

// Arrange: a 10x10 grid of enemies.
for (let i = 0; i < 100; i++) {
  harness.spawn('Enemy', 100 + (i % 10) * 60, 100 + Math.floor(i / 10) * 60);
}

harness.startProfiling();
await harness.stepFrames(120);
const profile = harness.stopProfiling();

harness.assert(
  profile.avgStepTimeMs < 16,
  'The game logic stays under 16ms per frame (60 FPS) with 100 enemies'
);
If this test fails, the profile attached to the result shows where the time goes (events, physics, rendering...) — a great starting point to optimize.
Gameplay tests and the AI
Gameplay tests work hand in hand with GDevelop AI:
- Ask the AI to write a test for a mechanic ("write a test that checks the player dies when falling in a pit") — or click Edit with AI on an existing test.
- When the AI builds or fixes a mechanic, it can run gameplay tests to verify its own work before telling you it's done.
- Tests also act as living documentation: they describe, in a precise and always-verified way, how your game is supposed to behave.
Tip
Start small: one test per core mechanic (jumping, collecting, taking damage). A handful of short tests that you re-run after every change catches most mistakes.