Add Enemies to the Game
This part of the tutorial explains how to add enemies to the game that can move back and forth along a set route. The next part of the tutorial explains how the player can kill -- and be killed by -- these enemies.
Series
You are reading Part 6 of the Platformer Tutorial.
- Part 1: Getting started
- Part 2: Create a Playable Character
- Part 3: Create Platforms
- Part 4: Animate the Playable Character
- Part 5: Add Collectible Coins to the Game
- Part 6: Add Enemies to the Game
- Part 7: Make Enemies Kill the Player (and the Player Kill the Enemies)
- Part 8: Add Checkpoints to the Game
Step 1: Create an object for the enemy
- Create a Sprite object named "Slime".
- Add an animation to the object that uses the following assets:
- slimeWalk1.png
- slimeWalk2.png
- Enable the Loop option.
- Drag an instance of the object into the scene.
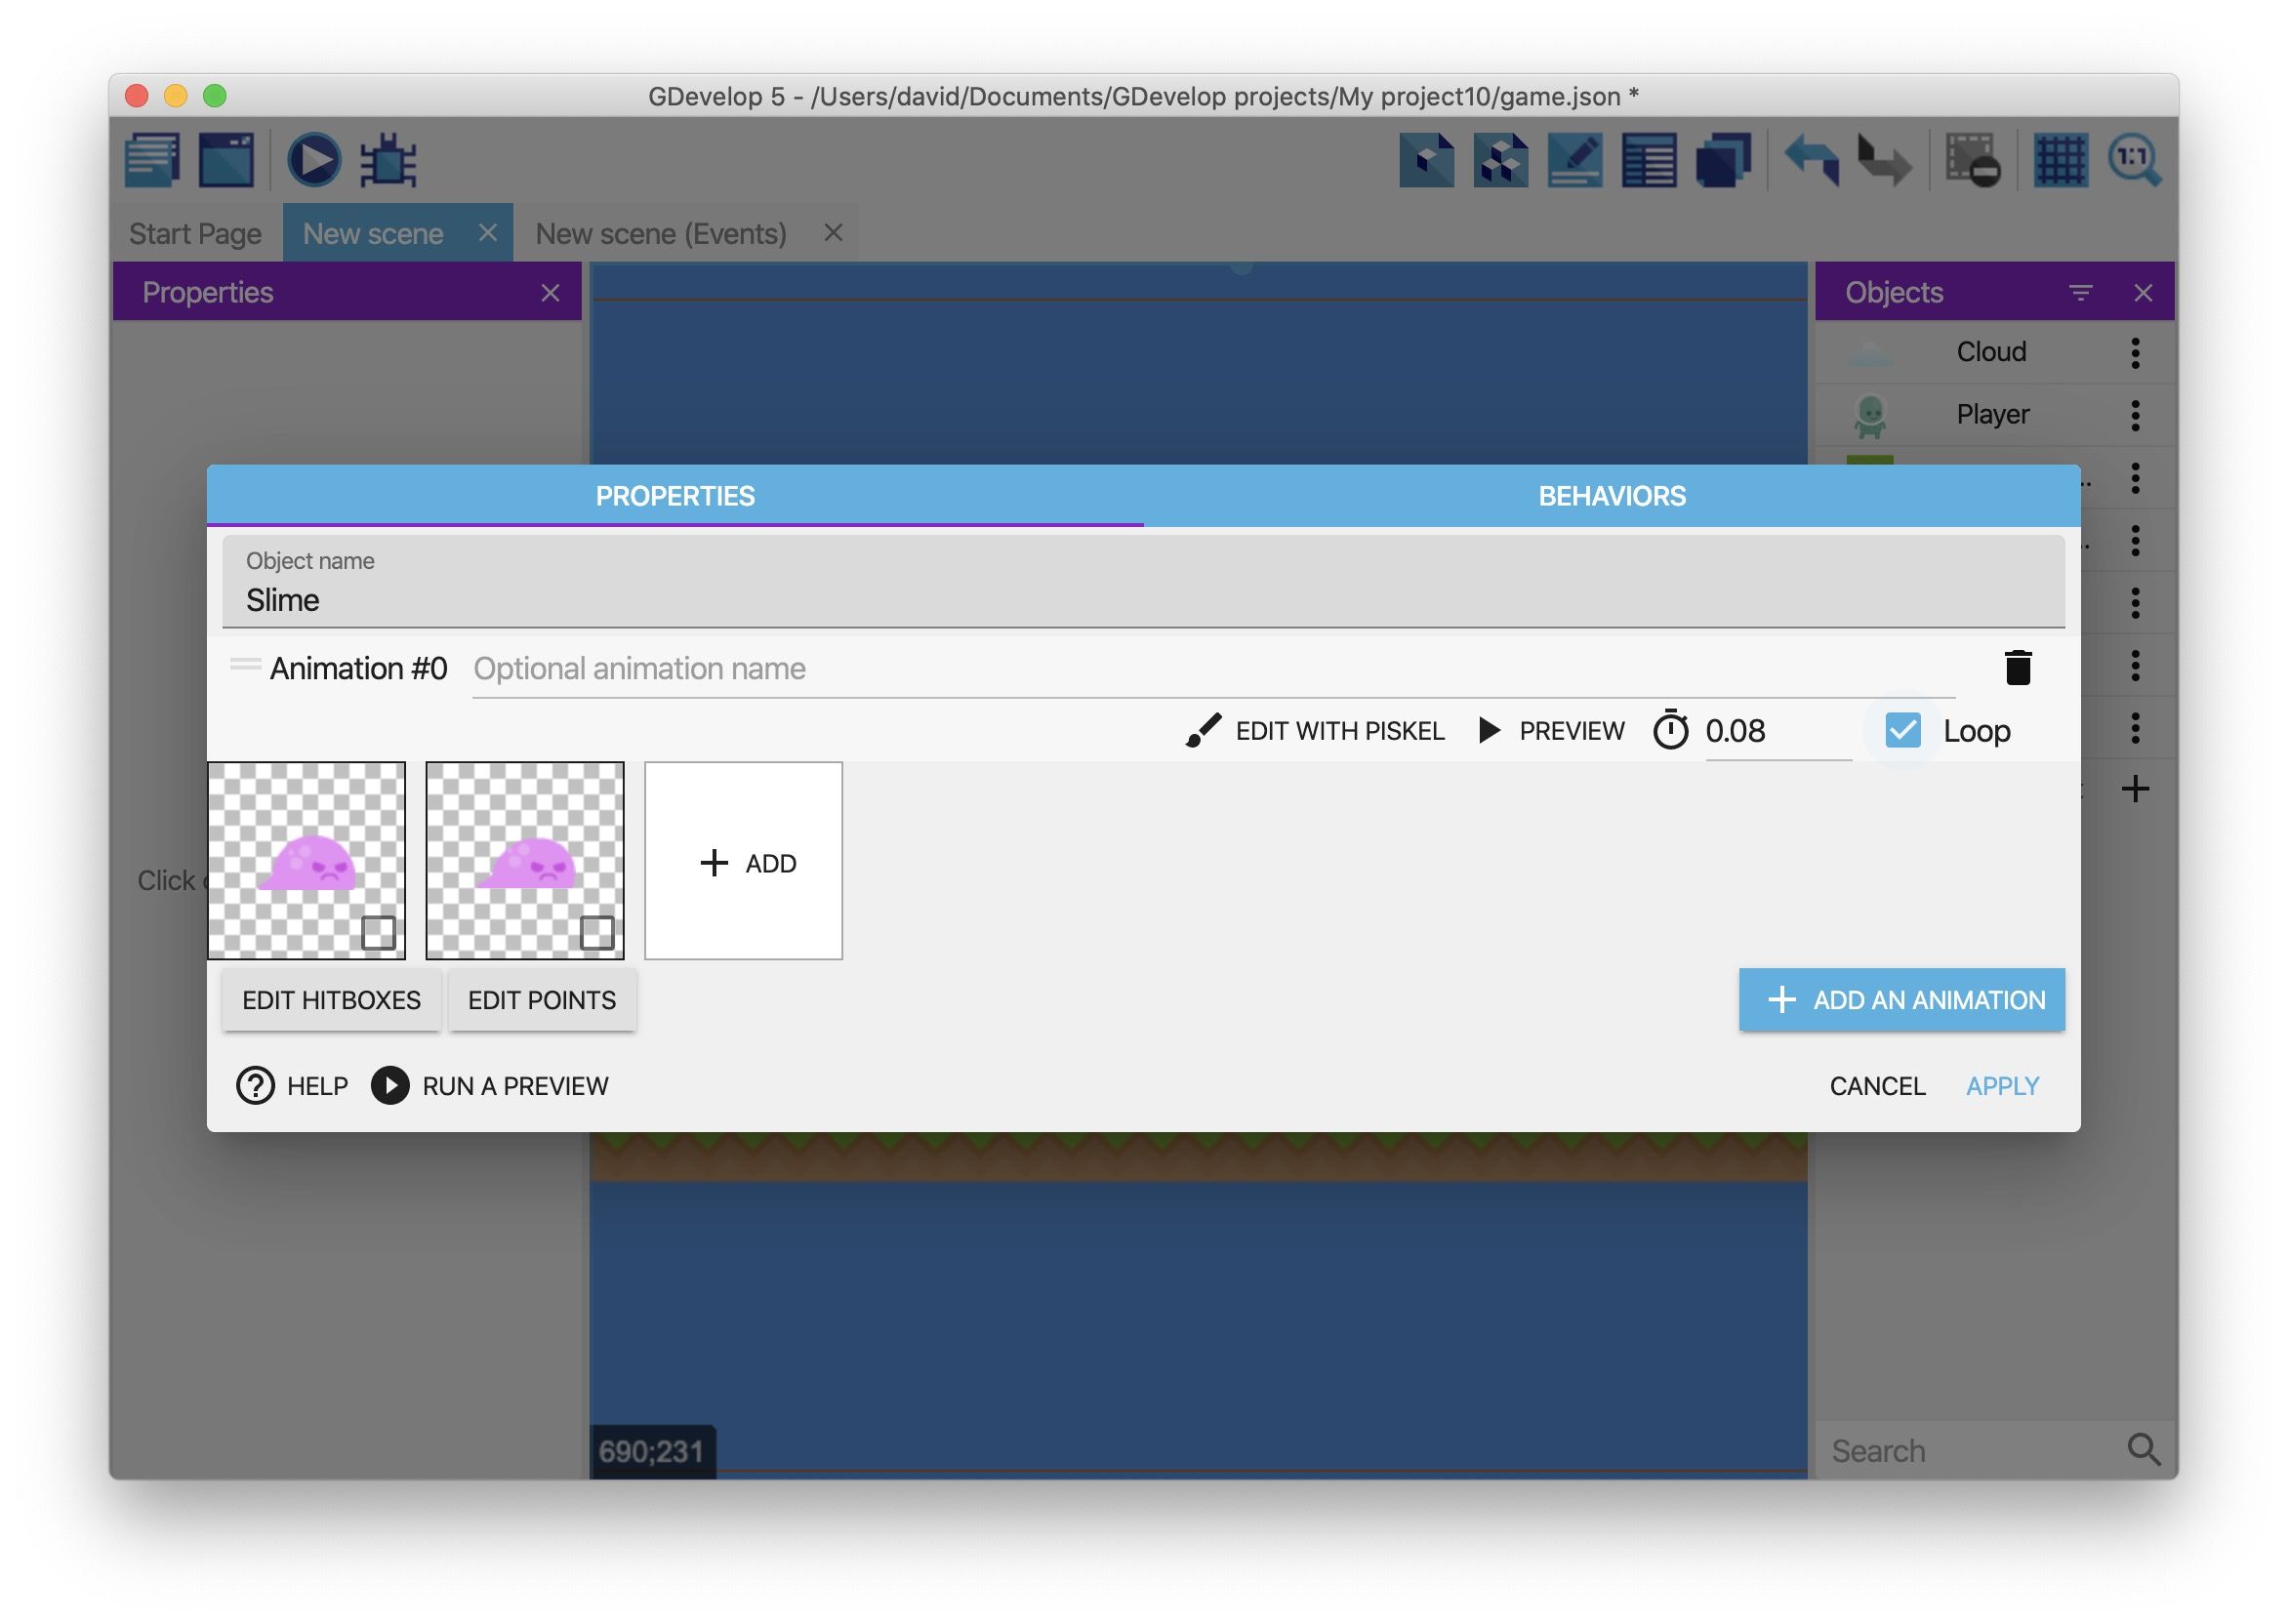
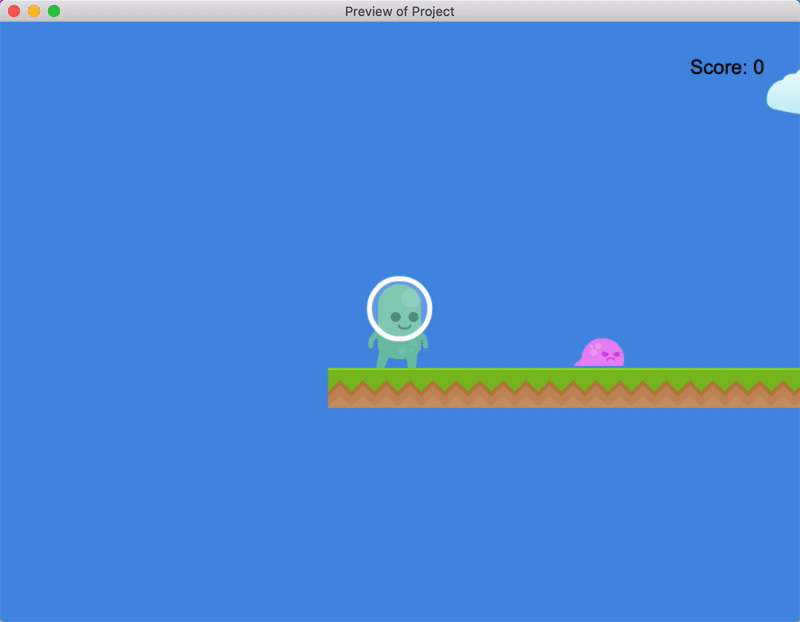
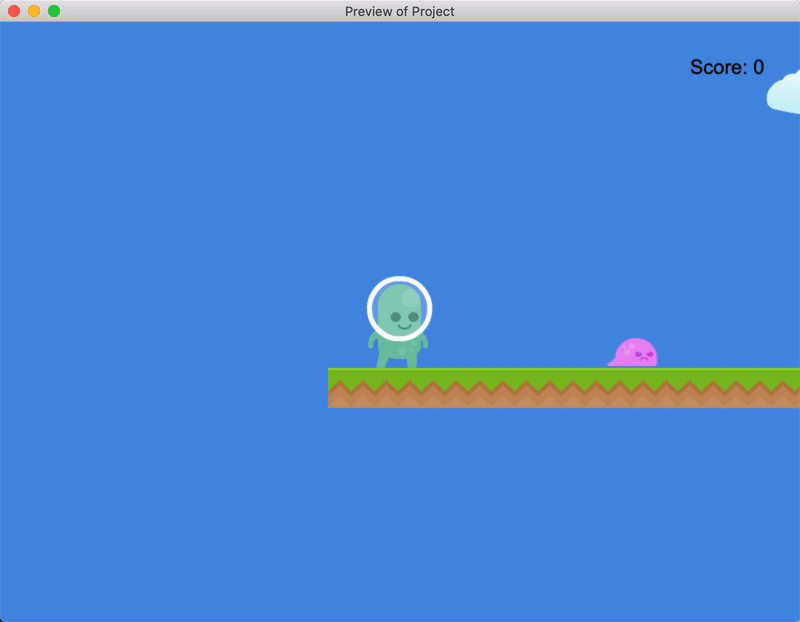
If you preview the game, an animated enemy appears on screen.
Step 2: Move the enemy to the right
The previous part of this tutorial mentioned that there were three types of variables:
- Object
- Scene
- Global
An object variable is tied to a specific object. This means the variable holds a value that is only available to -- and only relevant to -- the associated object.
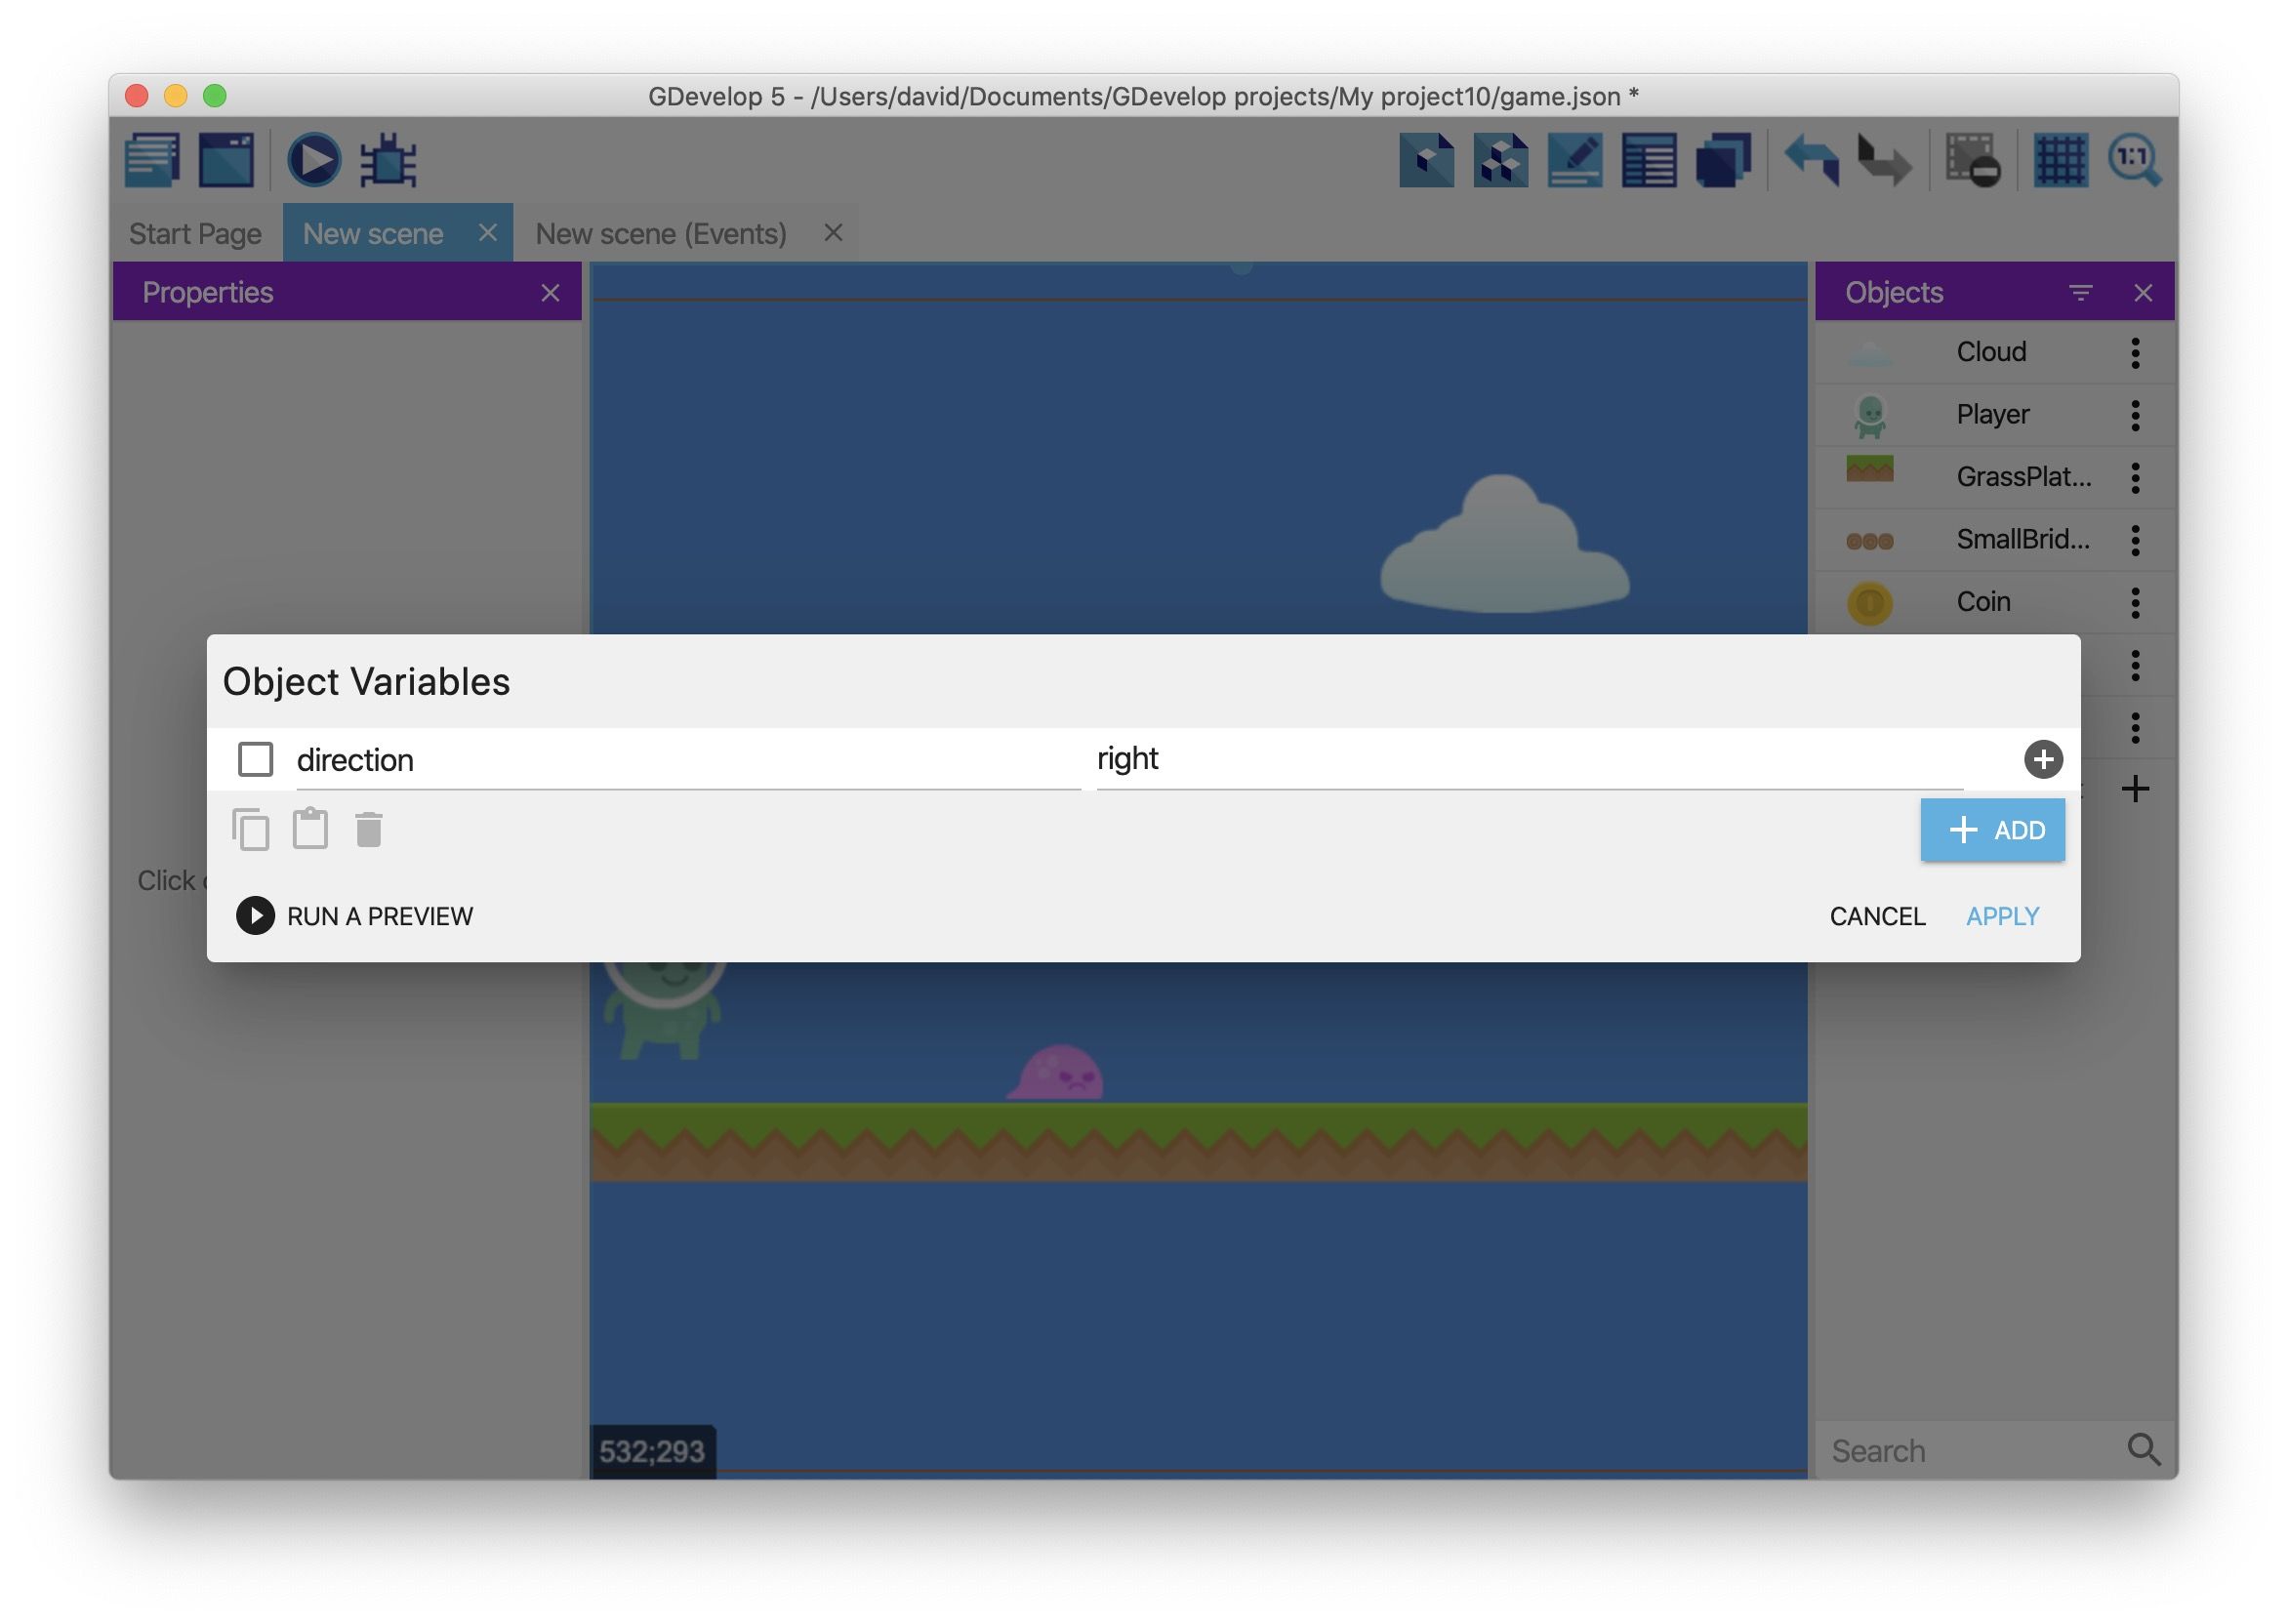
To add an object variable to the "Slime" object:
- Right click the "Slime" object.
- Select Edit object variables.
- Add a variable named "direction" with a value of "right". This is the default value of the variable.
- Click Apply.
This "direction" variable keeps track of the enemy's current direction. In a later step, you'll be able to change the direction of the enemy by changing the value of the variable.
To move the enemy to the right, create an event:
- Open the Events editor.
- Create a new event.
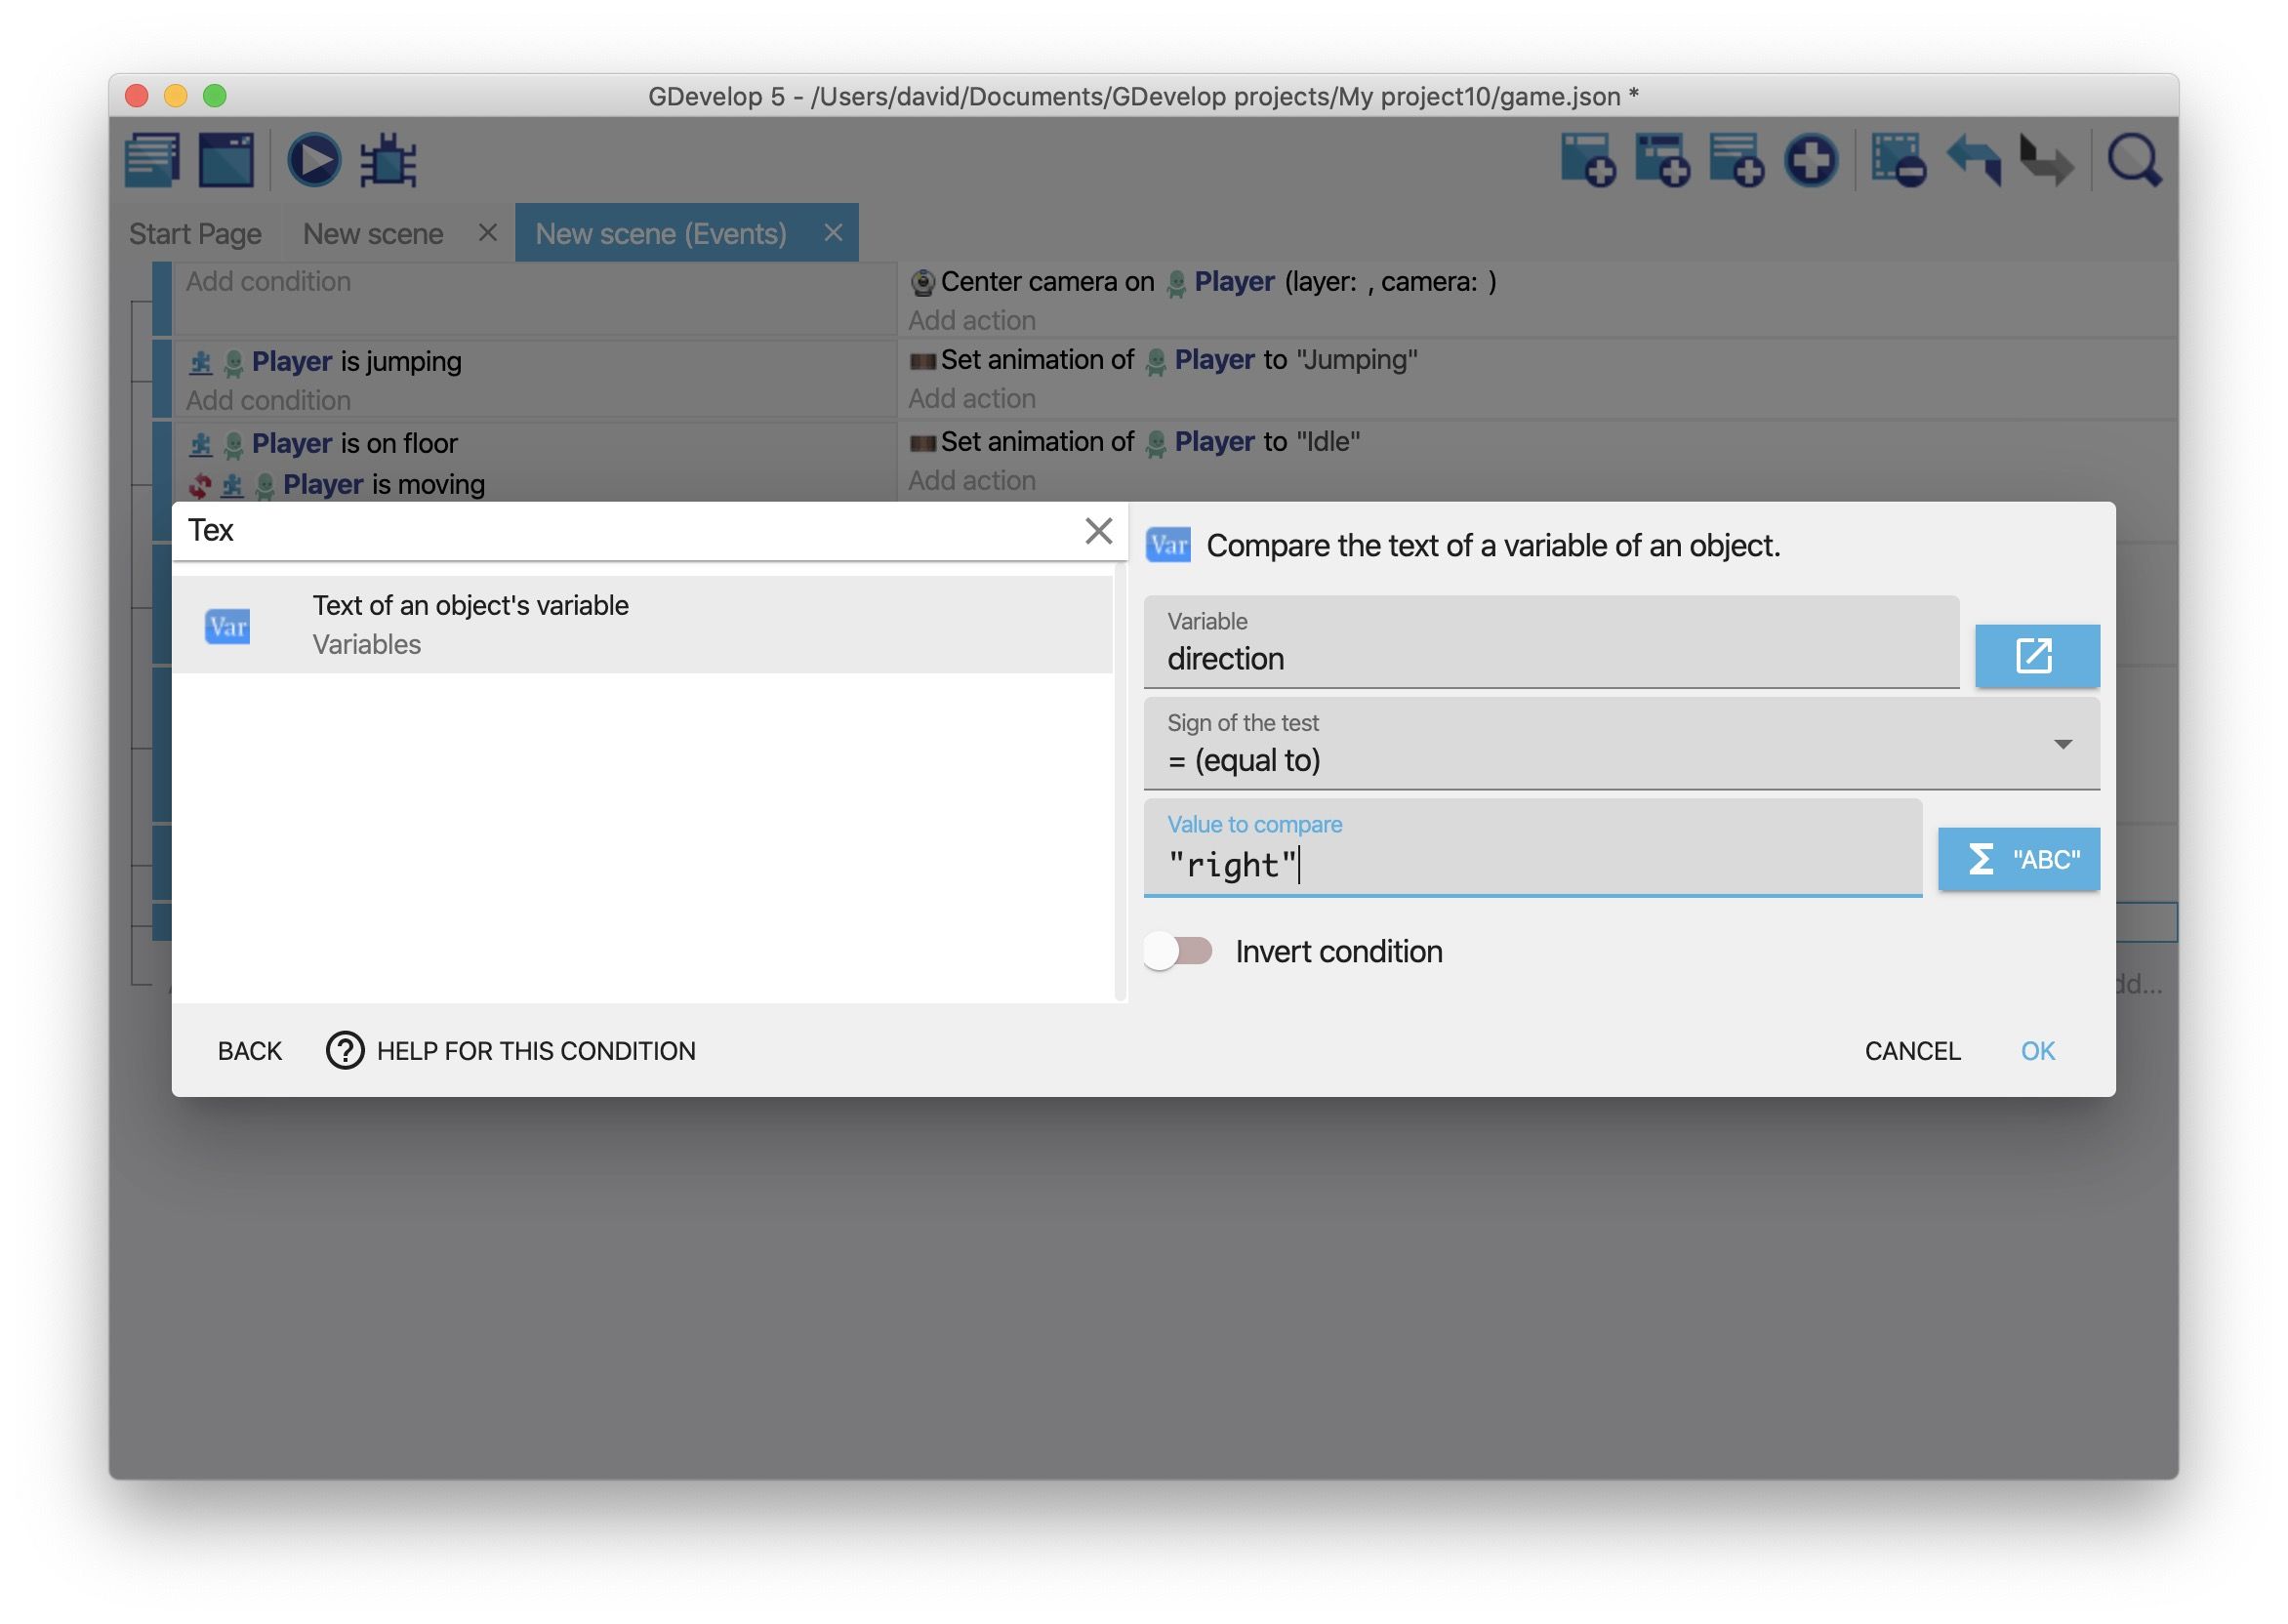
- Add the Text of an object's variable condition to the "Slime" object.
- In the Variable field, type "direction".
- In the Sign of the test field, select = (equal to).
- In the Value to compare field, type "right" (including the quotation marks).
- Click OK.
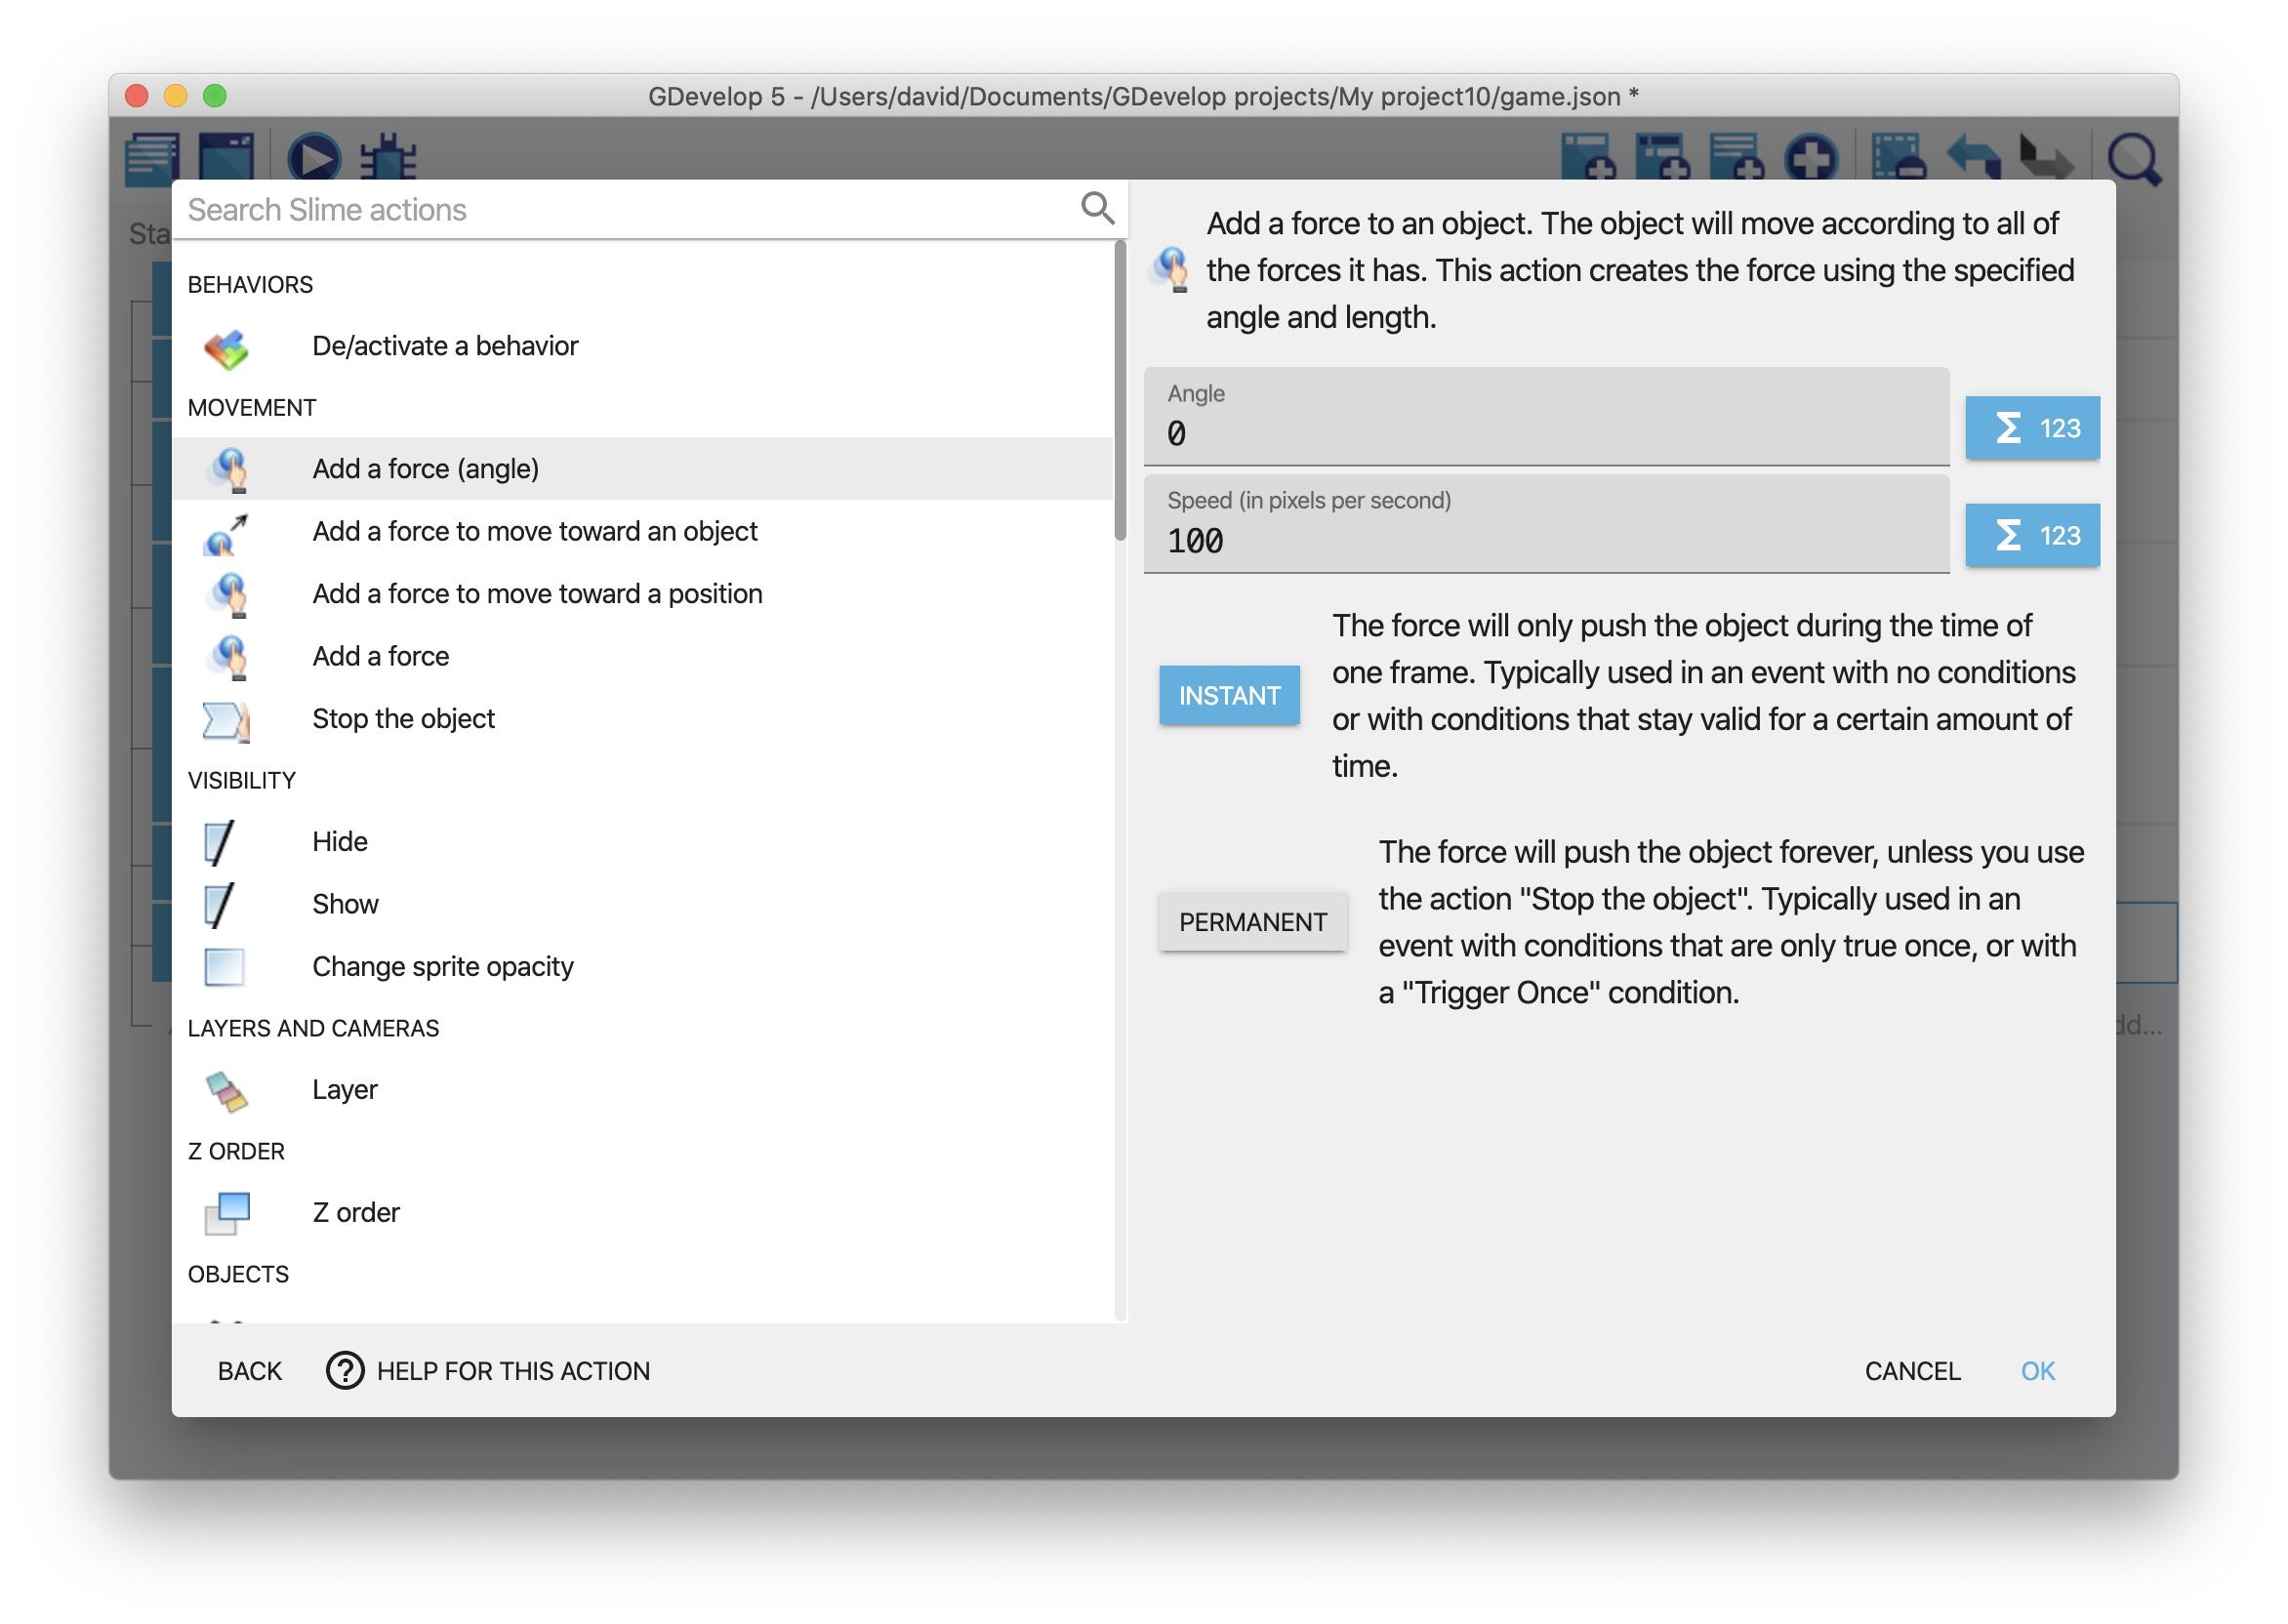
Then add an action to the event:
- Add the Add a force (angle) action to the event.
- In the Object field, select "Slime".
- In the Angle field, type "0".
- In the Speed field, type "100".
- Enable the Instant option.
- Click OK.
This is what the complete event looks like:
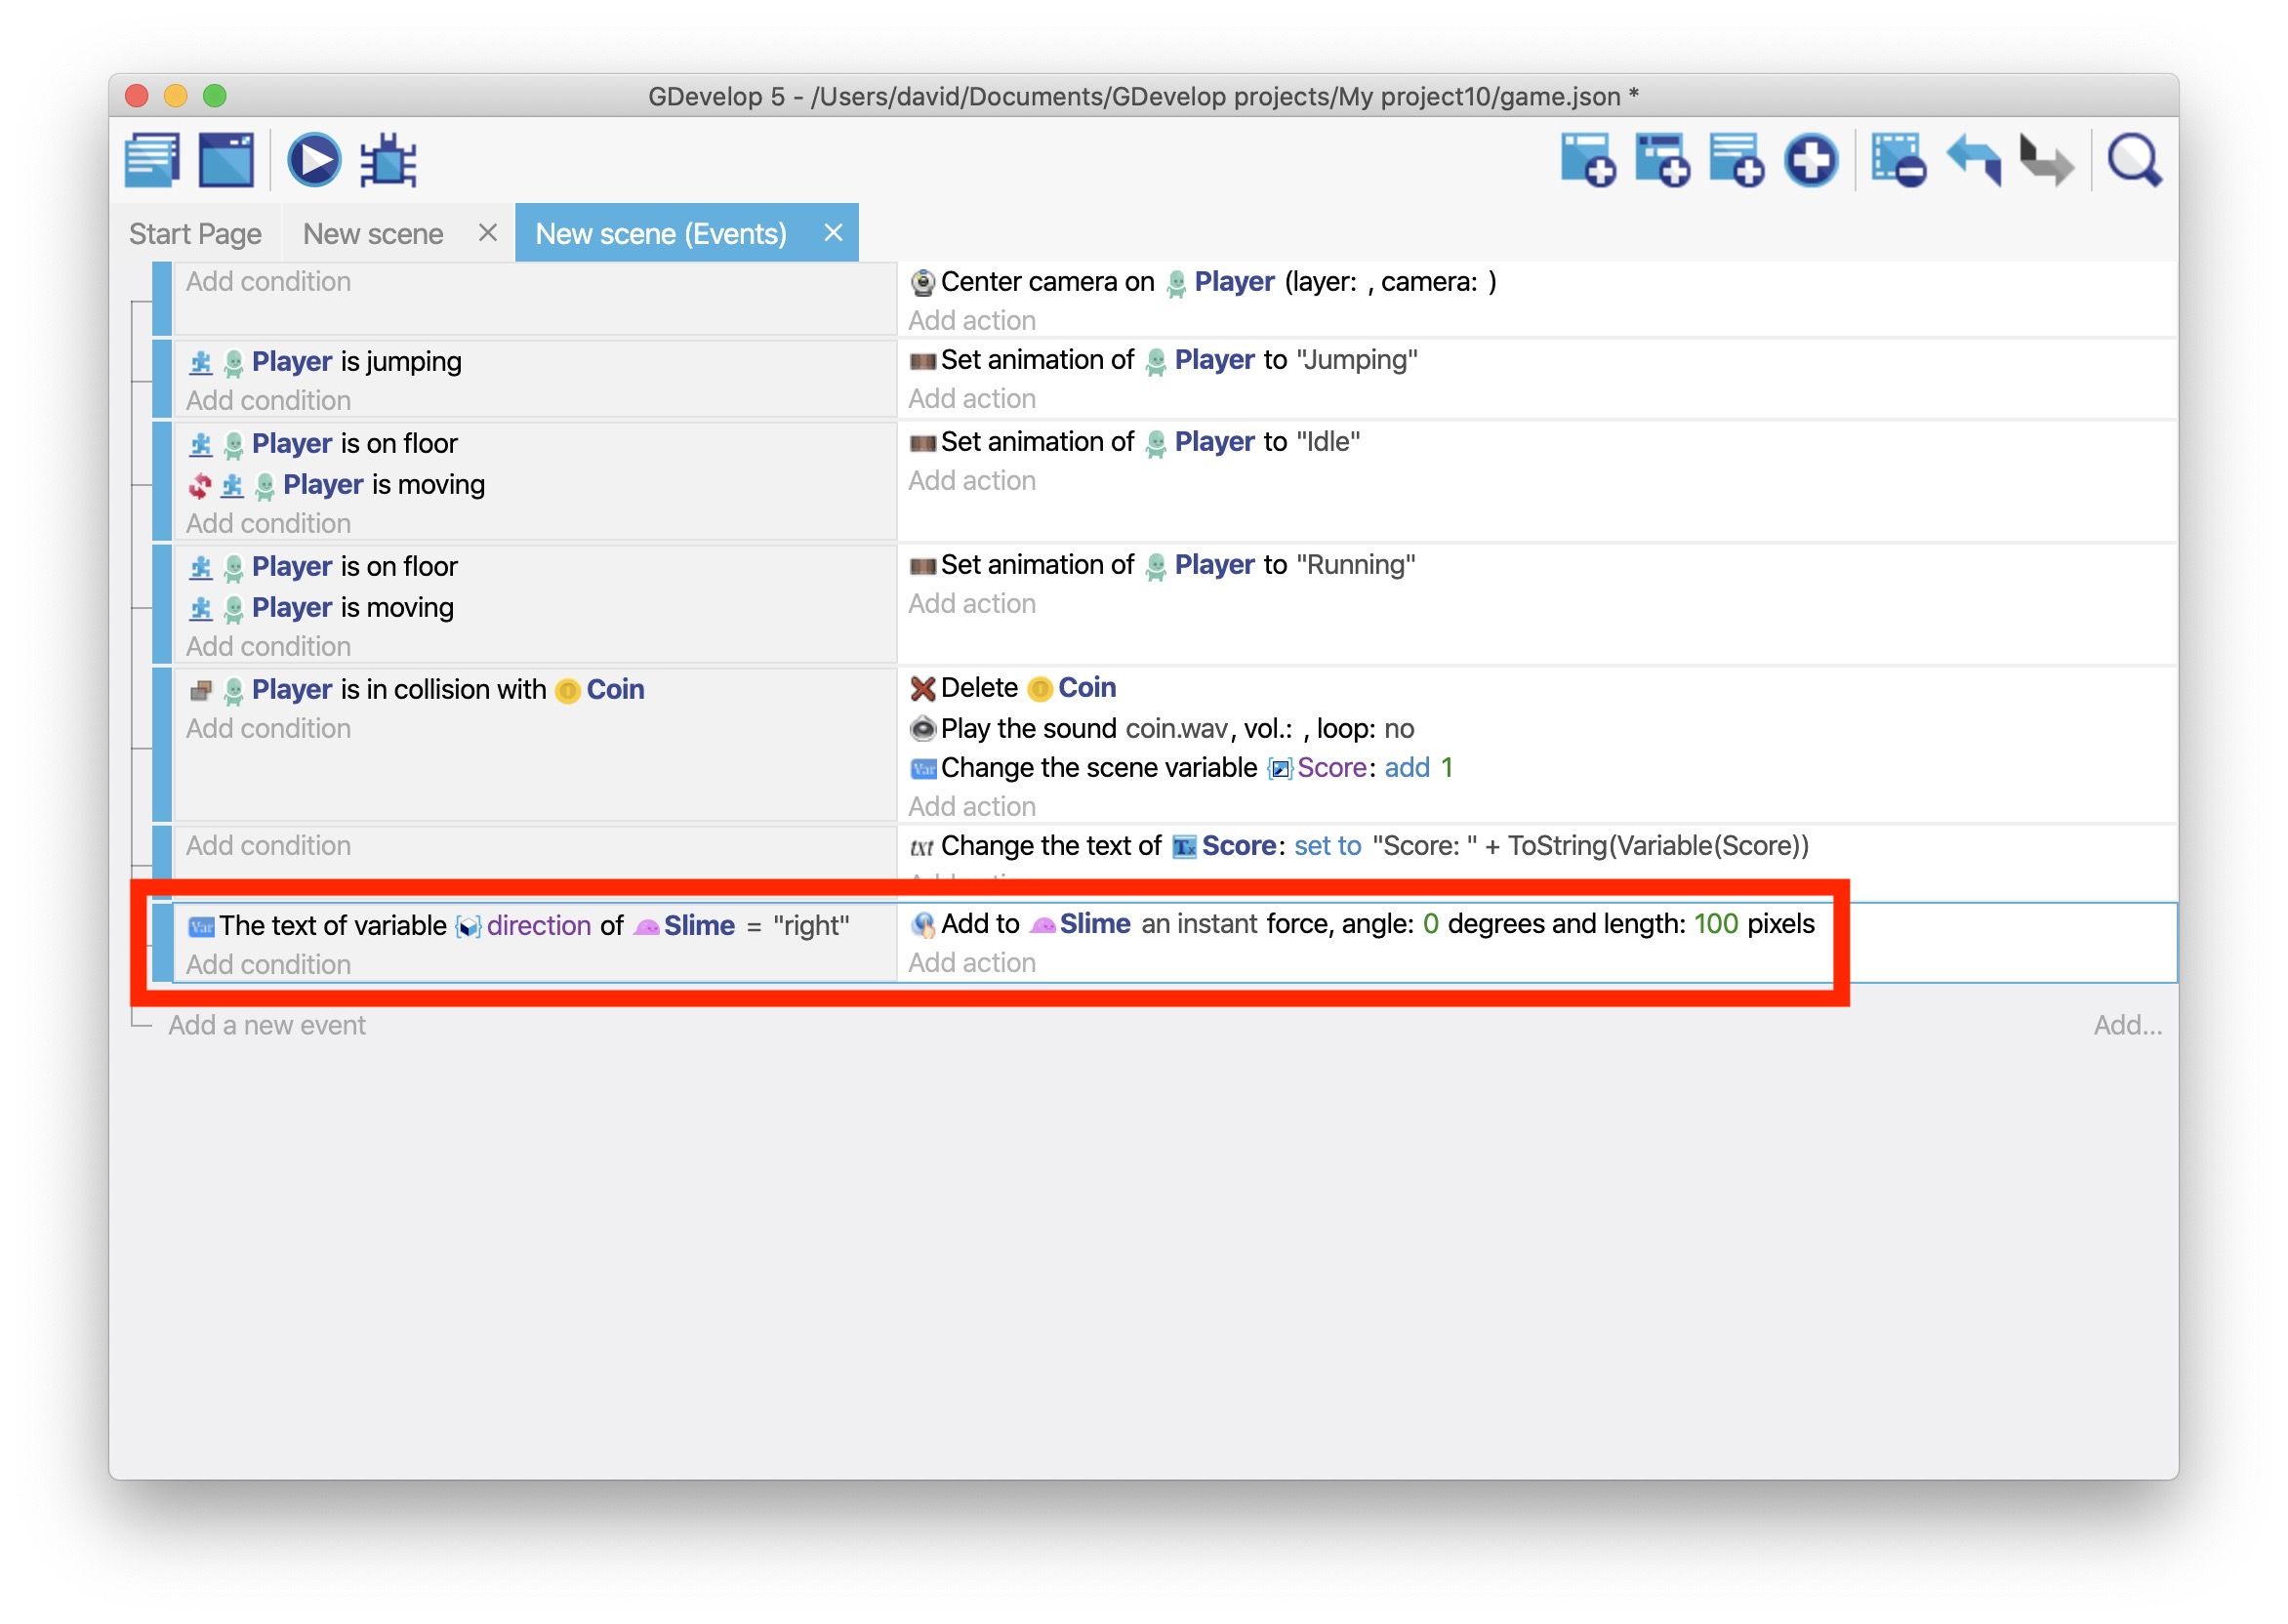
Based on this event, while the value of the "direction" variable is "right", the "Slime" object moves right. Because the object never changes direction though, it inevitably falls off the edge of the platform.

Step 3: Change the enemy's direction
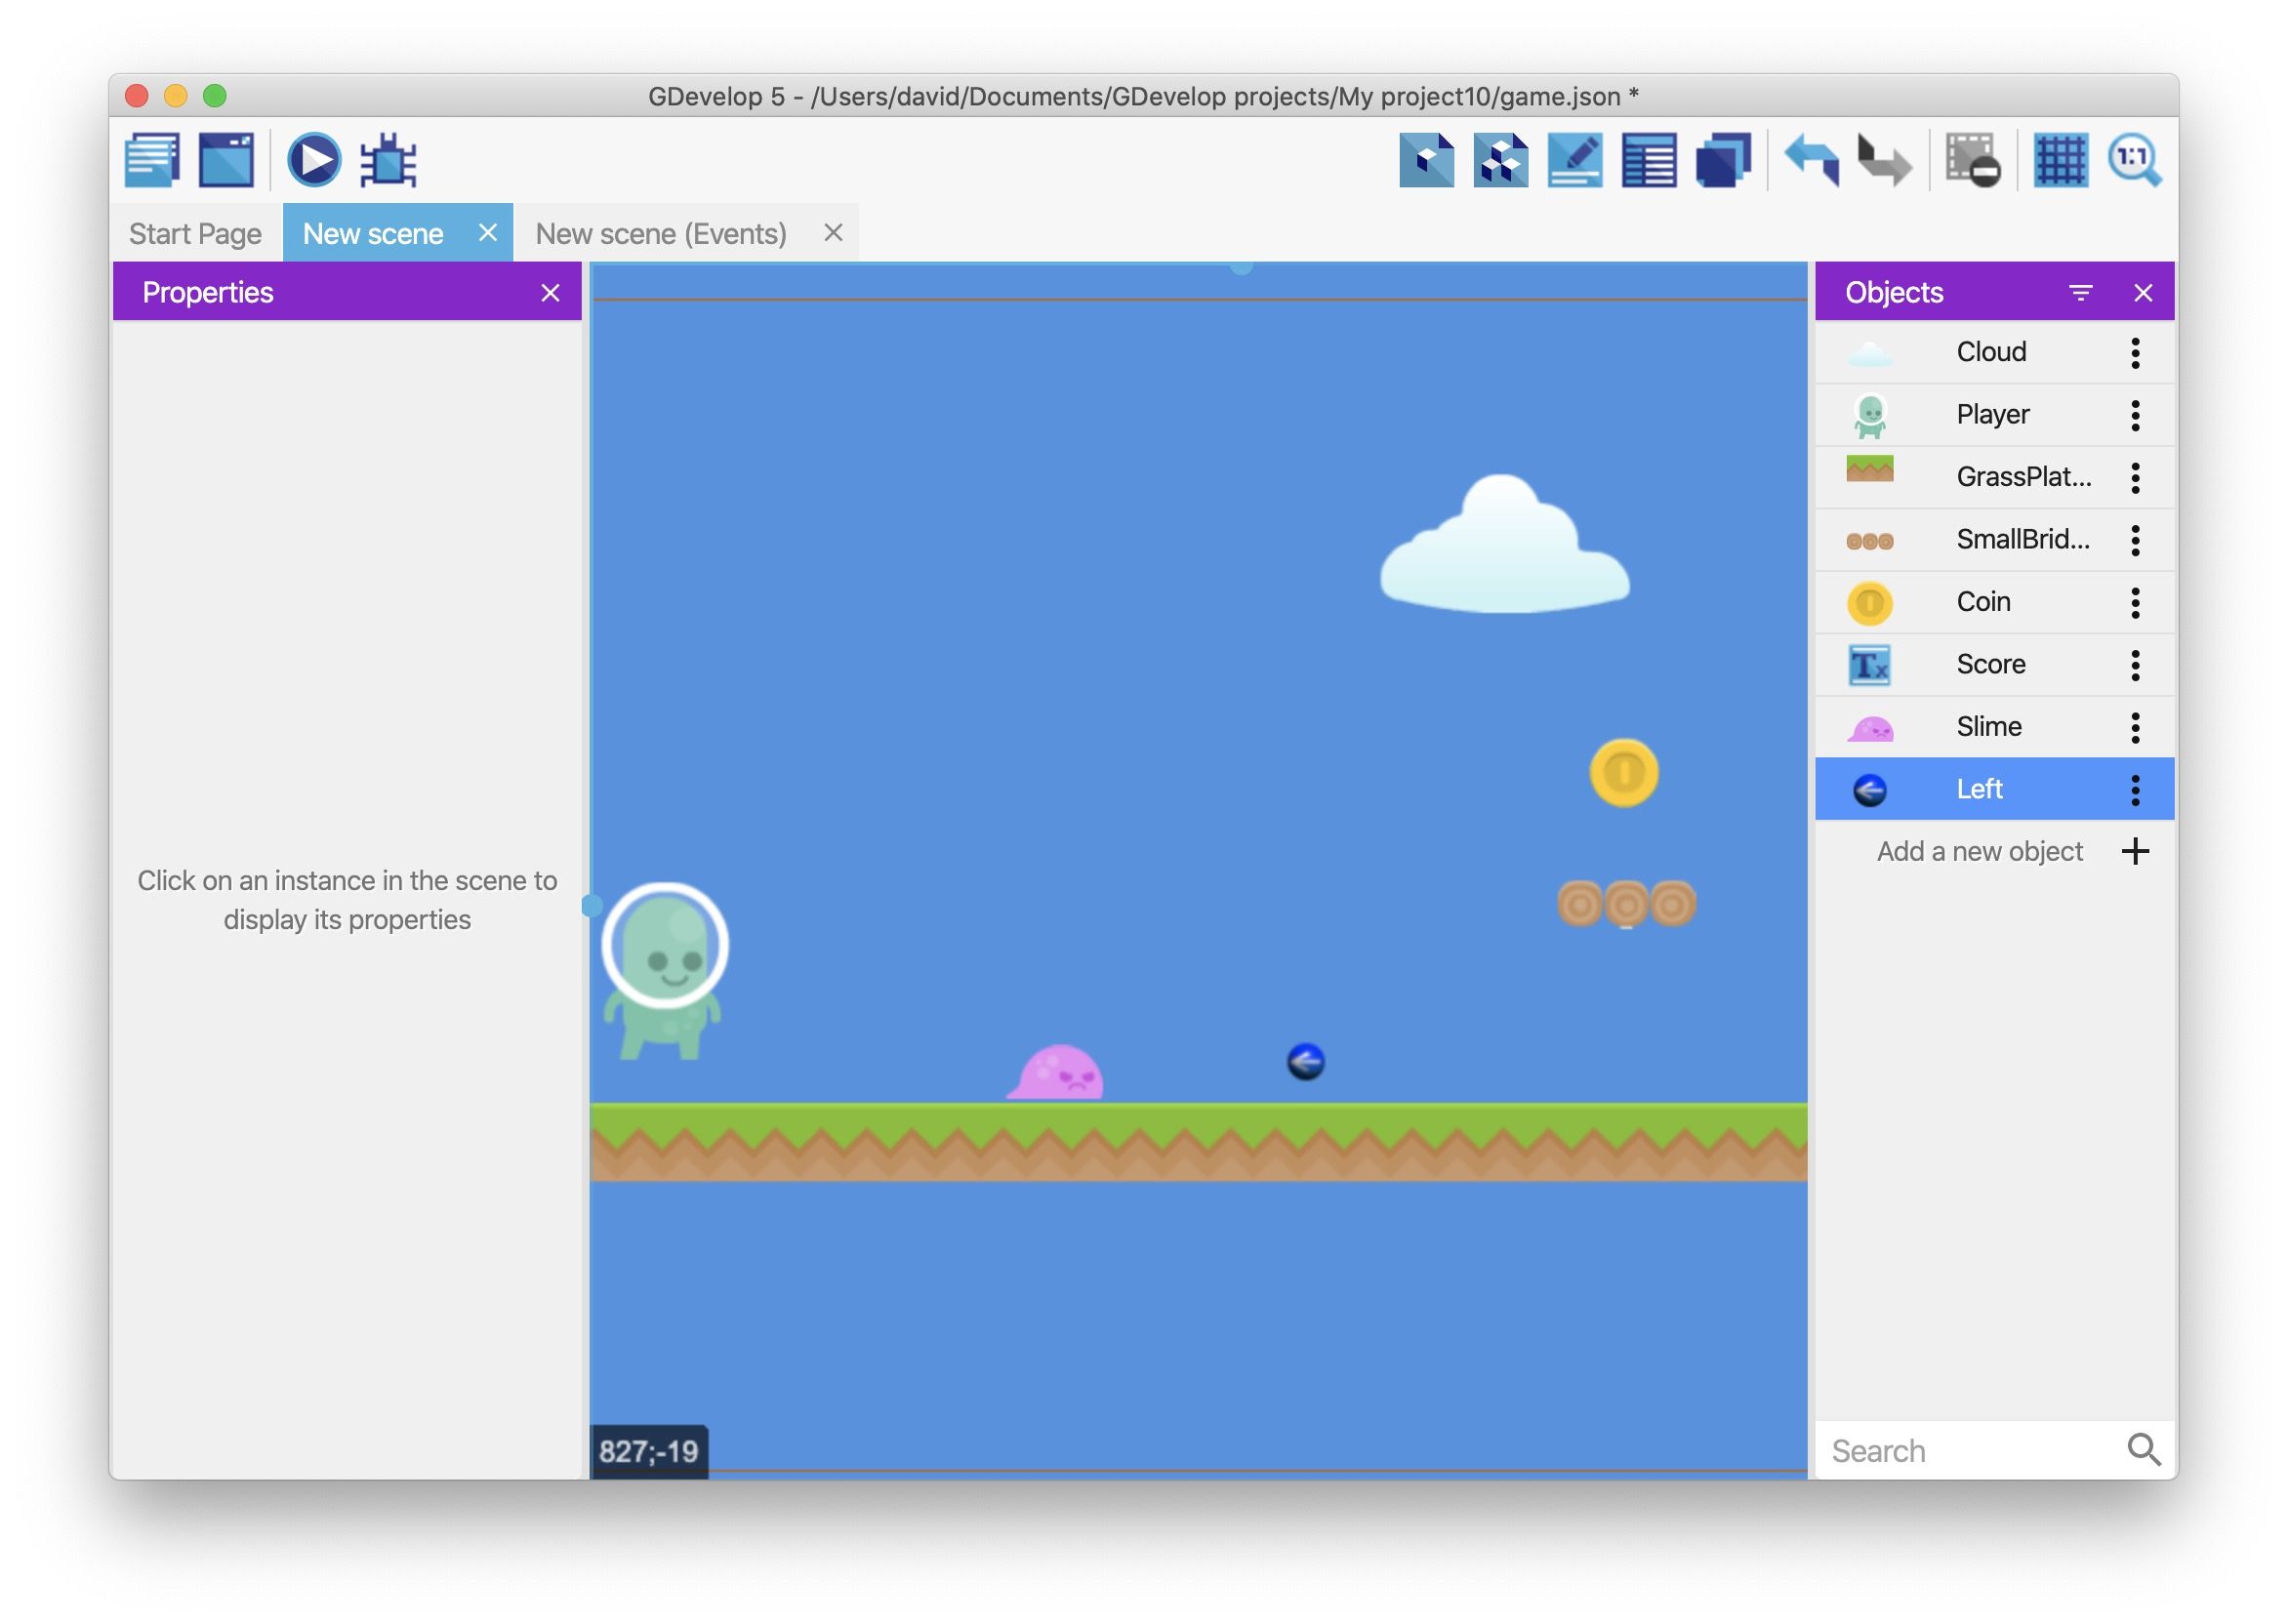
To make the enemy change direction, add two invisible objects to the scene -- one called "Left" and one called "Right" -- and place them on other side of the enemy.
Then, when the enemy collides with one of the objects, you can flip them around and move them in the other direction. This creates the illusion of the enemy following a set route.
This step focuses on creating the "Left" object. When the enemy collides with this object, they'll change direction from left to right. (The step that follows focuses on the "Right" object.)
Create the "Right" object
- Create a Sprite object named "Left".
- As the default sprite, use the "left.png" asset.
- Drag an instance of object into the scene (to the right of the enemy).
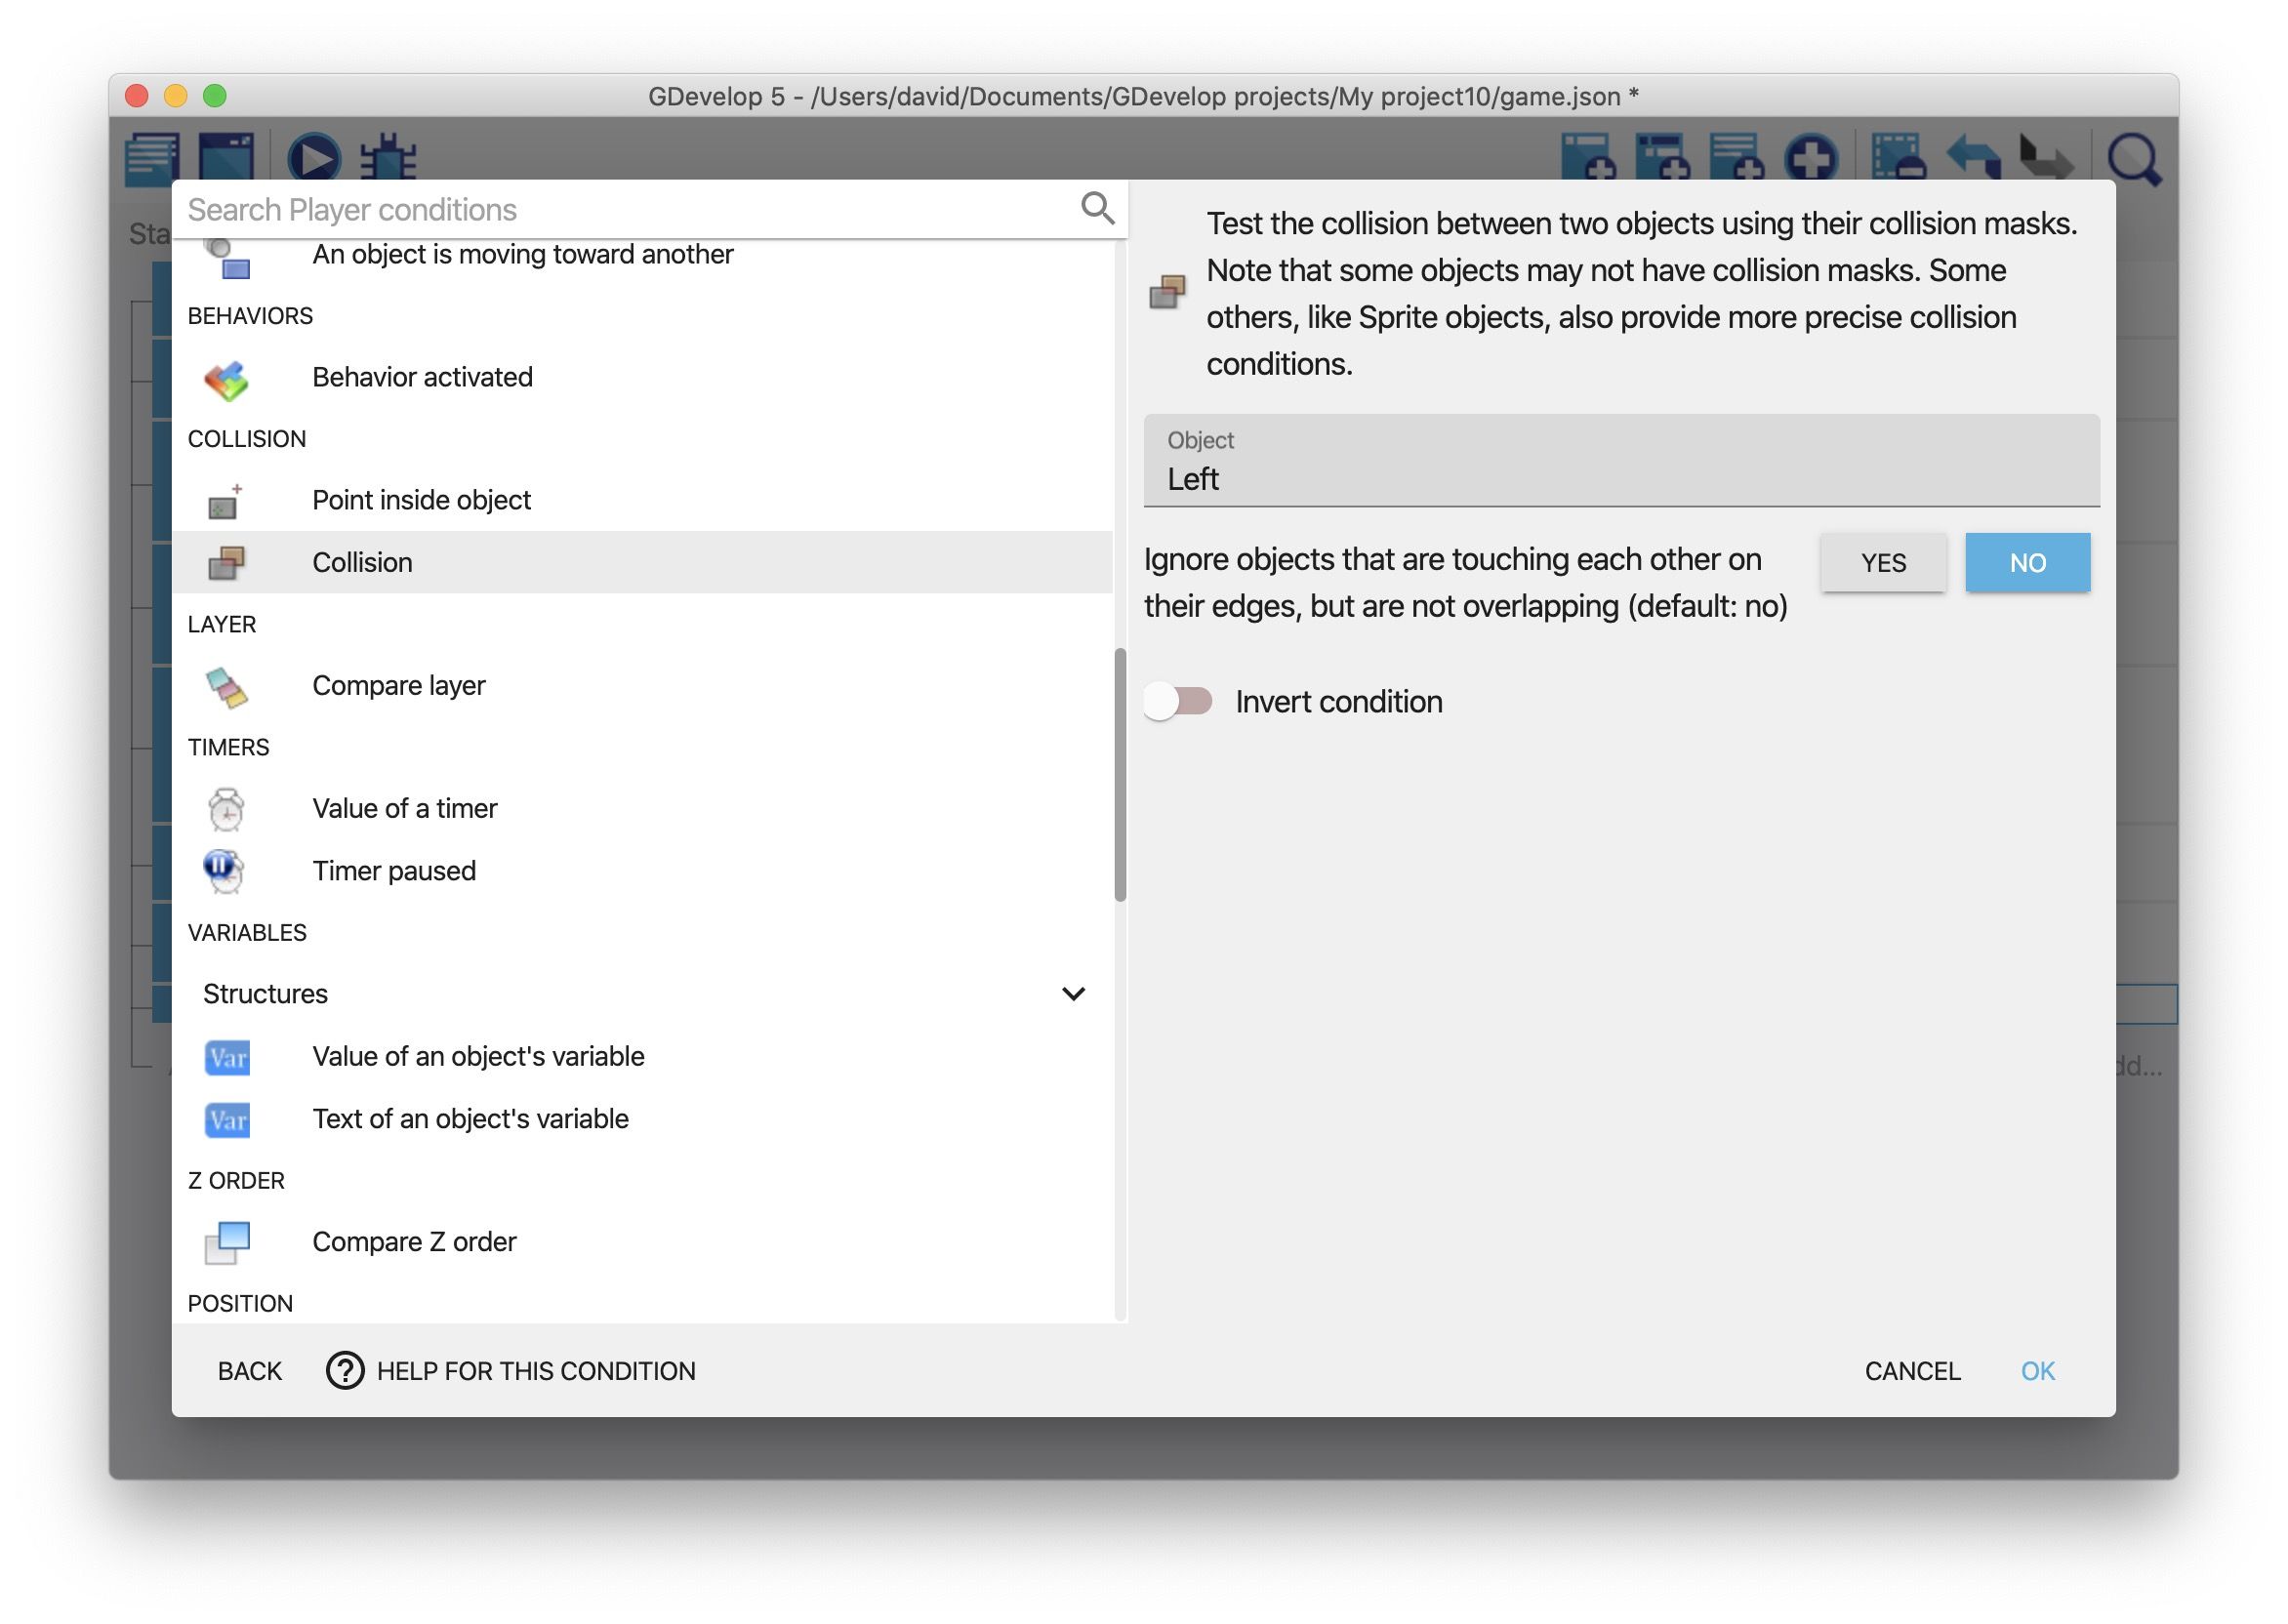
Detect when the enemy collides with the "Left" object
- Create a new event.
- Add a Collision condition that checks if the "Slime" object is colliding with the "Left" object.
Change the value of the "direction" variable
- Add the Modify the text of a variable of an object action to the event.
- In the Variable field, type "direction".
- From the Modification's sign dropdown, select = (set to).
- In the Value field, type "left" (with quotation marks).

Flip the "Slime" object
- Add the Flip the object horizontally action to the event.
- Set the Activate flipping option as Yes.
This ensures that the "Slime" object changes and faces a different direction, rather than just changing directions.
Change the enemy's direction
- Add the Add a force (angle) action to the event.
- In the Object field, select "Slime".
- In the Angle field, type "180".
- In the Speed field, type "100".
- Enable the Instant option.
- Click OK.
If you preview the game, the enemy changes direction when they collide with the "Left" object.

Hide the "Left" object
- Create a new event.
- Add the At the beginning of the scene condition to the event.
- Add the Hide action to the "Left" object.
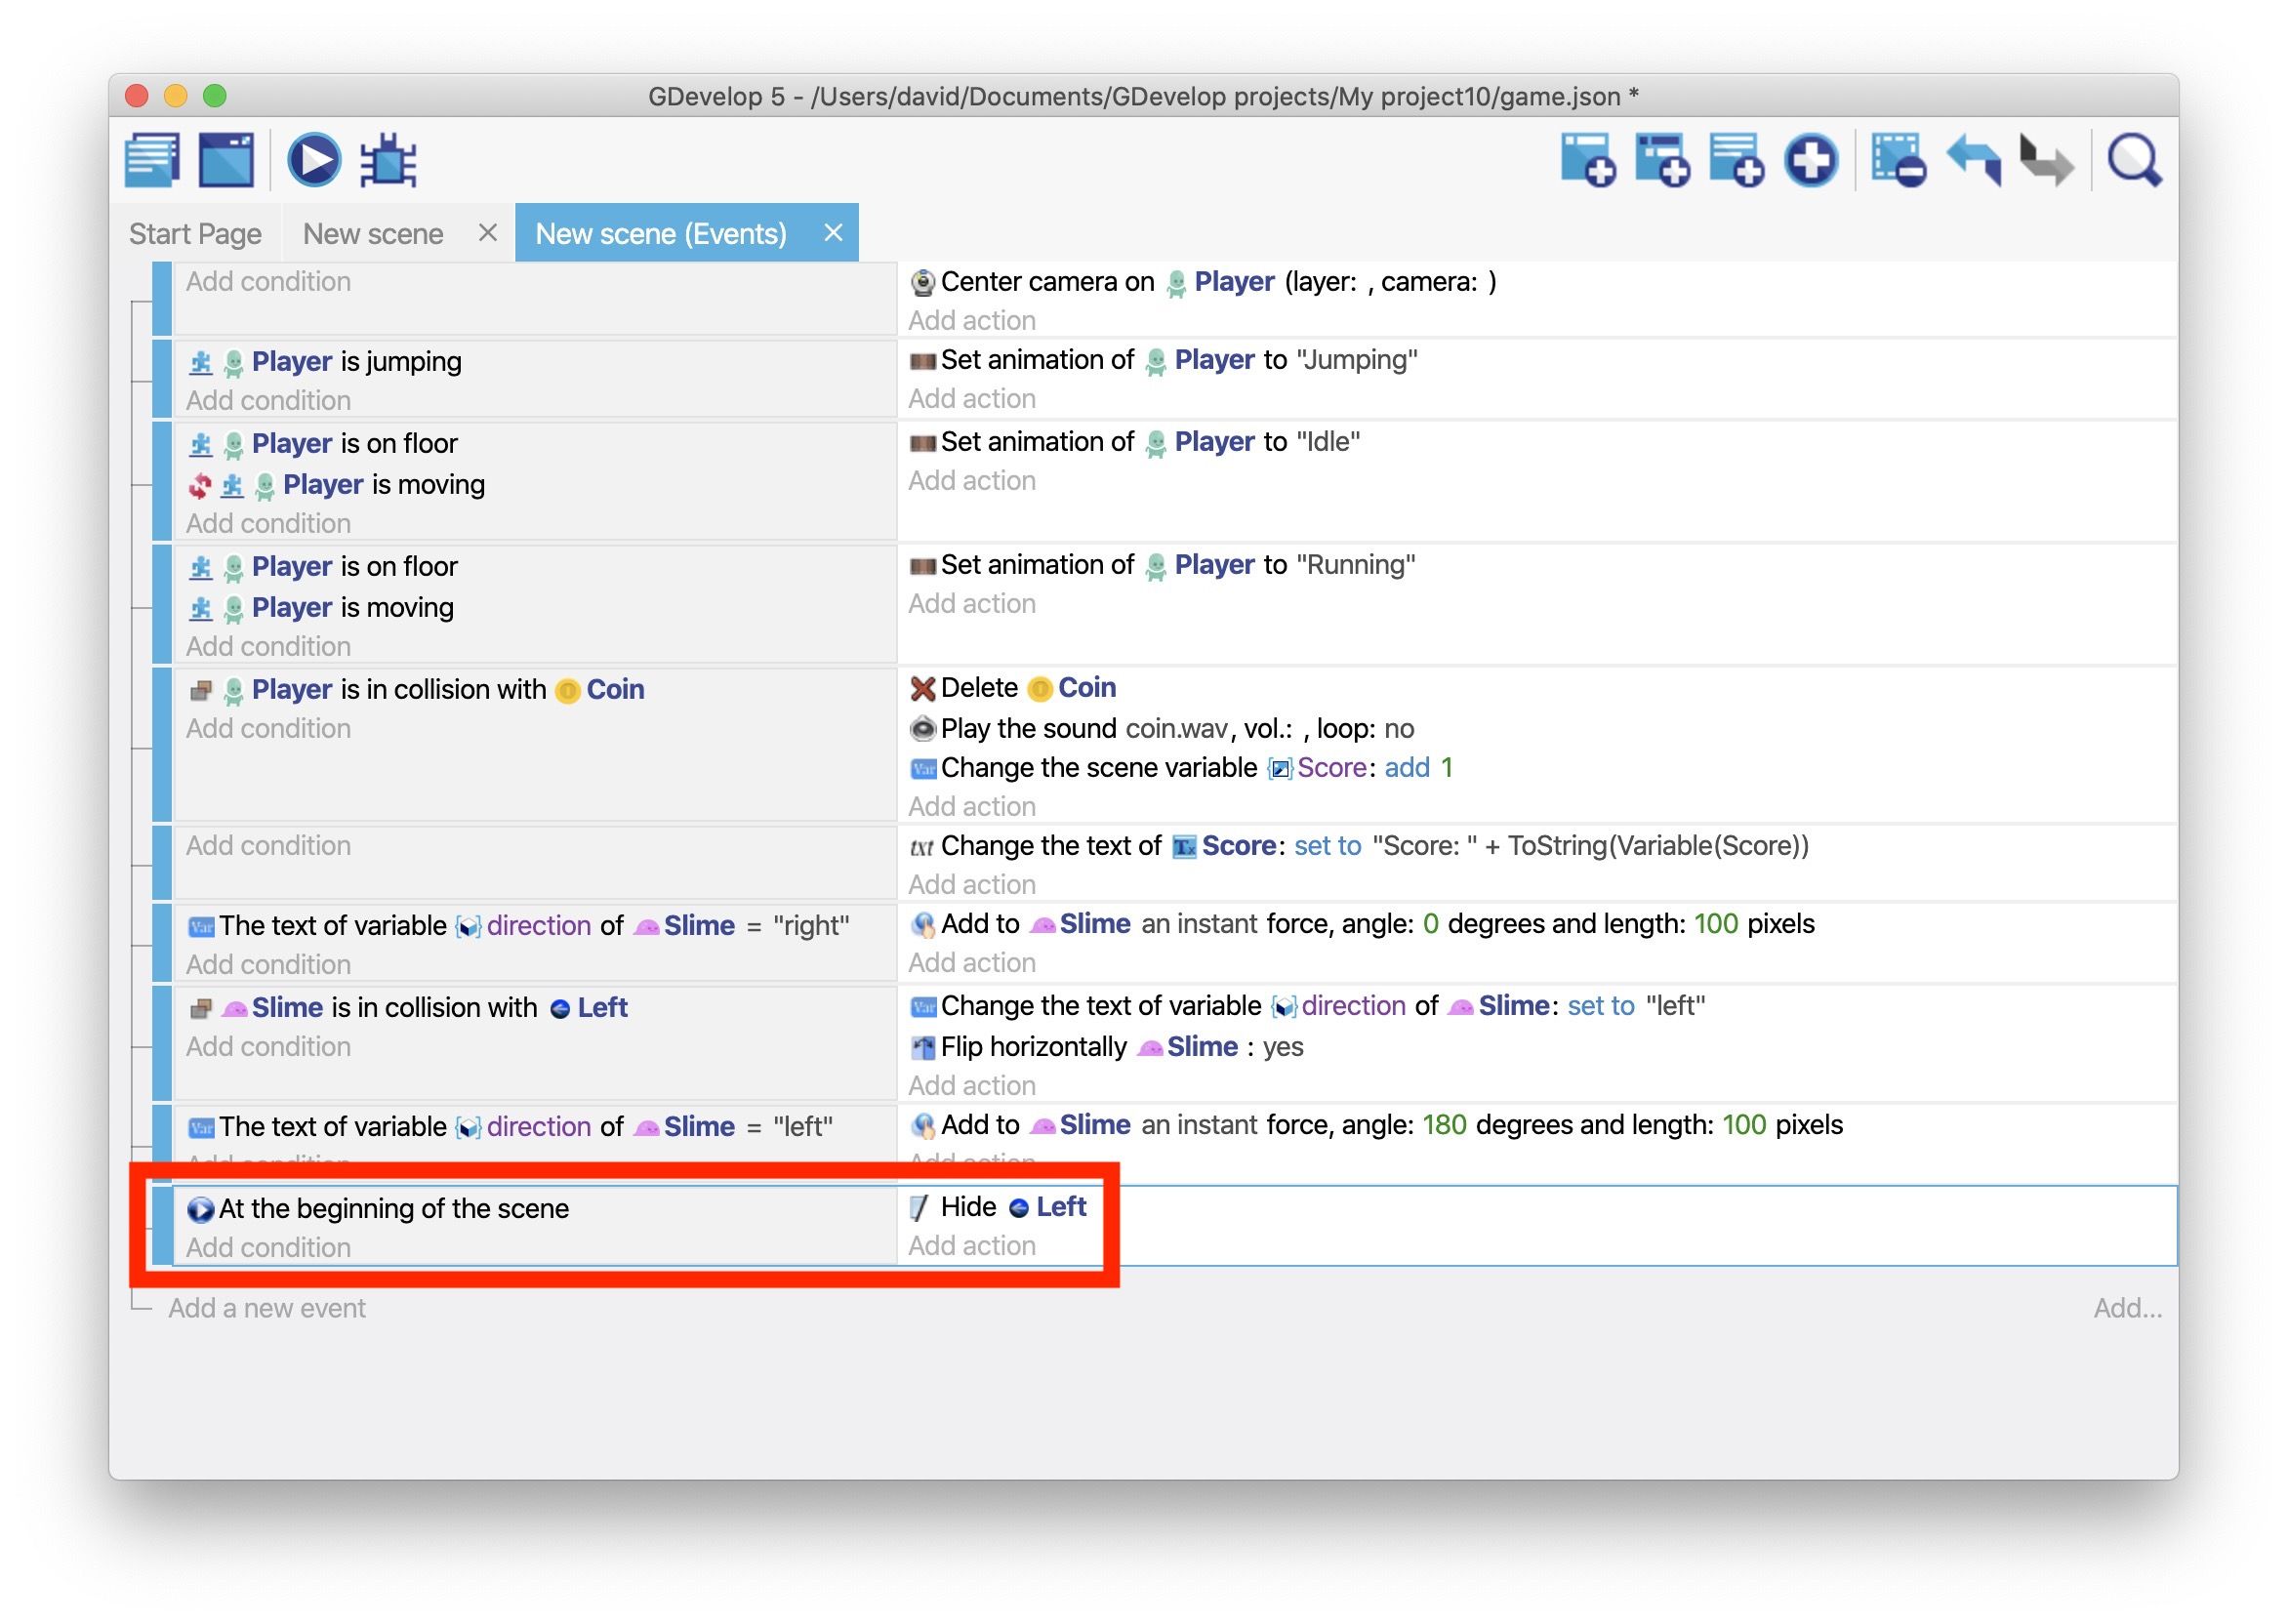
If you preview the game, the enemy appears to change direction by their own "choice".

Step 4: Change the enemy's direction (again)
After the enemy collides with the "Left" object, they start moving right and never stop moving right. To ensure they change direction again, create an object named "RIght". This object should be the same as the "Left" object, except for the following details:
- Use the "right.png" asset.
- When the "Player" object collides with the "Slime" object, set the "direction" variable to "right".
- For the Flip the object horizontally action, set Activate flipping to No.
Then drag an instance of the "Right" object into the scene, to the left of the enemy.
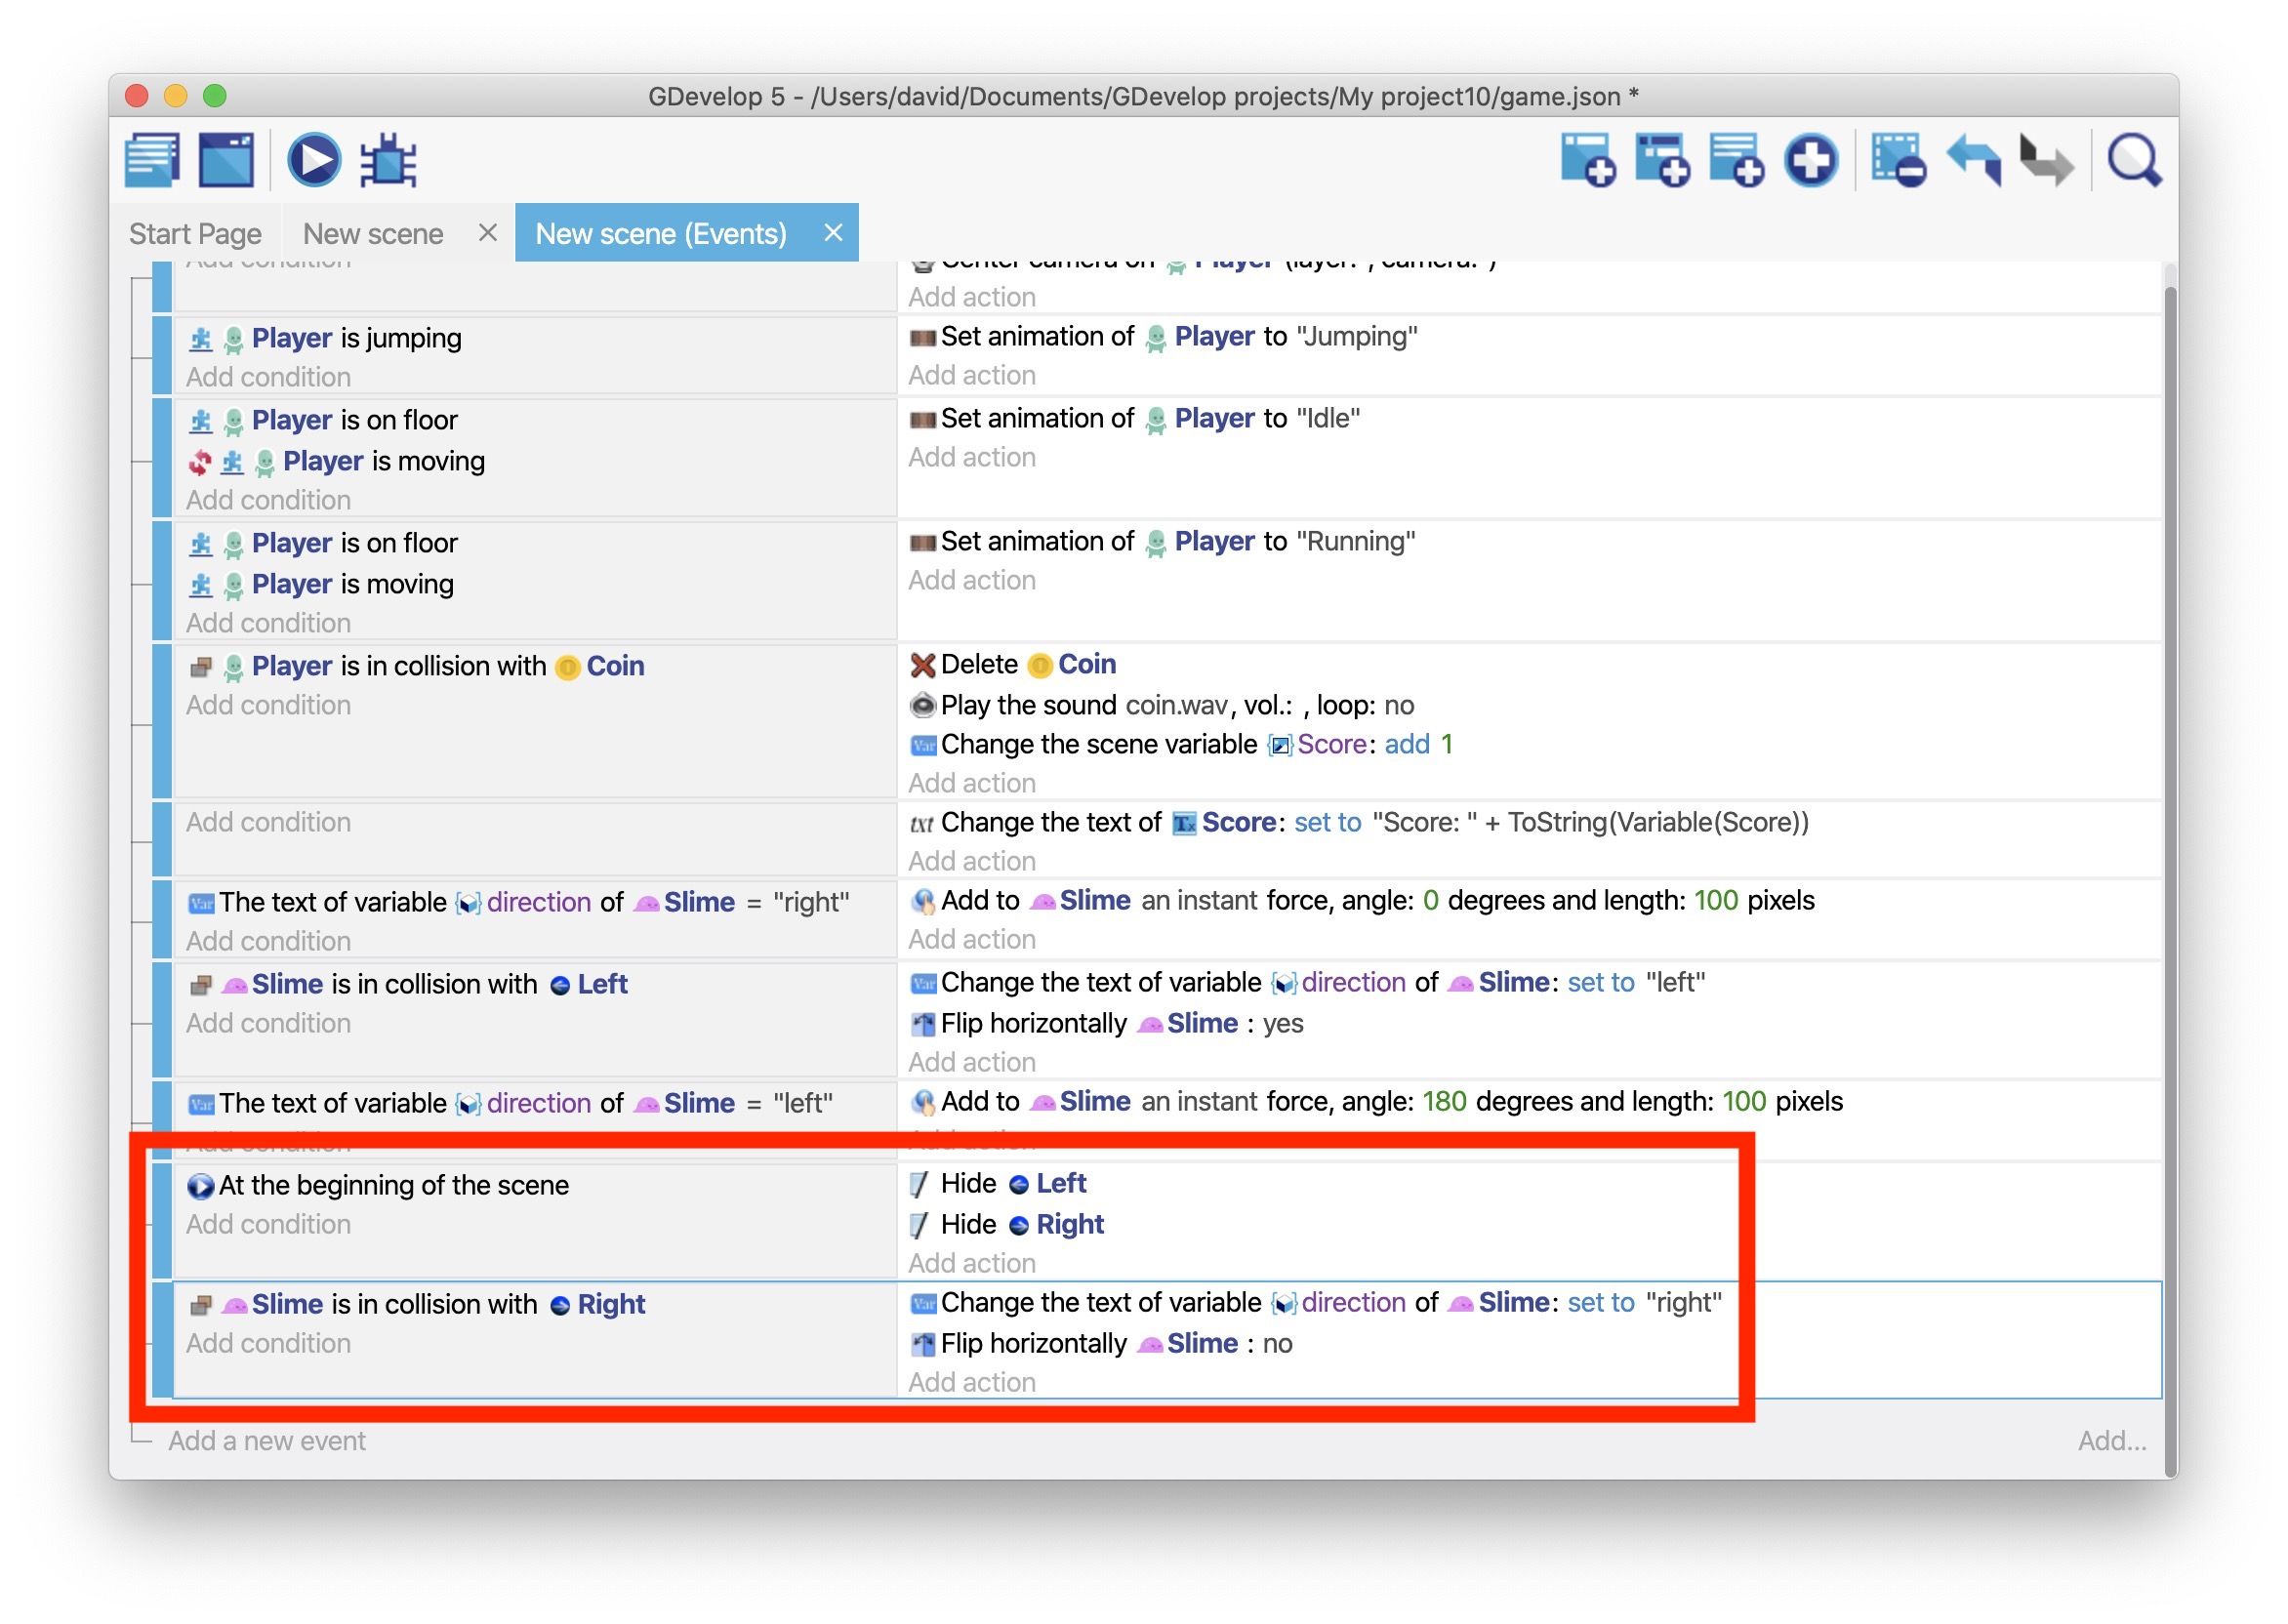
If you preview the game, the enemy moves back and forth between the invisible markers.
Next step
Read Part 7: Make Enemies Kill the Player (and the Player Kill the Enemies).