Platformer Tutorial, Deel 6: Vijanden toevoegen aan de game
In dit deel van de tutorial wordt uitgelegd hoe je vijanden aan het spel kunt toevoegen die langs een vaste route heen en weer bewegen. In het volgende deel van de tutorial wordt uitgelegd hoe de speler deze vijanden kan doden en er door gedood kan worden.
Reeks
Je leest Deel 6 van de Platformer Tutorial.
- Platformer Tutorial, Deel 1
- Platformer Tutorial, Deel 2
- [nl:[gdevelop5:tutorials:platformer:part-3|Platformer Tutorial, Deel 3]]
- Platformer Tutorial, Deel 4
- Platformer Tutorial, Deel 5
- Platformer Tutorial, Deel 6
- Platformer Tutorial, Deel 7
- Platformer Tutorial, Deel 8
Stap 1: Maak een object voor de vijand
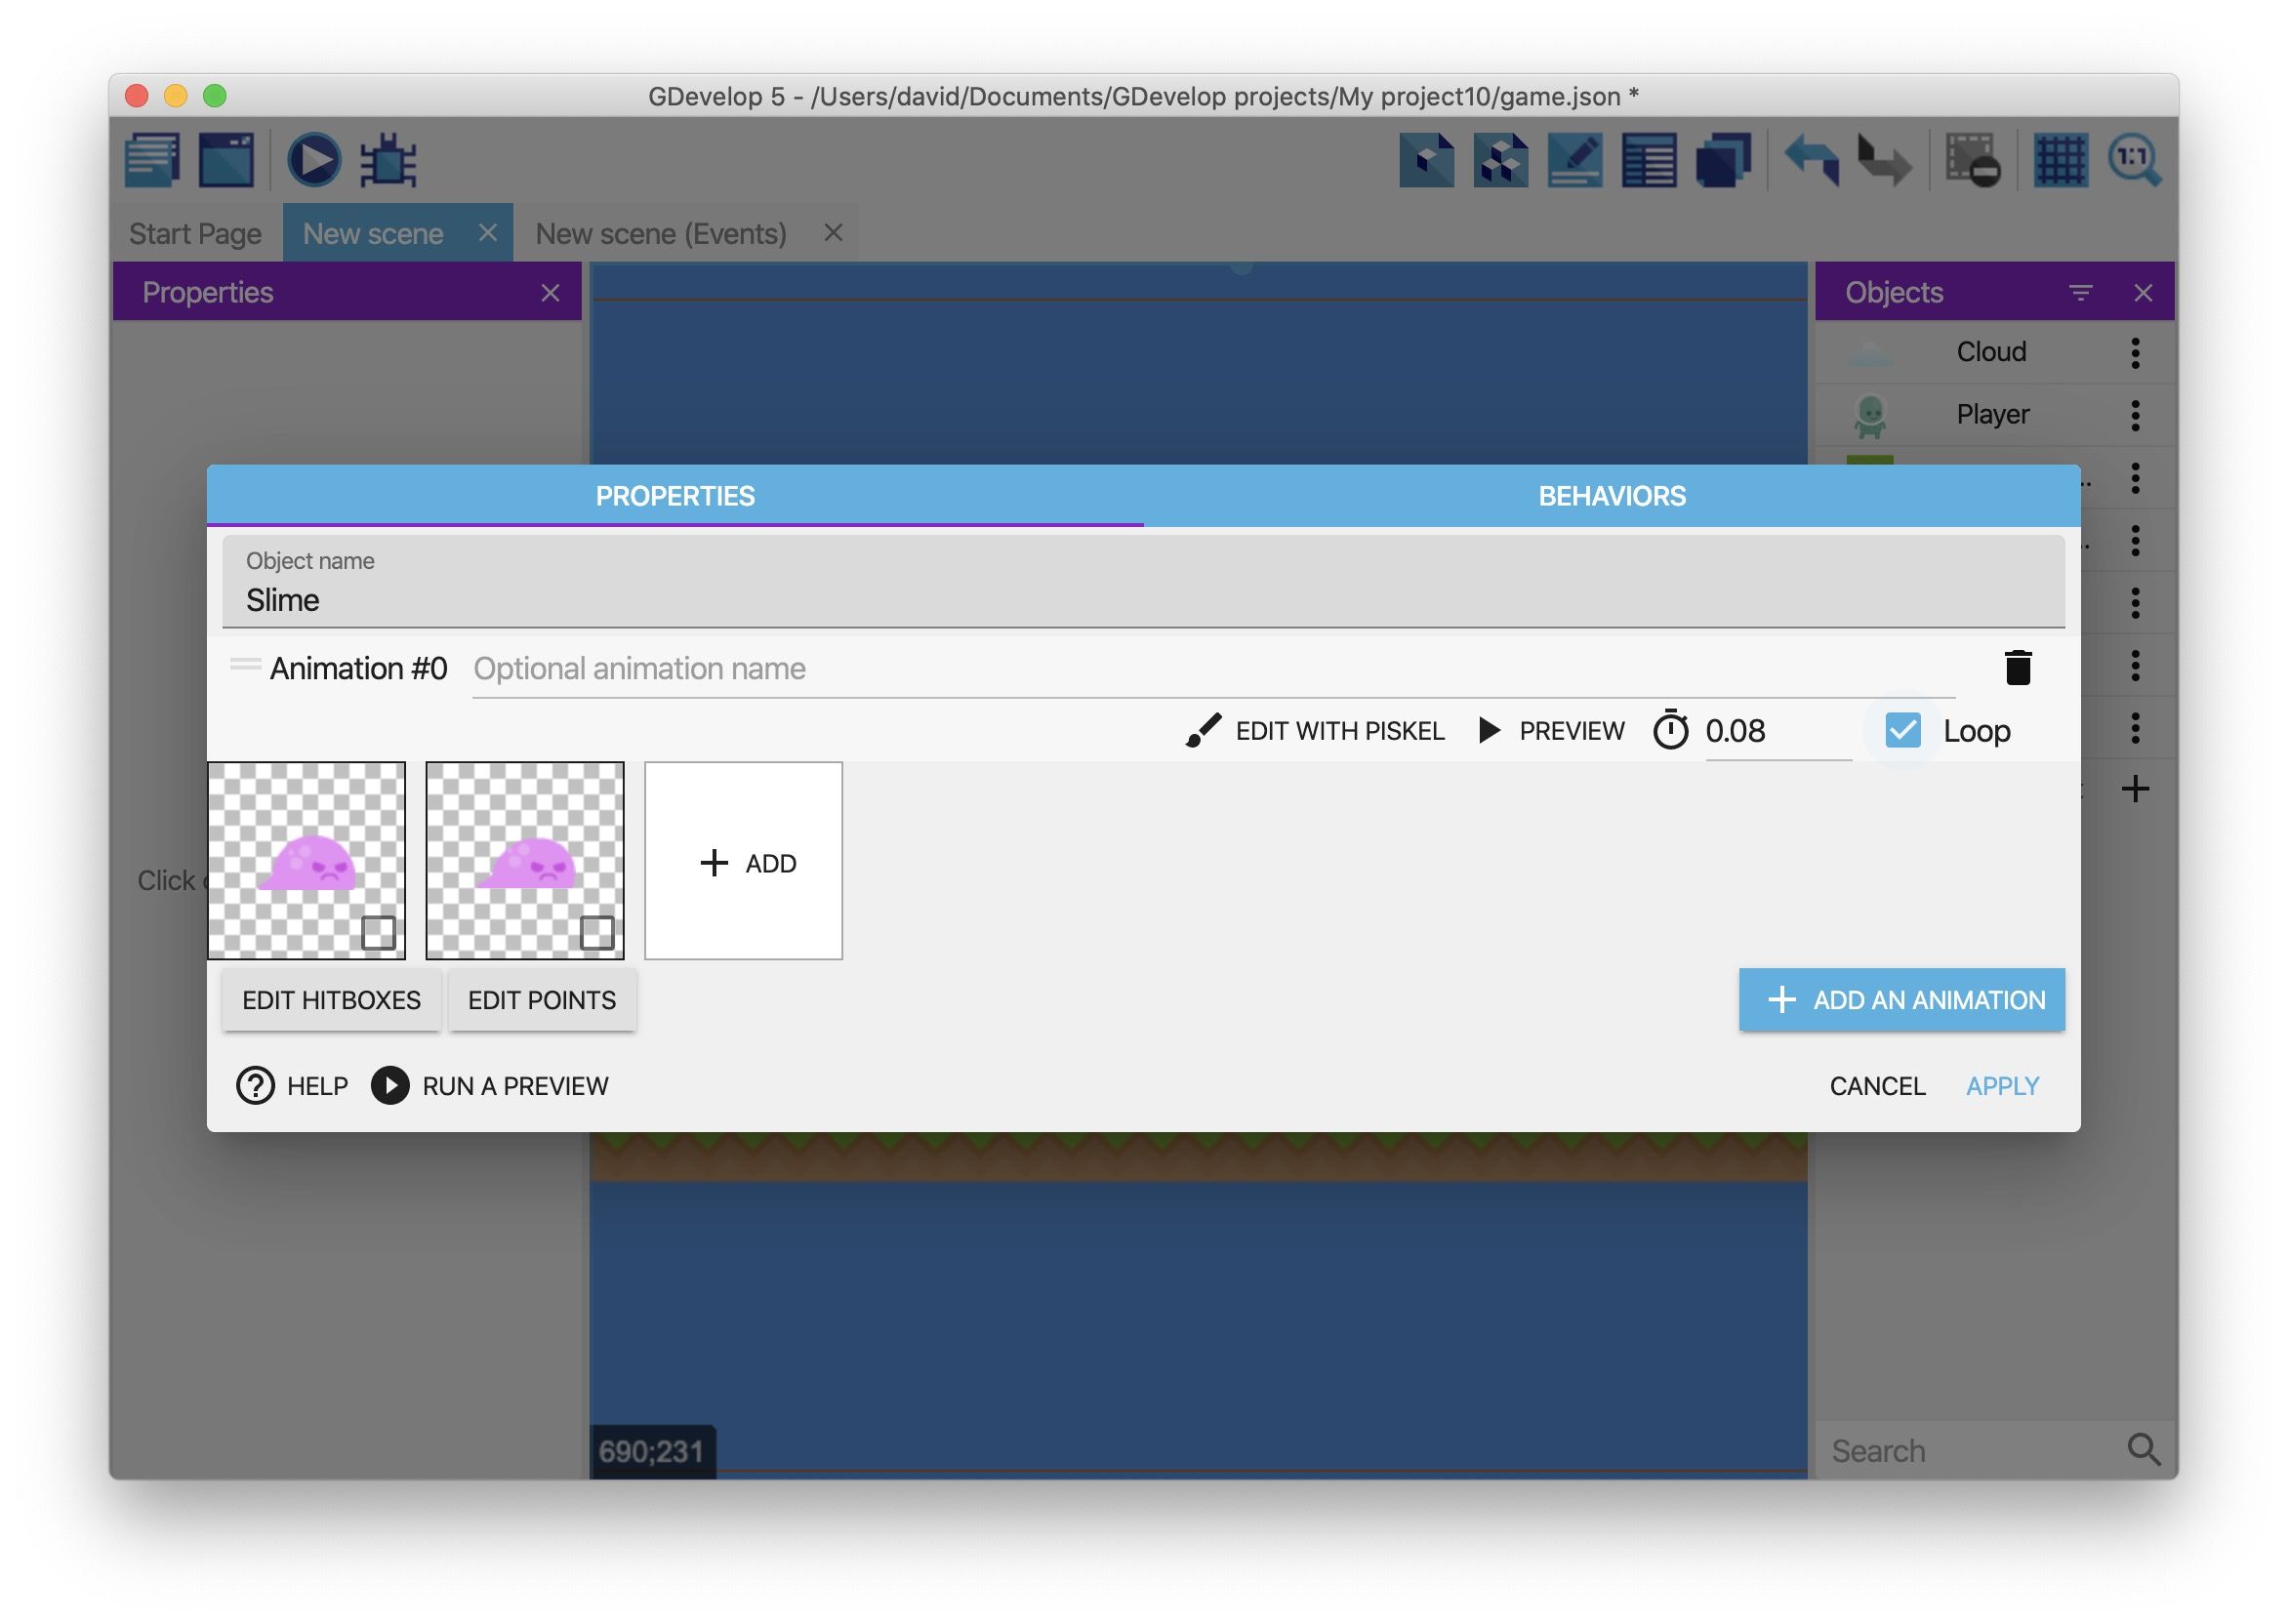
- Maak een sprite object met de naam "Slime".
- Voeg een animatie toe aan het object. Gebruik hiervoor de volgende bestanden:
- slimeWalk1.png
- slimeWalk2.png 3. Vink de Loop optie aan. 4. Sleep een instantie van het object toe aan de scène.
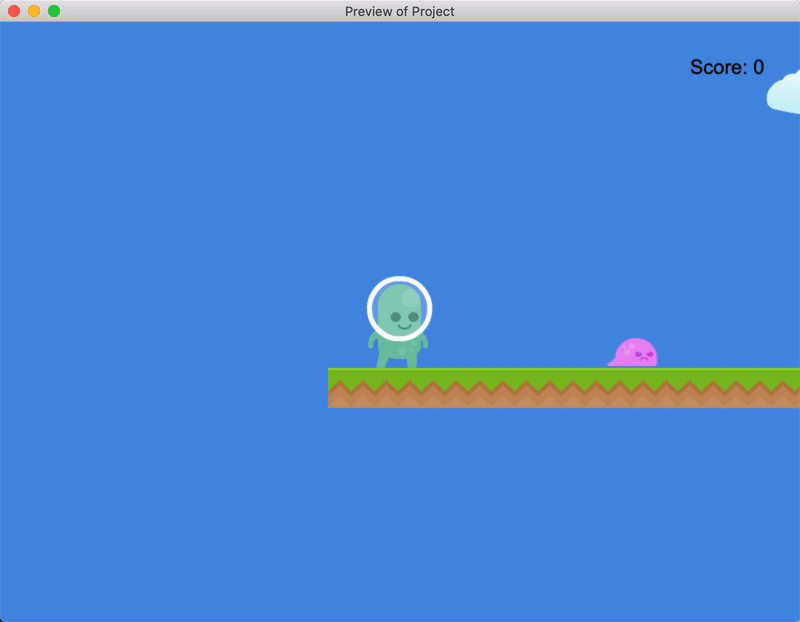
Als je een voorbeeld van de game bekijkt zie je een geanimeerde vijand op het scherm.
Stap 2: Laat de vijand naar rechts bewegen
In het vorige deel van de tutorial werd uitgelegd dat er drie type variabelen zijn:
- Object
- Scene
- Global
Een object variabele is gekoppeld aan een specifiek object. Dit betekend dat de variabele een waarde bevat die alleen beschikbaar is voor het object waar die aan gekoppeld is.
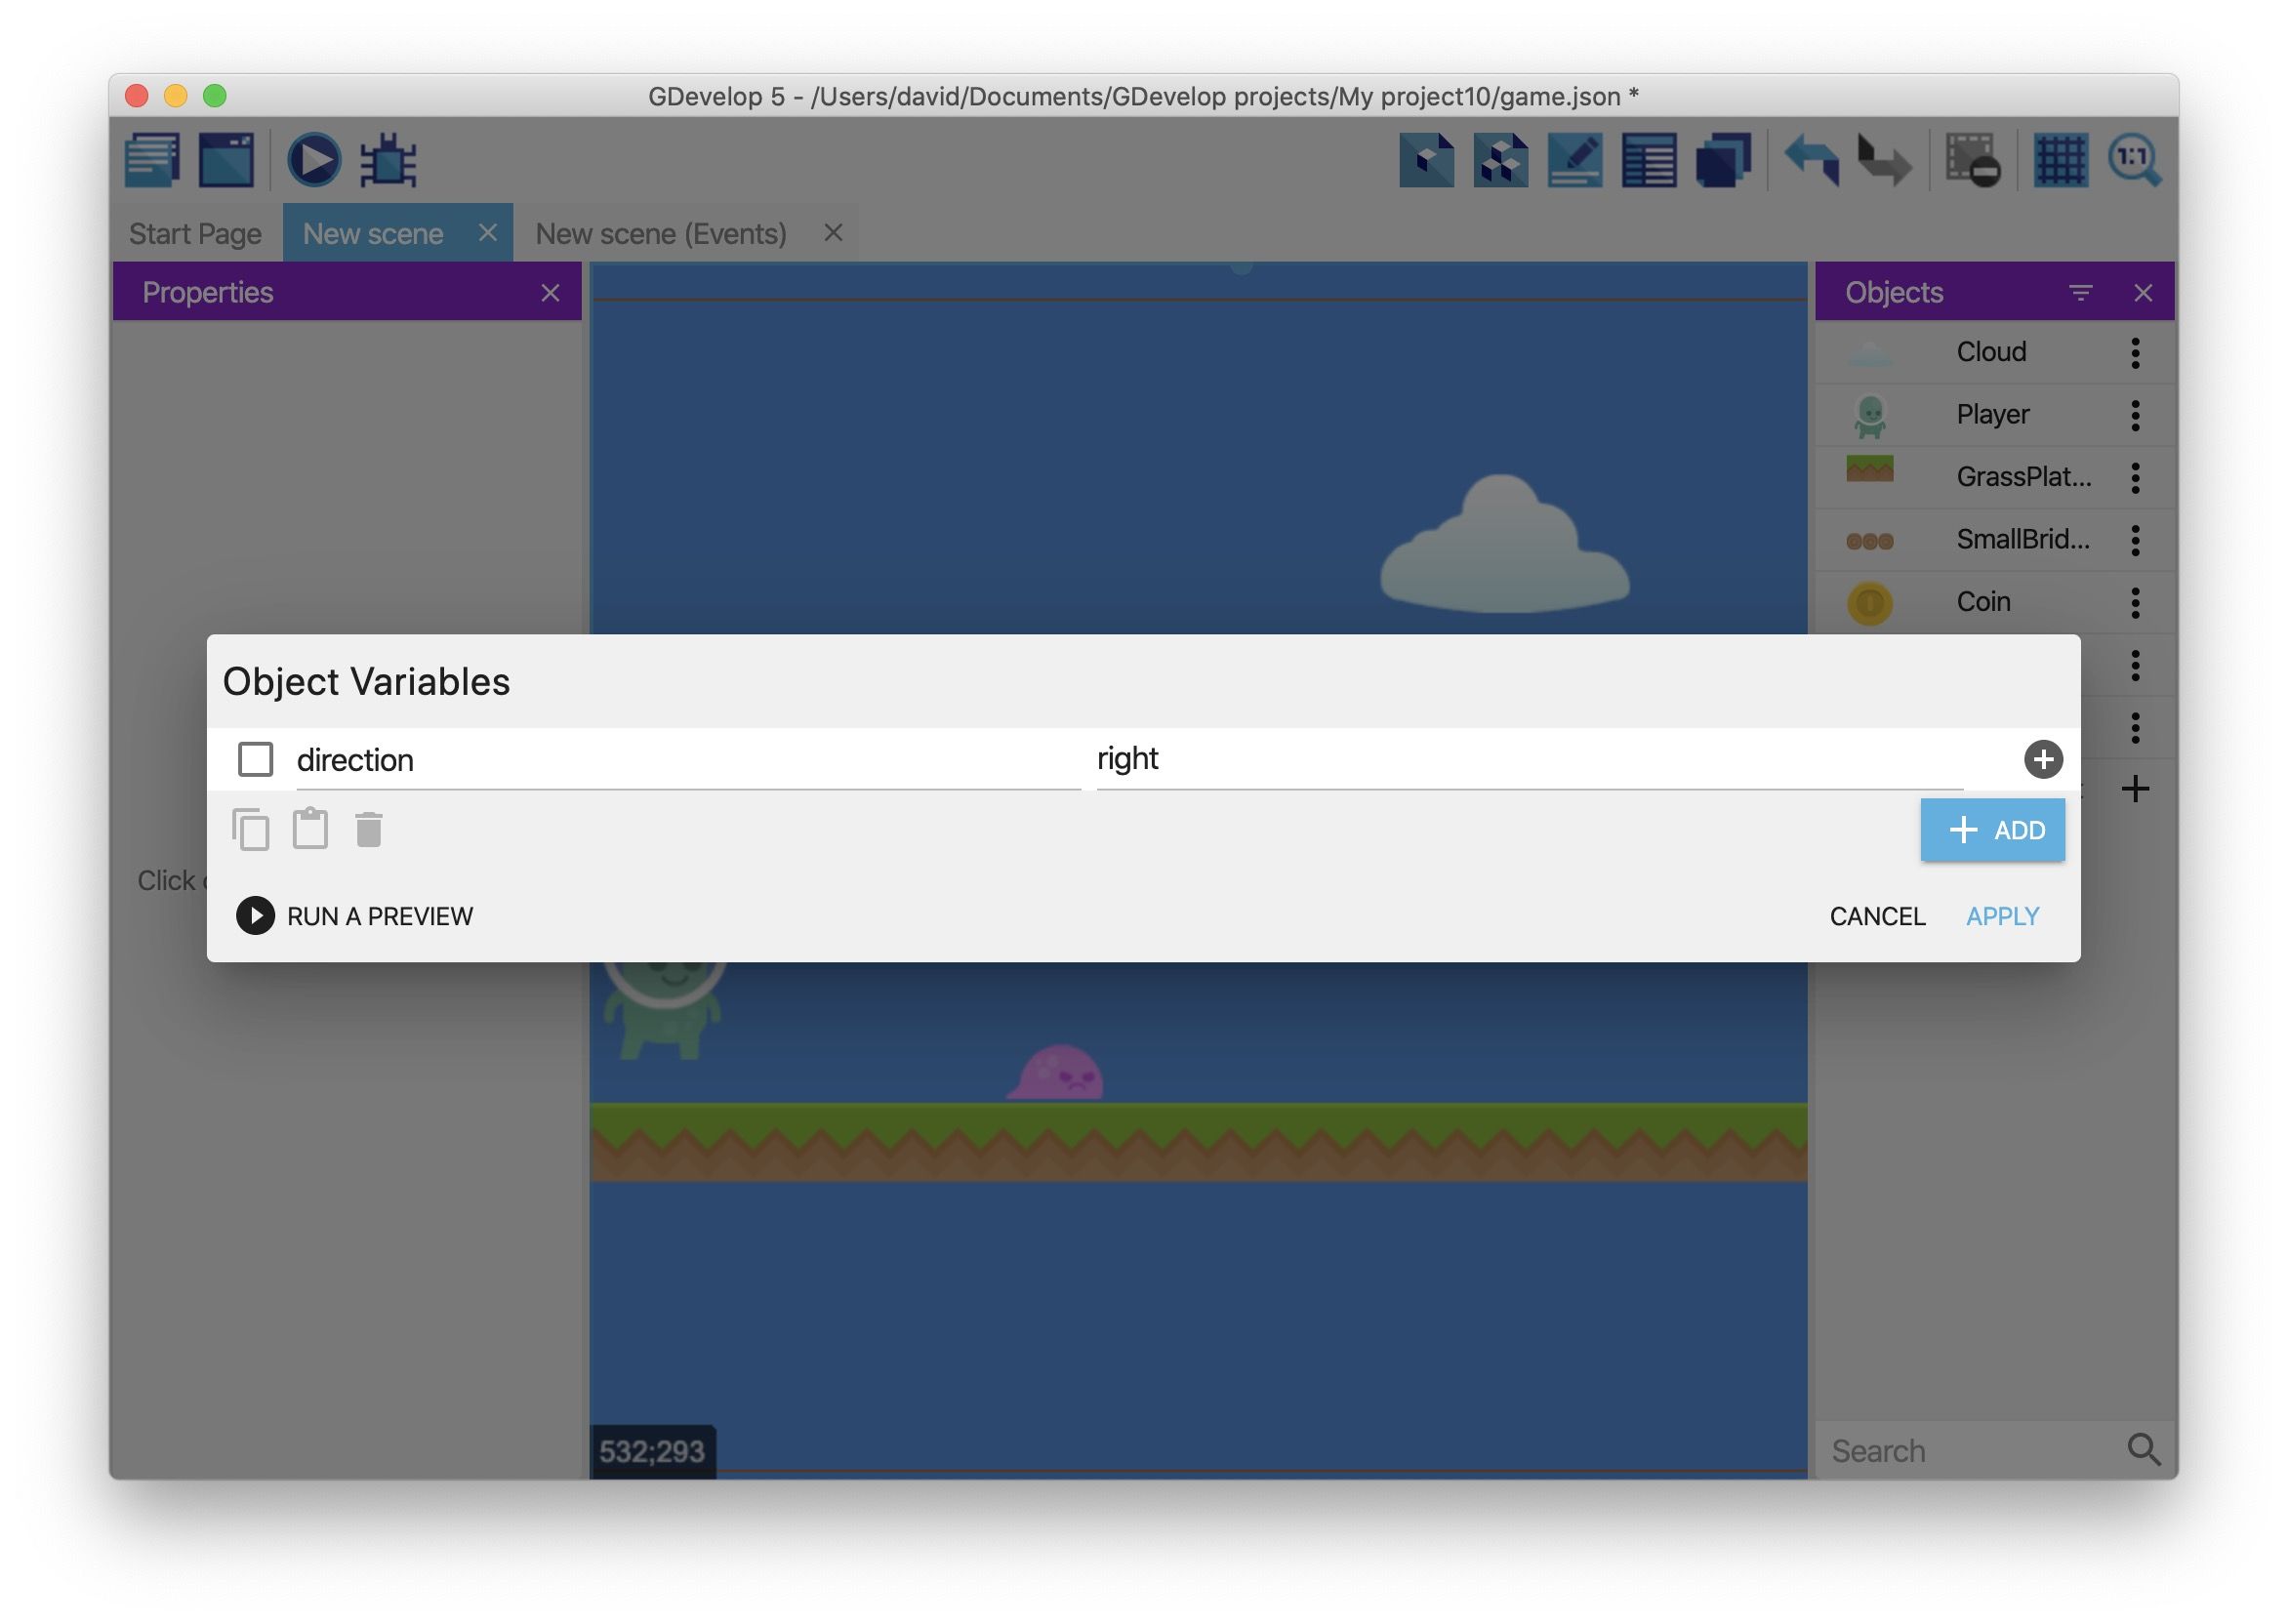
Om een variabele aan een object toe te voegen:
- Klik met de rechter muisknop op het "Slime" object.
- Selecteer Edit object variables.
- Voer een variabele toe met de naam "direction" en de waarde "right". Dit is de standaard waarde van de variabele.
- Klik op Apply.
Deze variabele "direction" houdt de huidige richting van de vijand bij. In een latere stap kunt je de richting van de vijand wijzigen door de waarde van de variabele te wijzigen.
Voeg een event toe om de vijand naar rechts te laten bewegen:
- Open de Events editor.
- Maak een nieuw event.
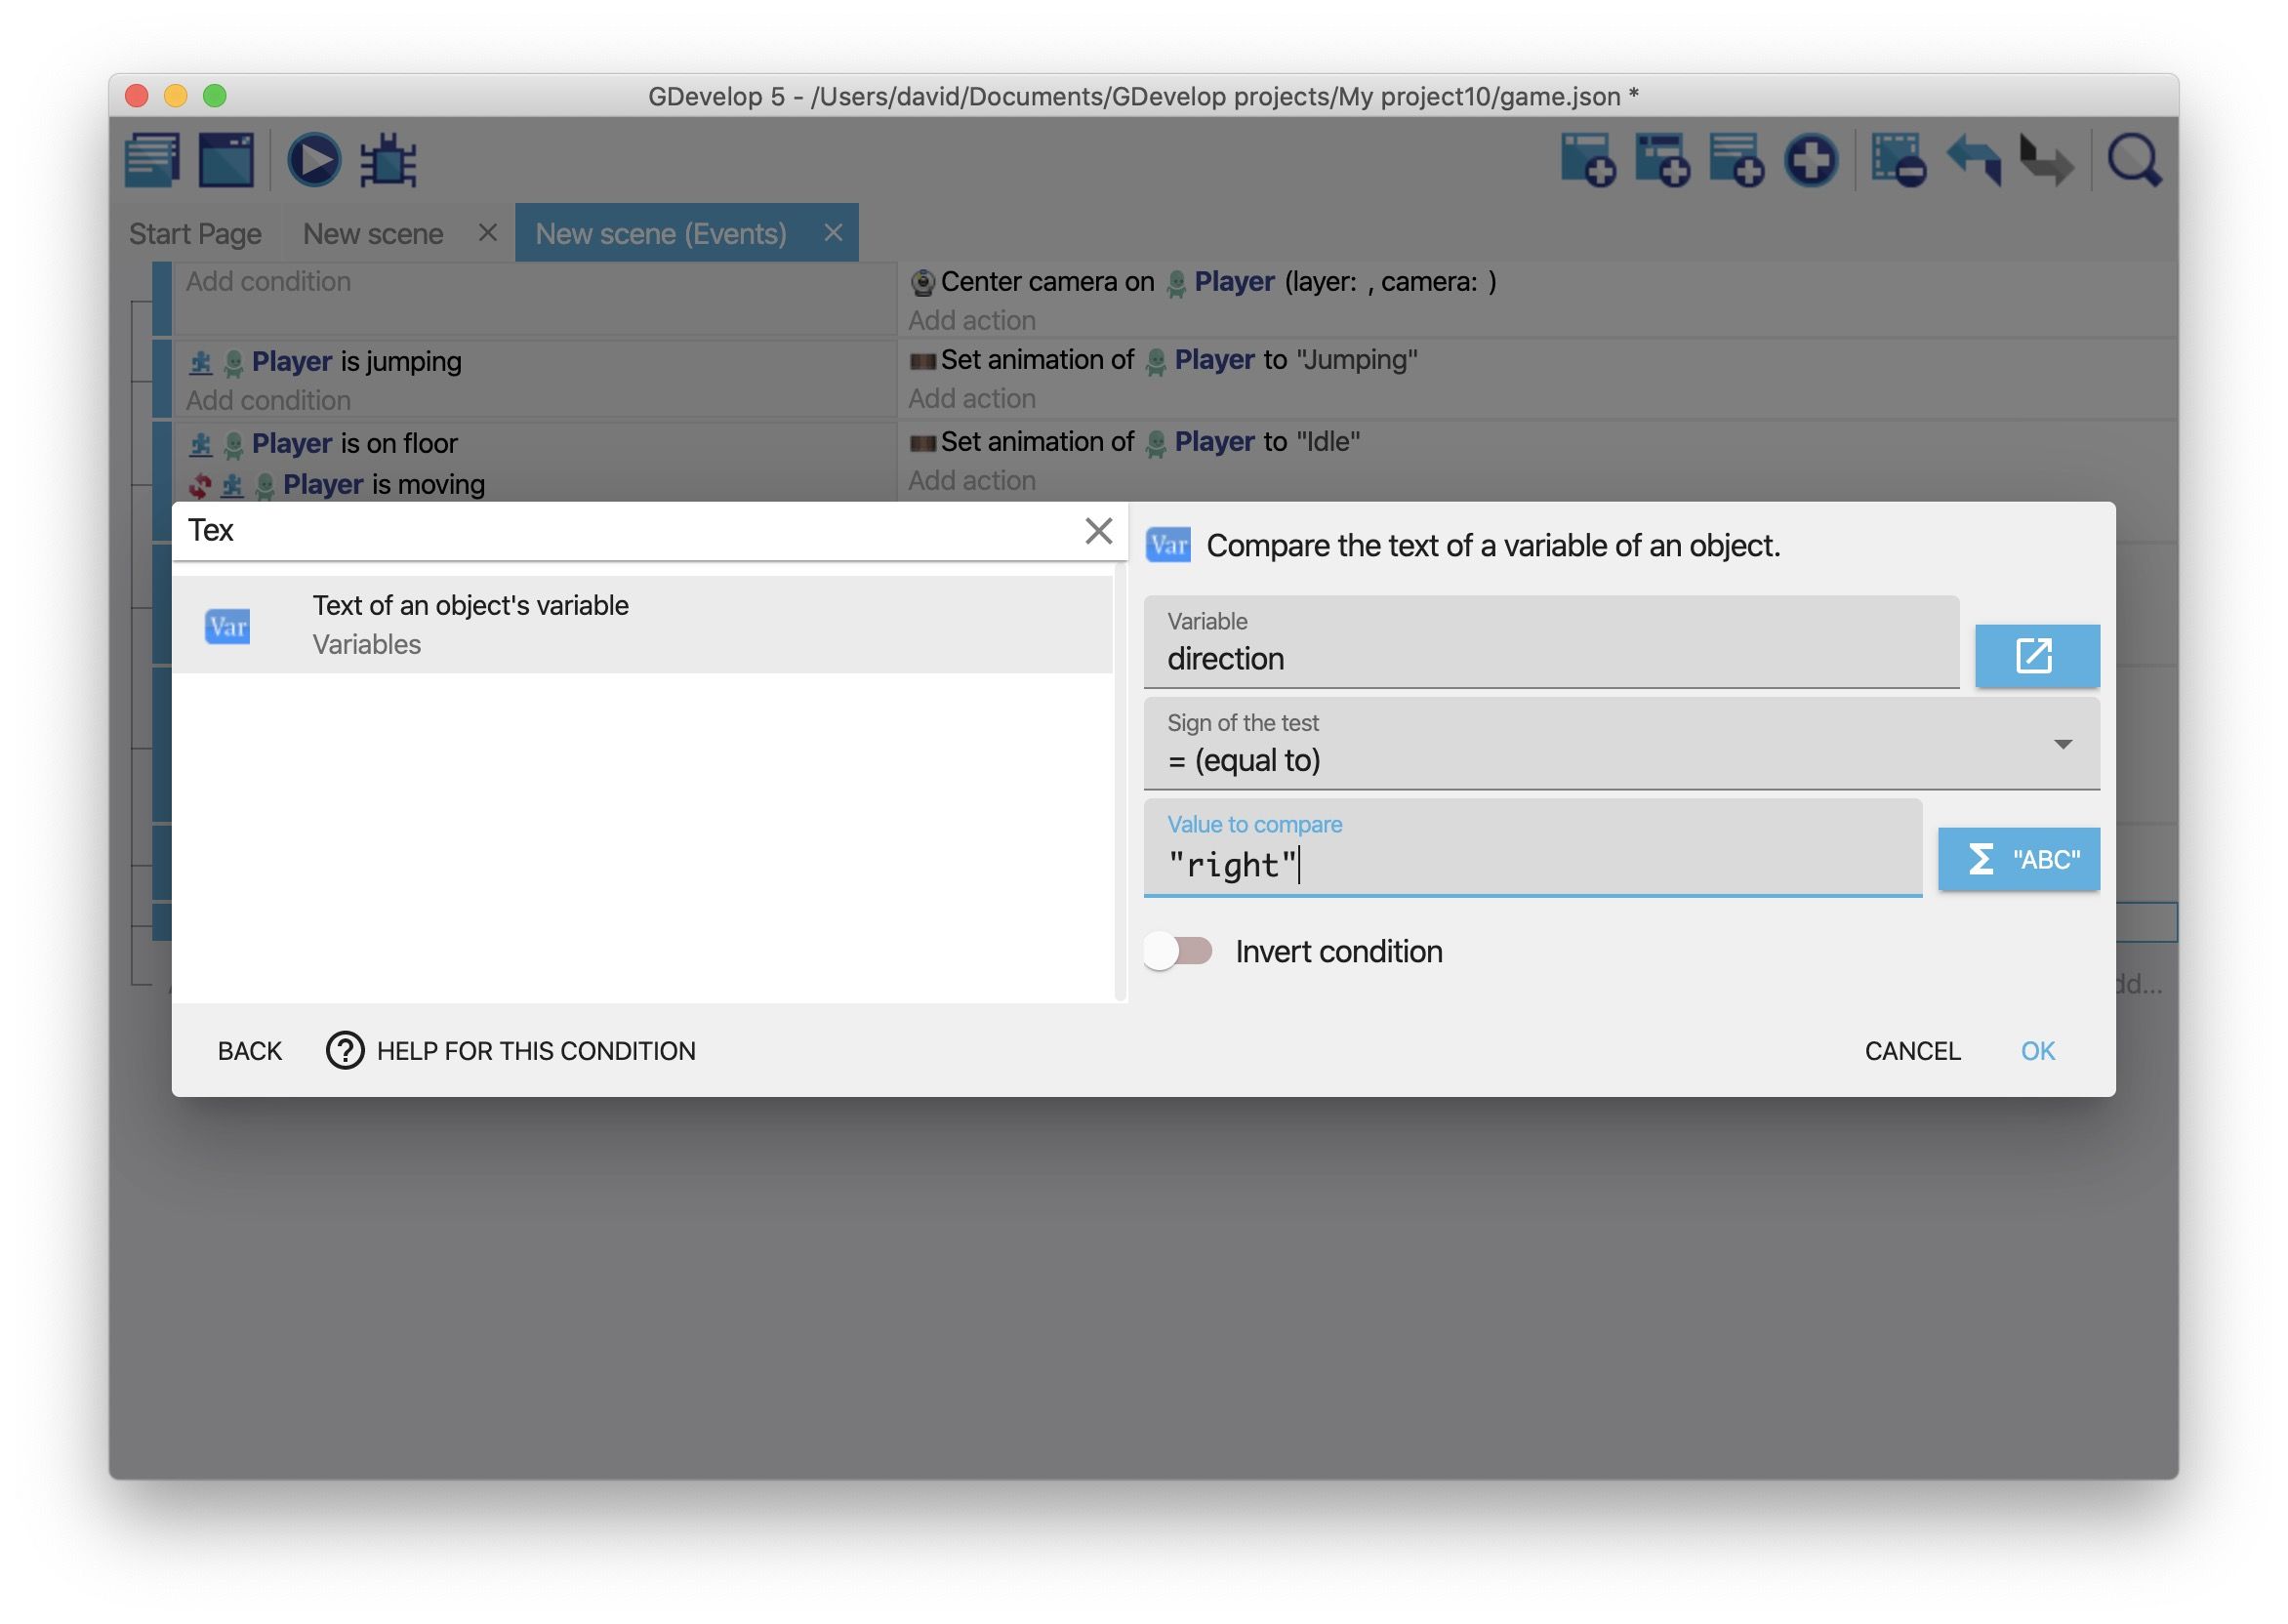
- Voeg de Text of an object's variable conditie toe aan het "Slime" object.
- In het Variable veld, typ "direction".
- In het Sign of the test veld, selecteer = (equal to).
- In het Value to compare veld, typ "right" (inclusief de dubbele quotes).
- Klik op OK.
Voeg vervolgens een actie toe aan het event:
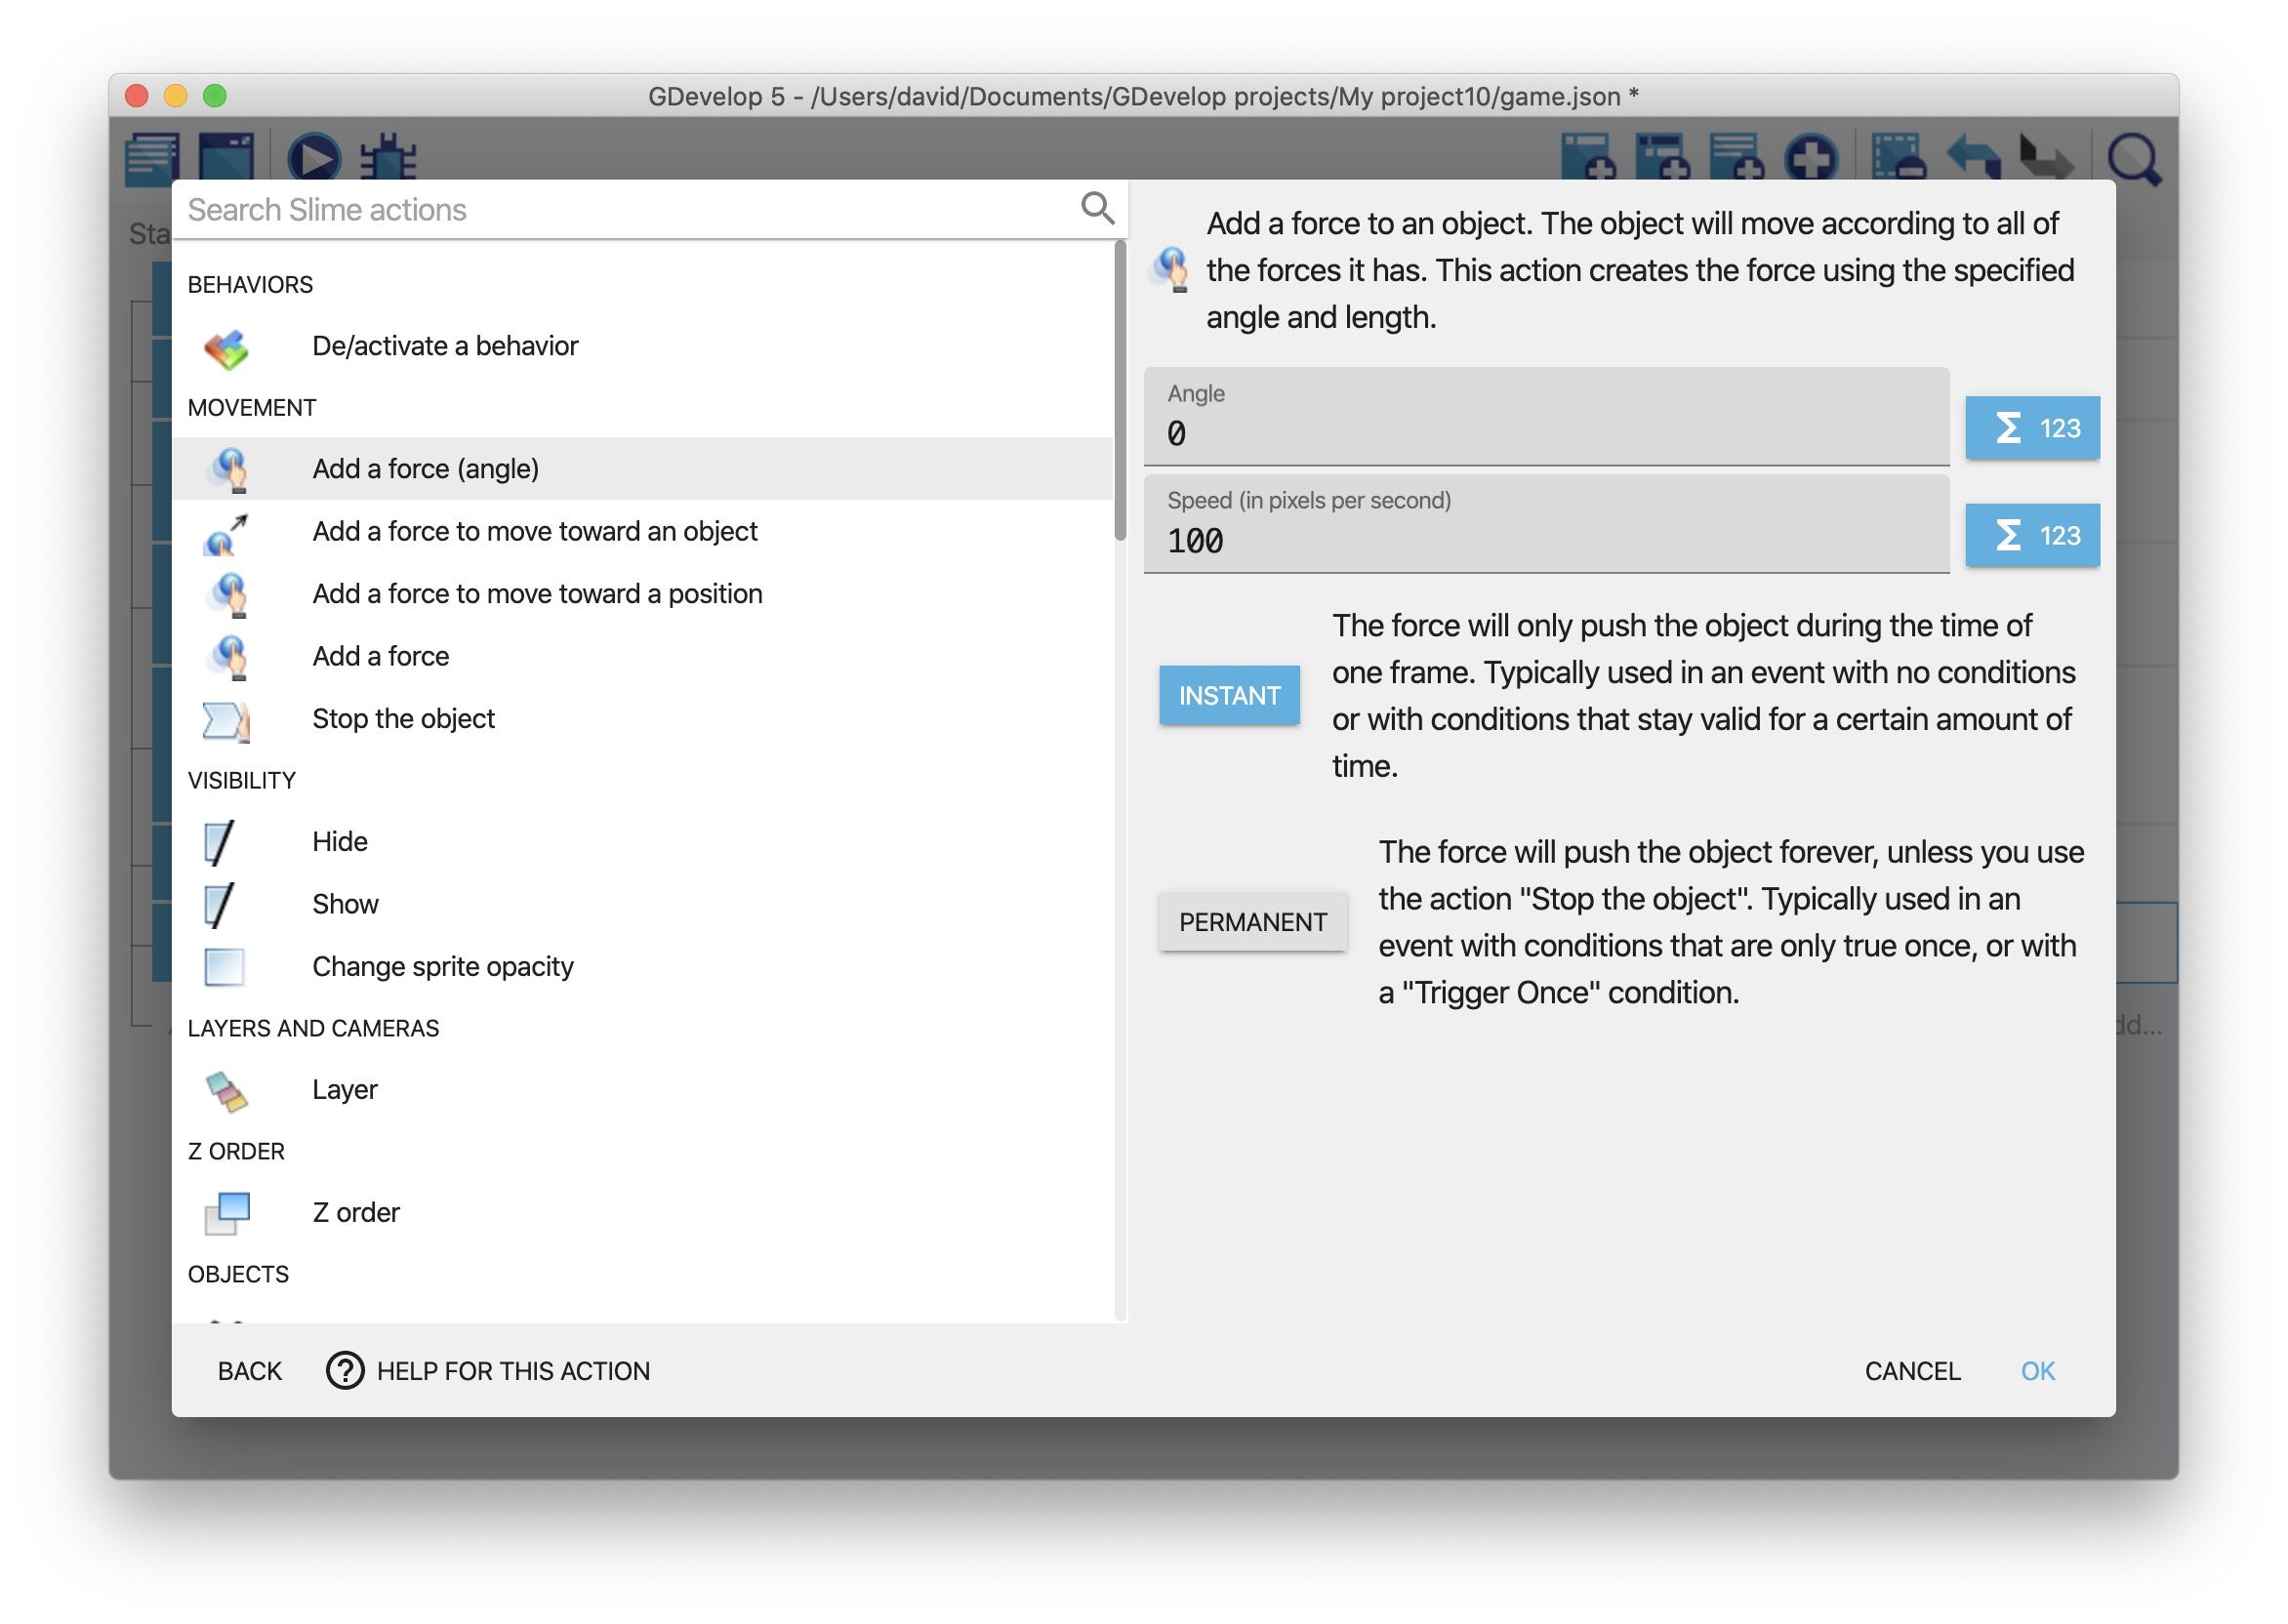
- Voeg de Add a force (angle) actie toe aan het event.
- In het Object veld, selecteer "Slime".
- In het Angle veld, typ "0".
- In het Speed veld, typ "100".
- Vink de optie Instant aan.
- Klik op OK.
Dit is hoe het event eruit ziet:
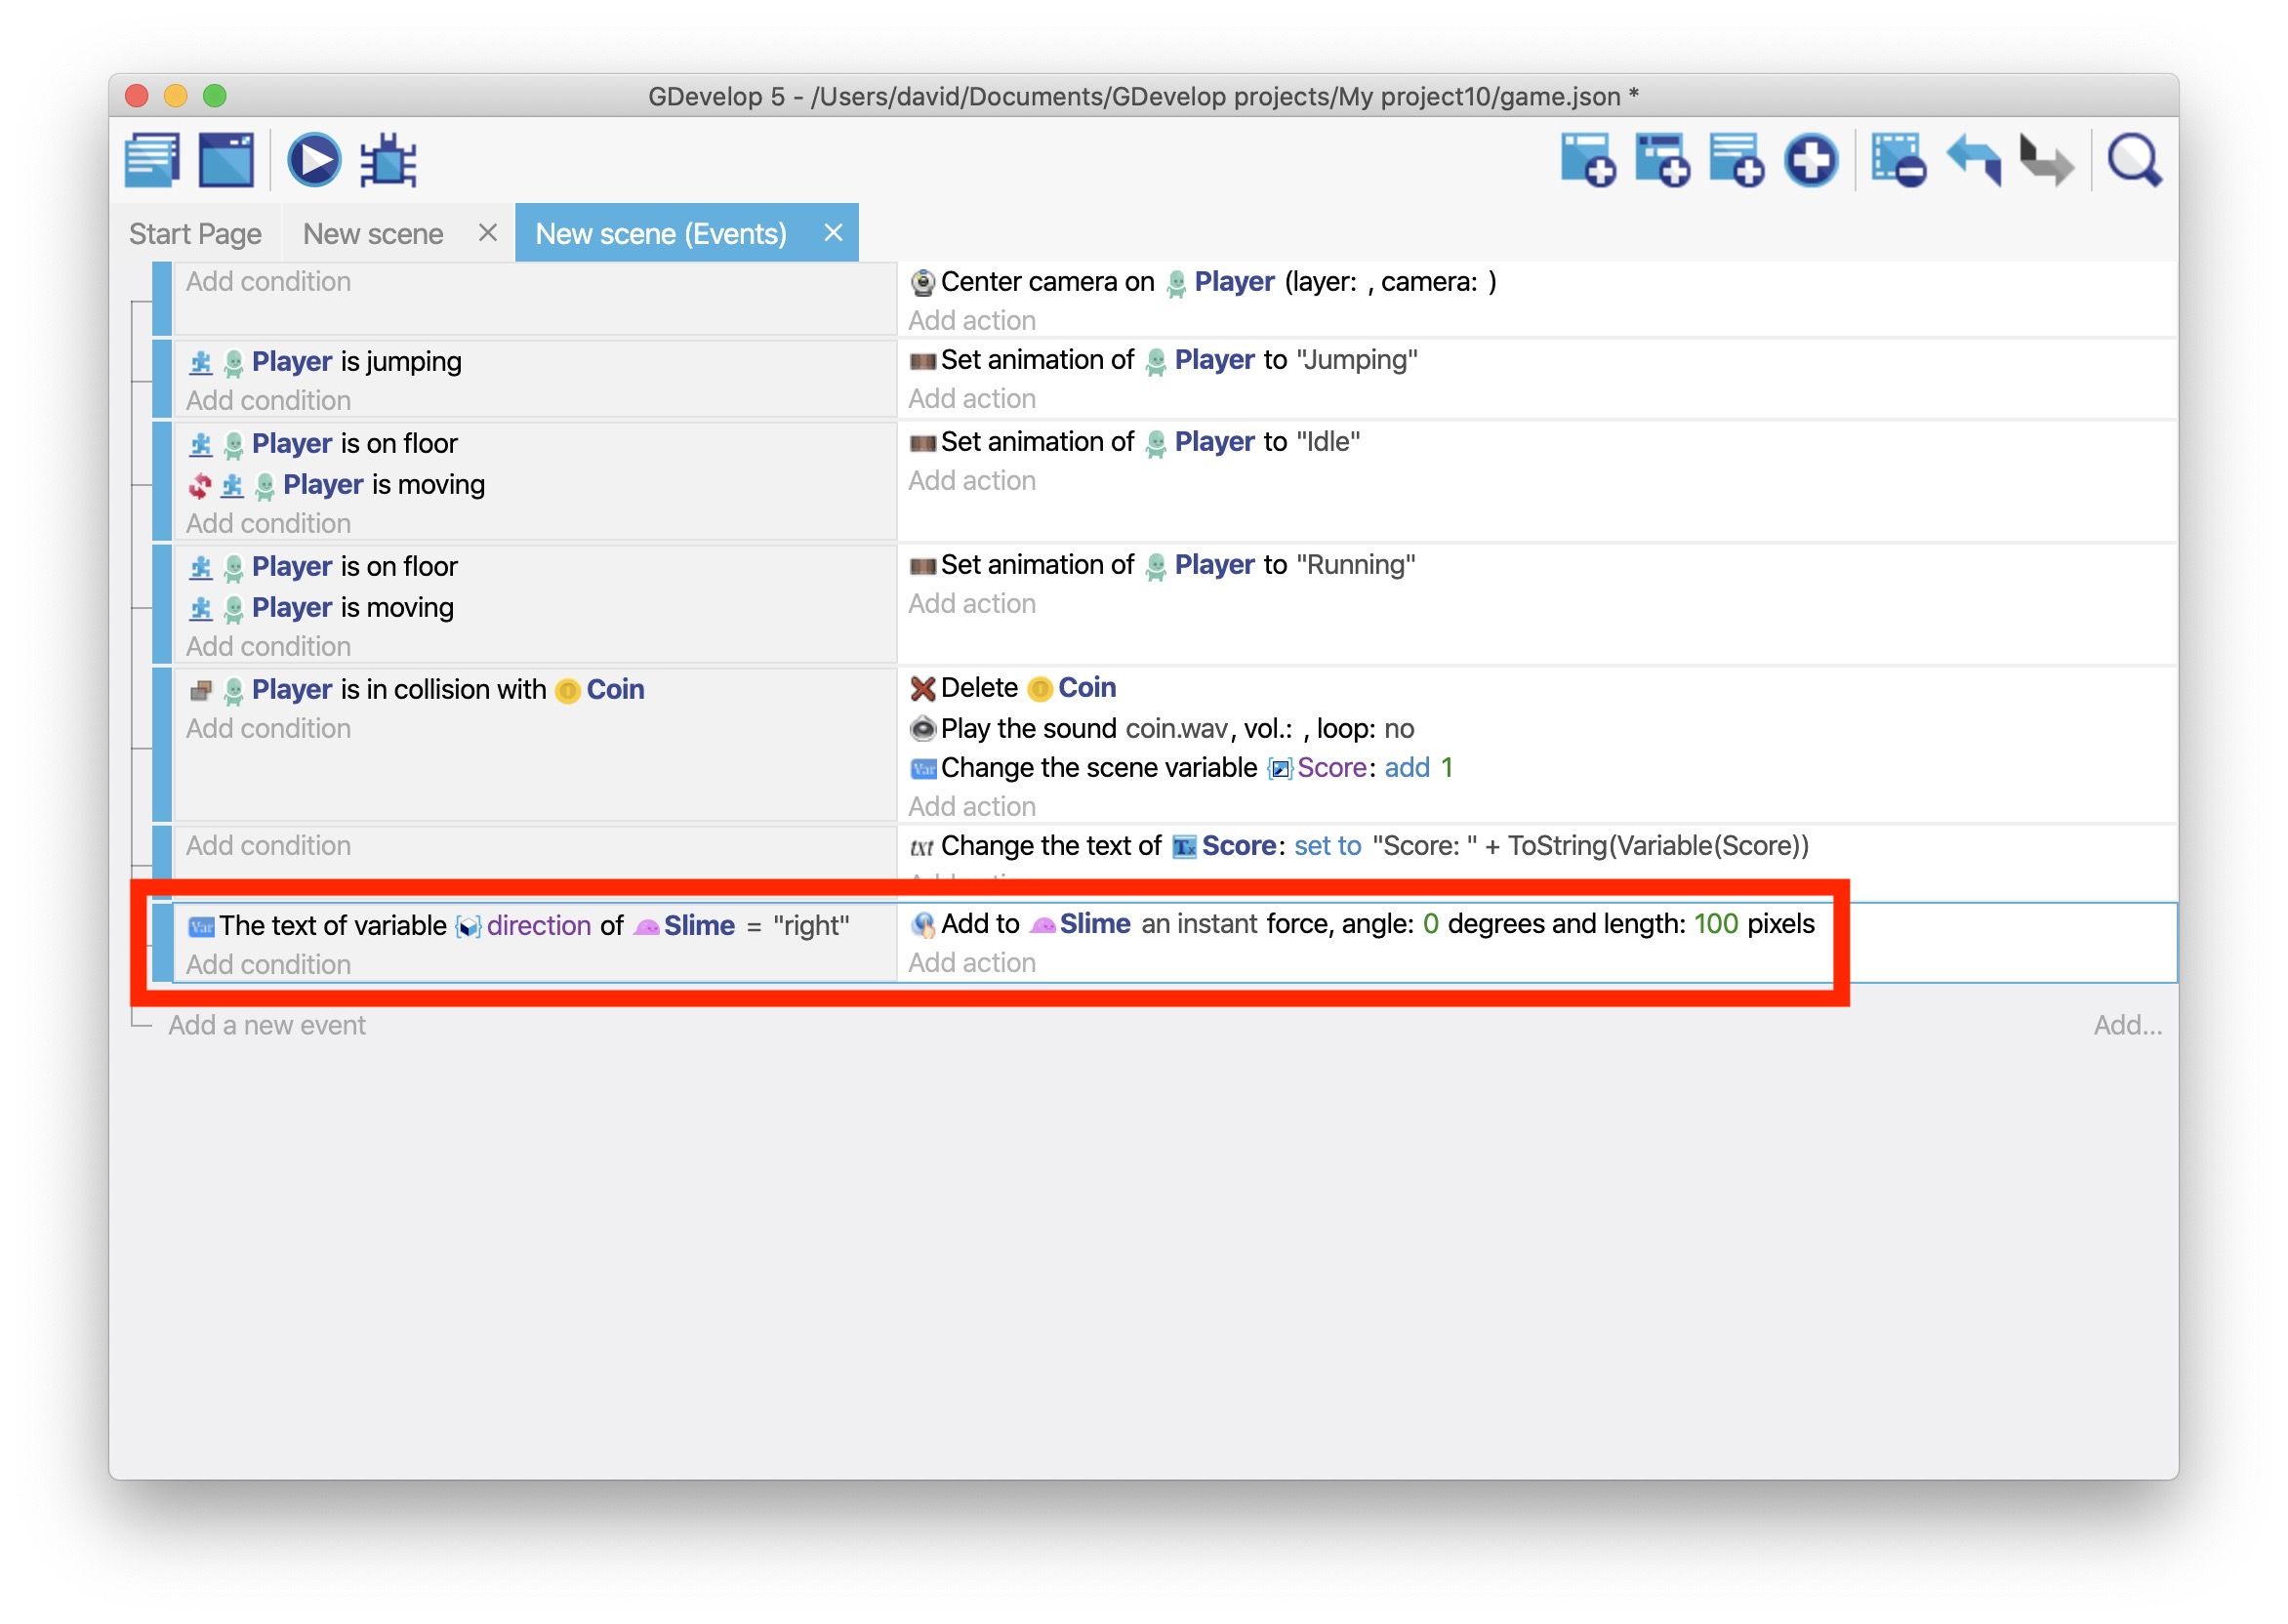
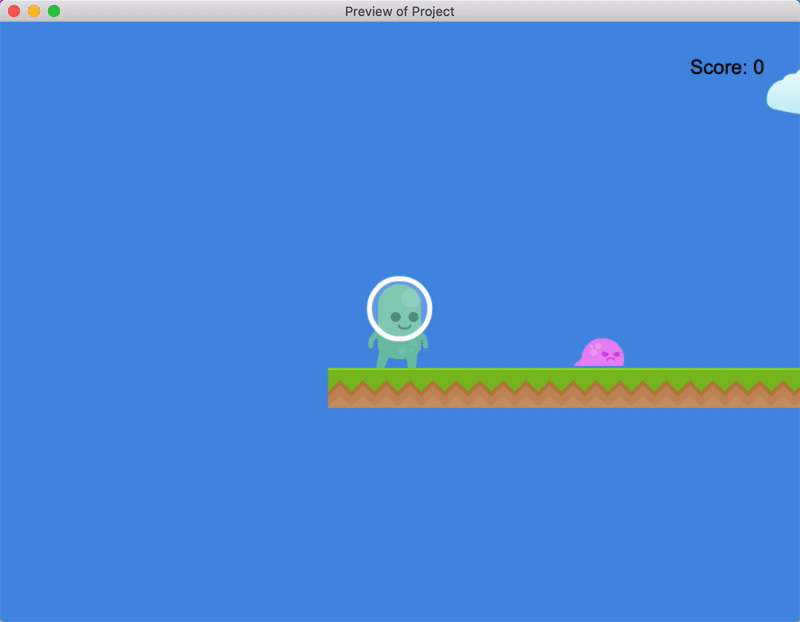
Dit event zorgt er nu voor dat zolang de waarde van de "direction" variabele "right" is het "Slime" object naar rechts beweegt. Omdat het object nu nog niet van richting veranderd valt het uiteindelijk van het platform af.

Stap 3: Verander de richting van de vijand
To make the enemy change direction, add two invisible objects to the scene -- one called "Left" and one called "Right" -- and place them on other side of the enemy.
Then, when the enemy collides with one of the objects, you can flip them around and move them in the other direction. This creates the illusion of the enemy following a set route.
This step focuses on creating the "Left" object. When the enemy collides with this object, they'll change direction from left to right. (The step that follows focuses on the "Right" object.)
Create the "Right" object
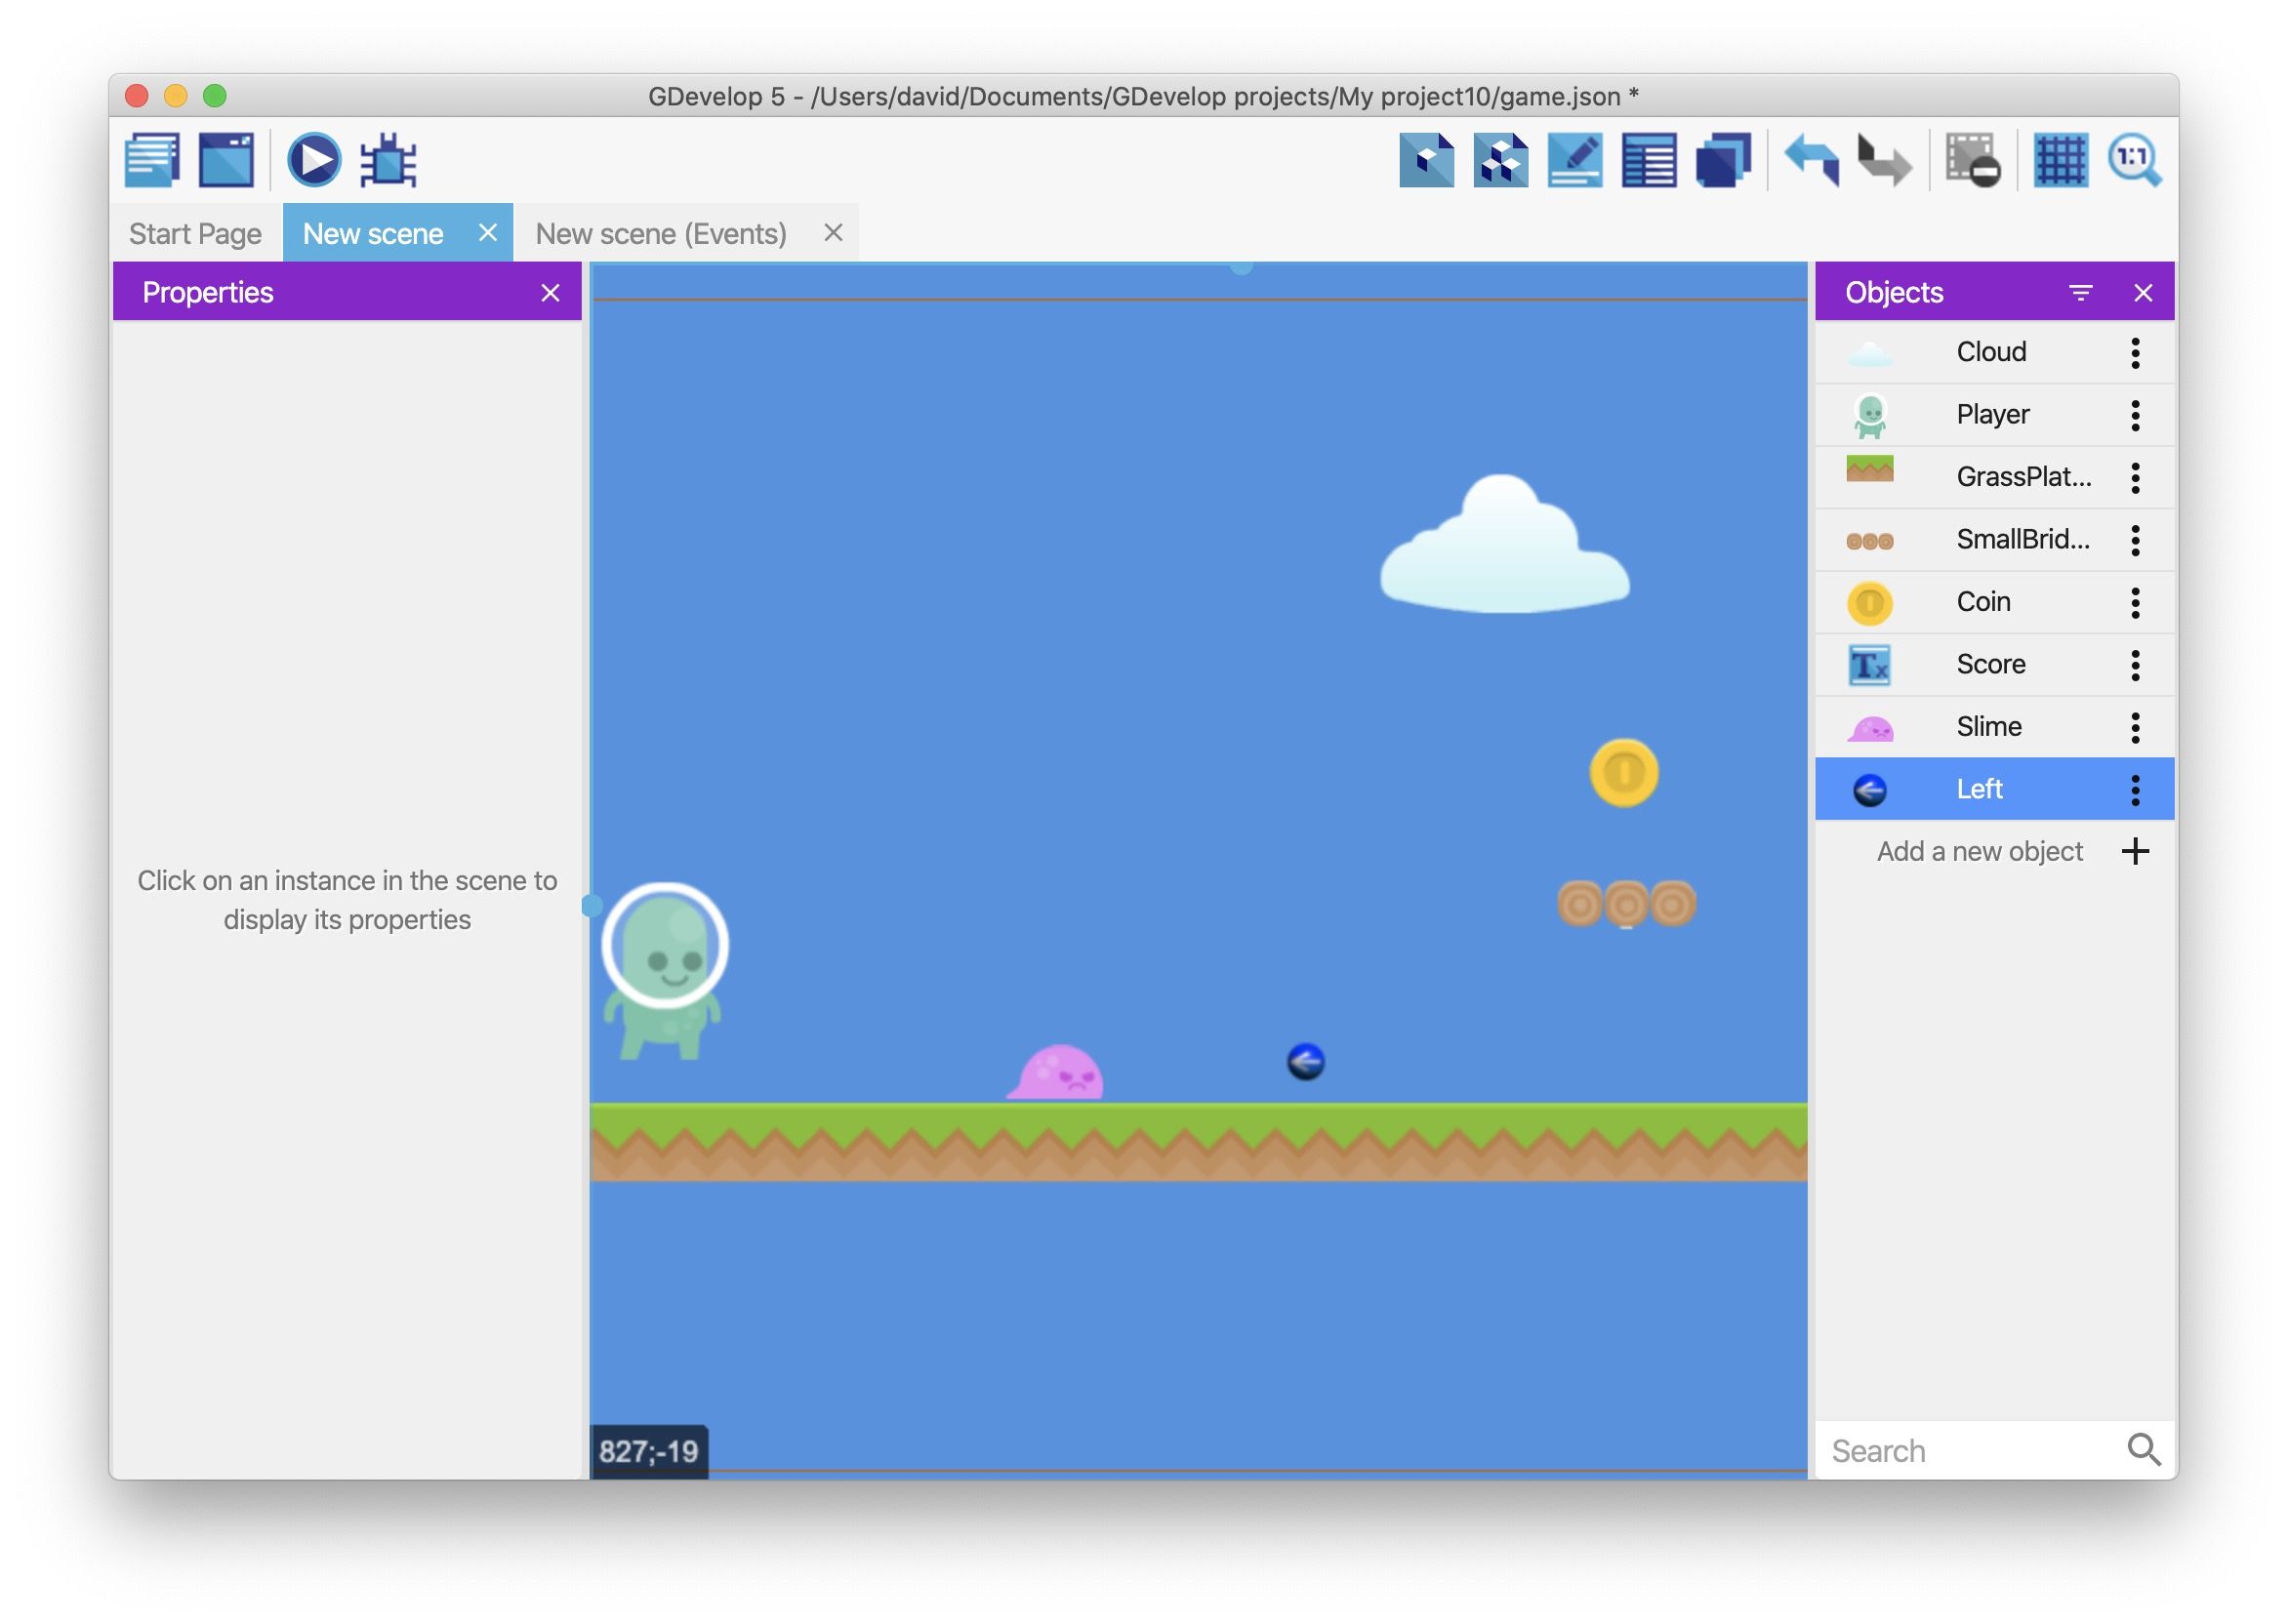
- Create a Sprite object named "Left".
- As the default sprite, use the "left.png" asset.
- Drag an instance of object into the scene (to the right of the enemy).
Detect when the enemy collides with the "Left" object
- Create a new event.
- Add a Collision condition that checks if the "Slime" object is colliding with the "Left" object.
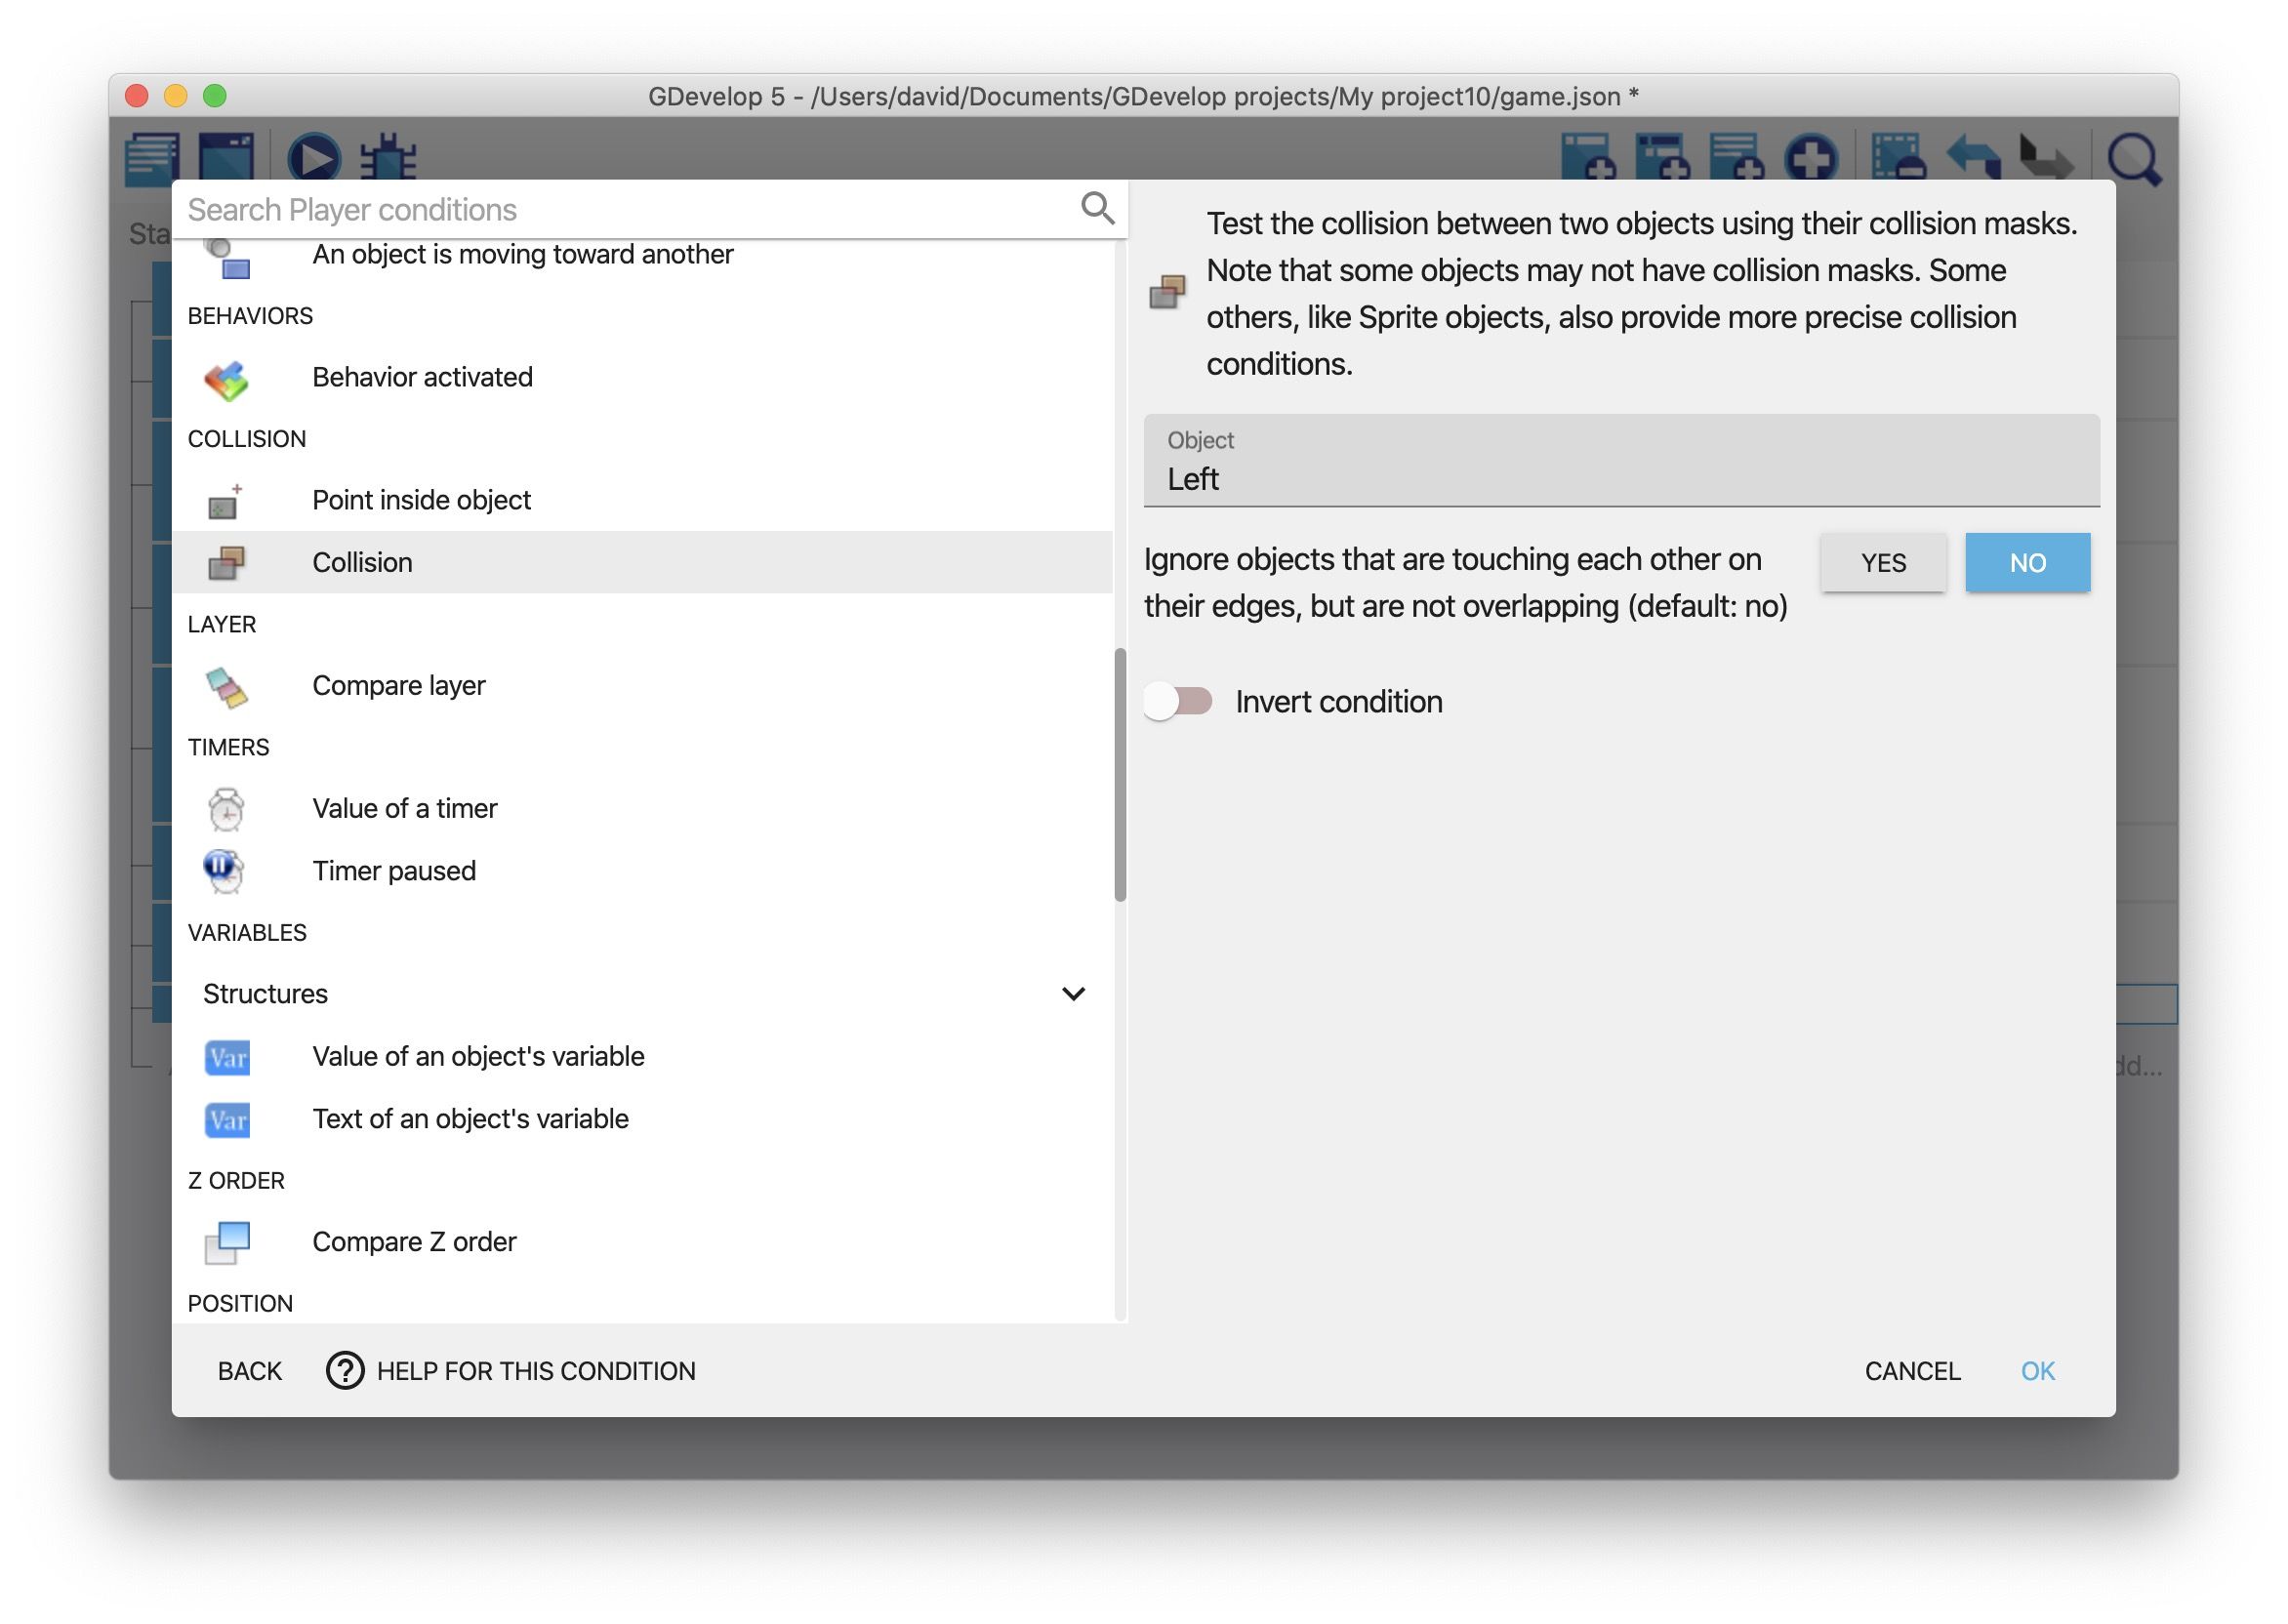
Change the value of the "direction" variable
- Add the Modify the text of a variable of an object action to the event.
- In the Variable field, type "direction".
- From the Modification's sign dropdown, select = (set to).
- In the Value field, type "left" (with quotation marks).

Flip the "Slime" object
- Add the Flip the object horizontally action to the event.
- Set the Activate flipping option as Yes.
This ensures that the "Slime" object changes and faces a different direction, rather than just changing directions.
Change the enemy's direction
- Add the Add a force (angle) action to the event.
- In the Object field, select "Slime".
- In the Angle field, type "180".
- In the Speed field, type "100".
- Enable the Instant option.
- Click OK.
If you preview the game, the enemy changes direction when they collide with the "Left" object.

Hide the "Left" object
- Create a new event.
- Add the At the beginning of the scene condition to the event.
- Add the Hide action to the "Left" object.
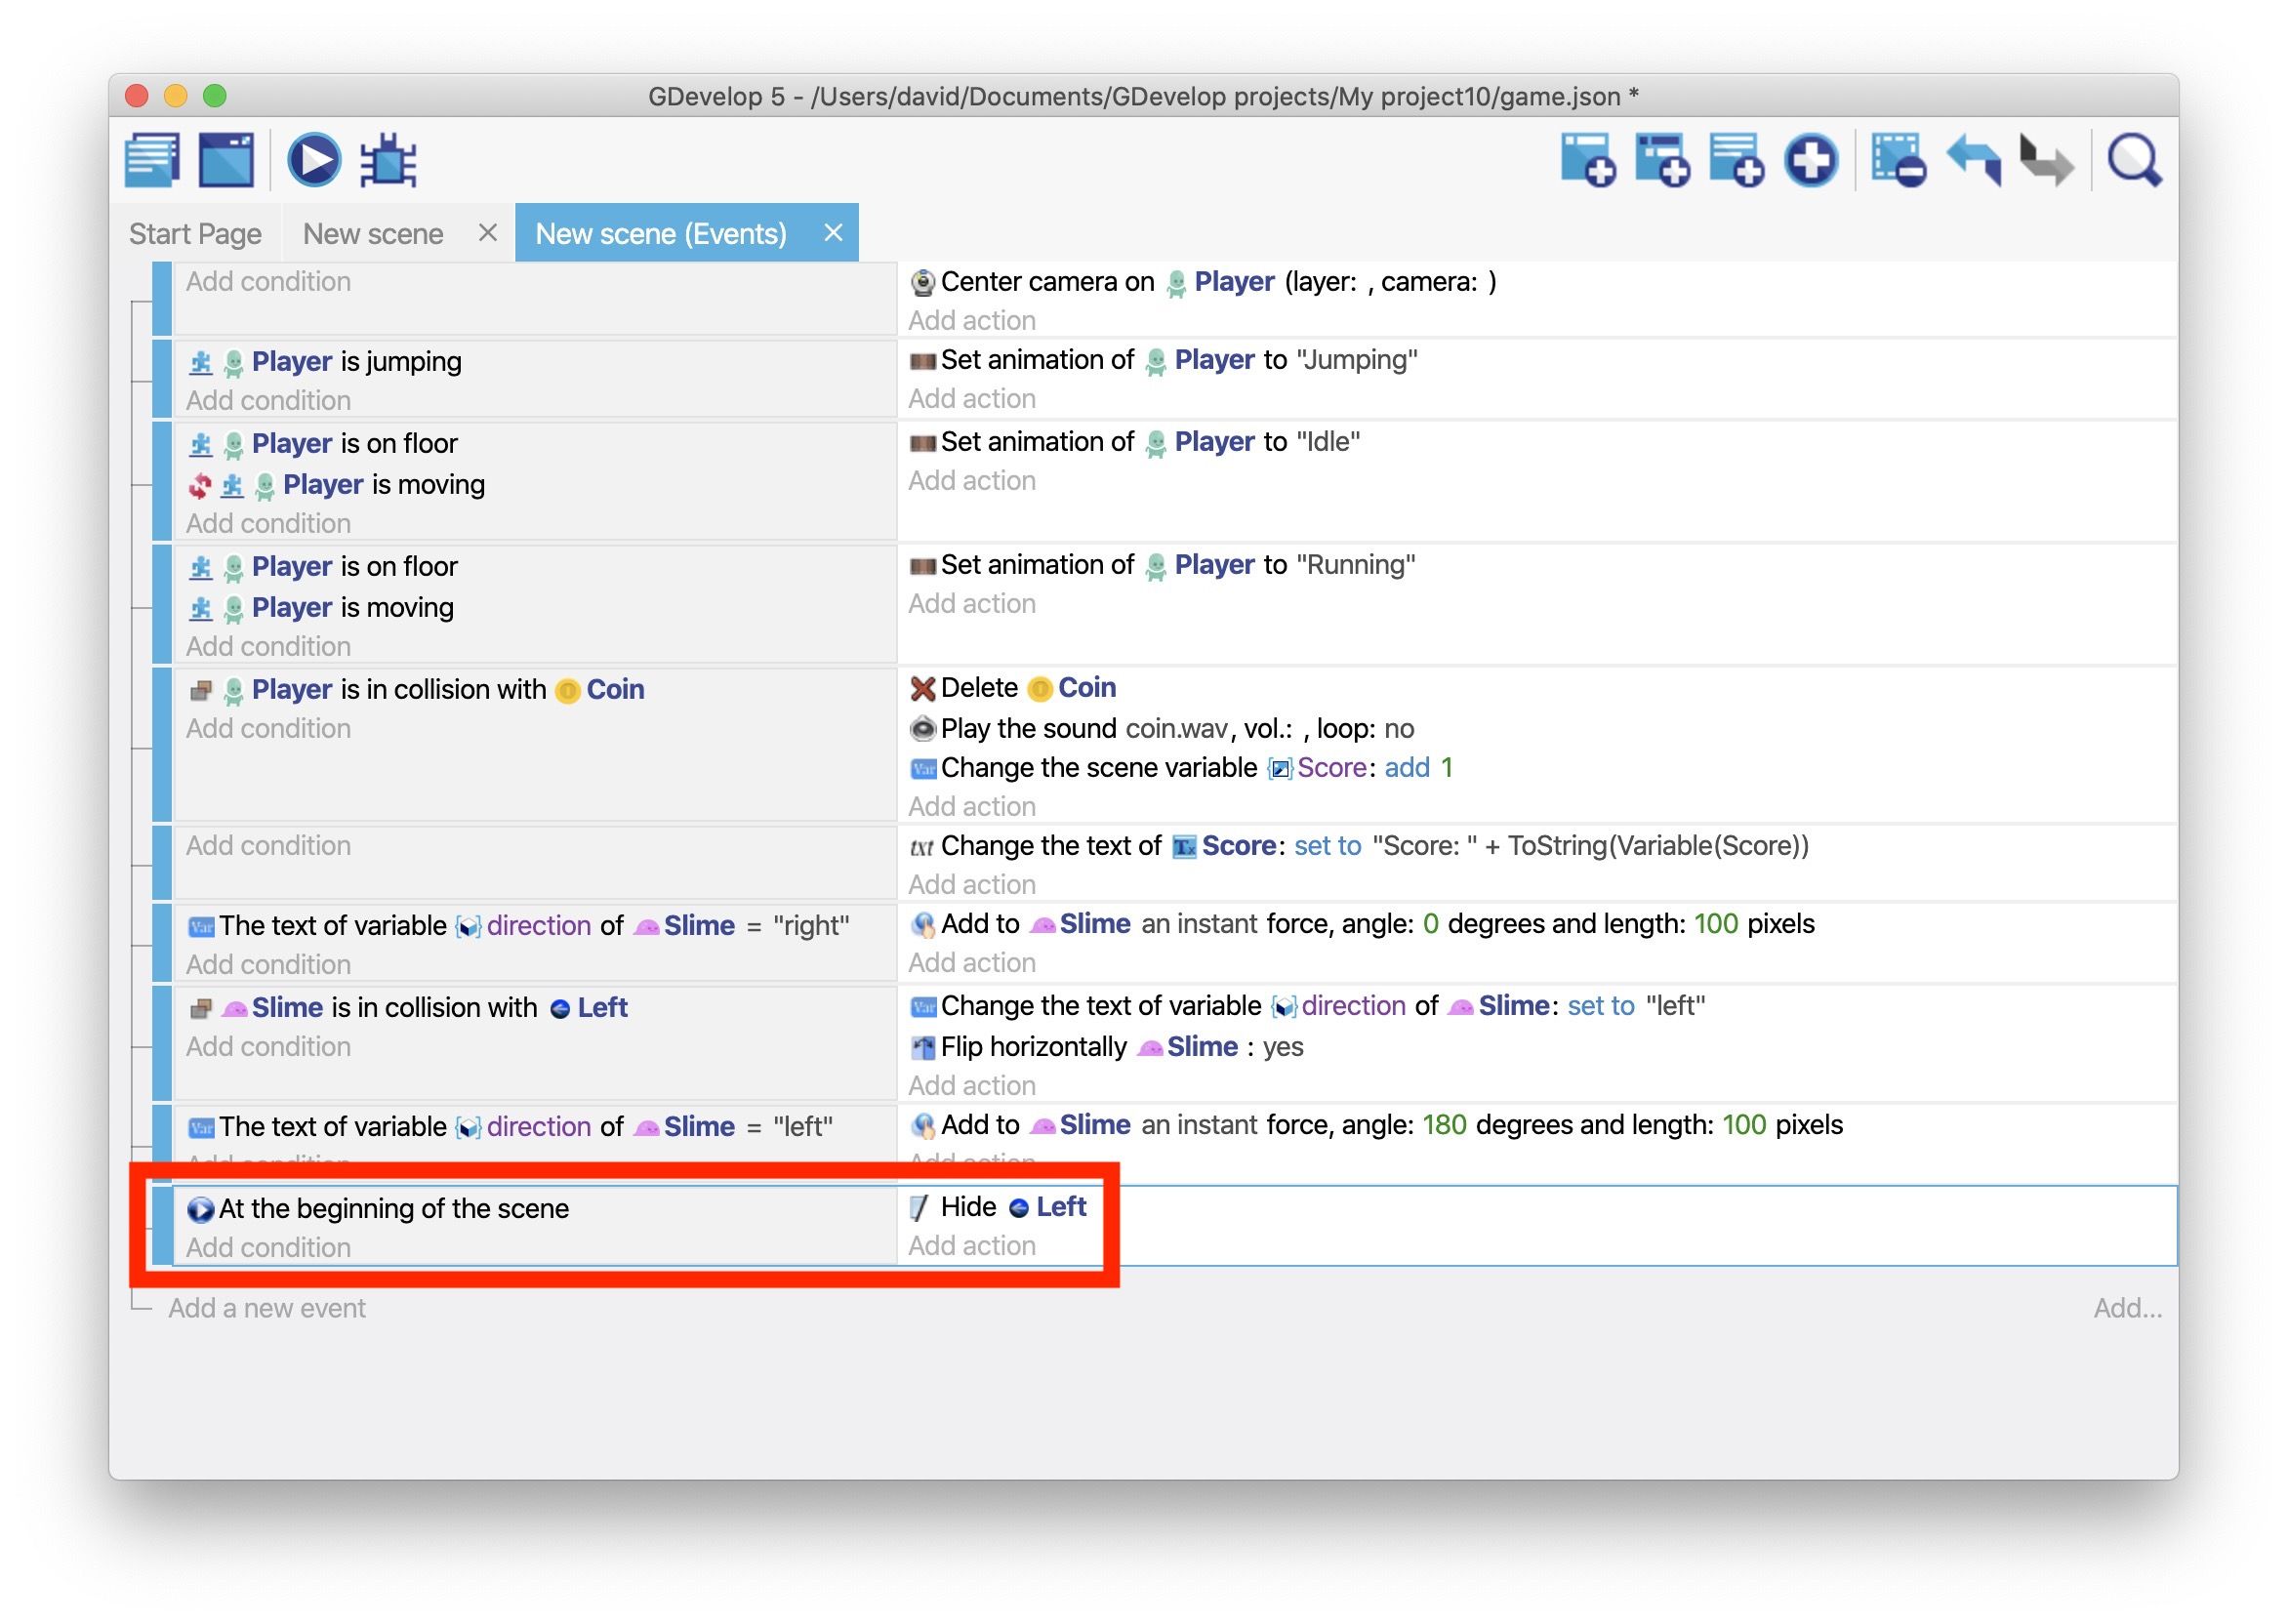
If you preview the game, the enemy appears to change direction by their own "choice".

Step 4: Change the enemy's direction (again)
After the enemy collides with the "Left" object, they start moving right and never stop moving right. To ensure they change direction again, create an object named "RIght". This object should be the same as the "Left" object, except for the following details:
- Use the "right.png" asset.
- When the "Player" object collides with the "Slime" object, set the "direction" variable to "right".
- For the Flip the object horizontally action, set Activate flipping to No.
Then drag an instance of the "Right" object into the scene, to the left of the enemy.
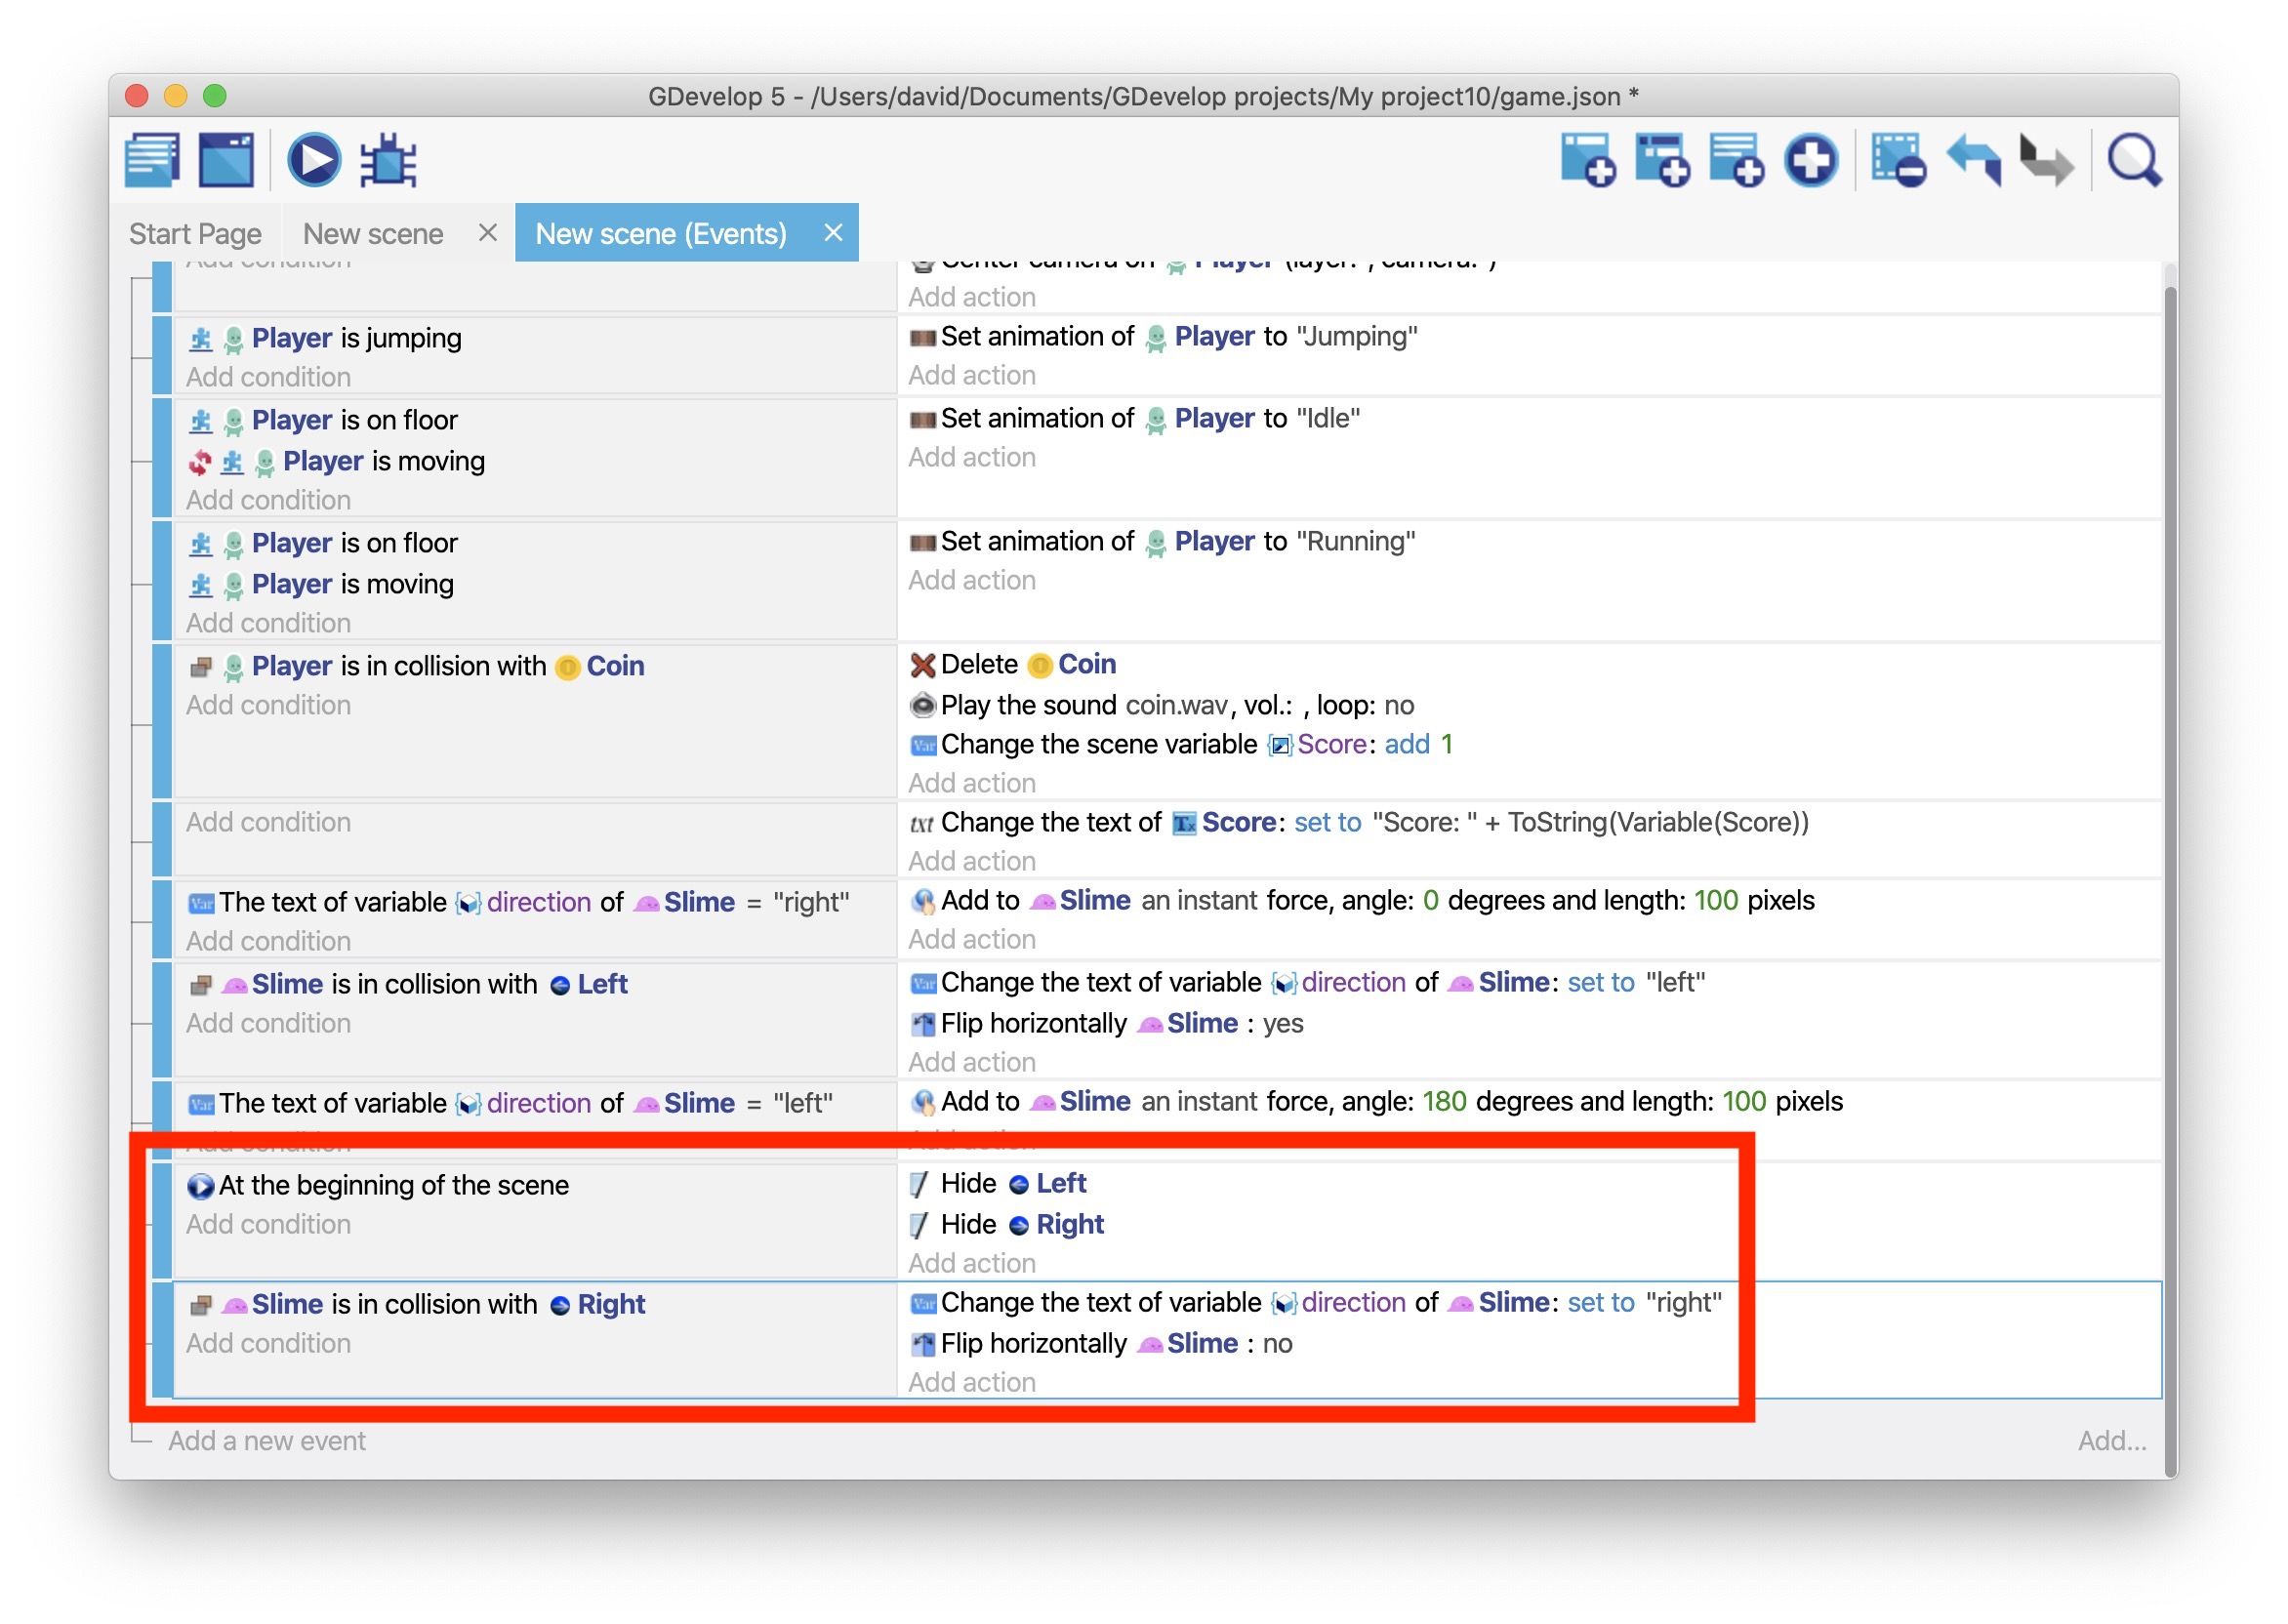
If you preview the game, the enemy moves back and forth between the invisible markers.