13. Main Menu & The End
Series
You are reading Part 13 of the Space Shooter Tutorial.
- Space Shooter, Part 1
- Space Shooter, Part 2
- Space Shooter, Part 3
- Space Shooter, Part 4
- Space Shooter, Part 5
- Space Shooter, Part 6
- Space Shooter, Part 7
- Space Shooter, Part 8
- Space Shooter, Part 9
- Space Shooter, Part 10
- Space Shooter, Part 11
- Space Shooter, Part 12
- Space Shooter, Part 13
Tip
In this chapter, we will learn how to add the main menu and finish the game.
Preparing the main menu scene
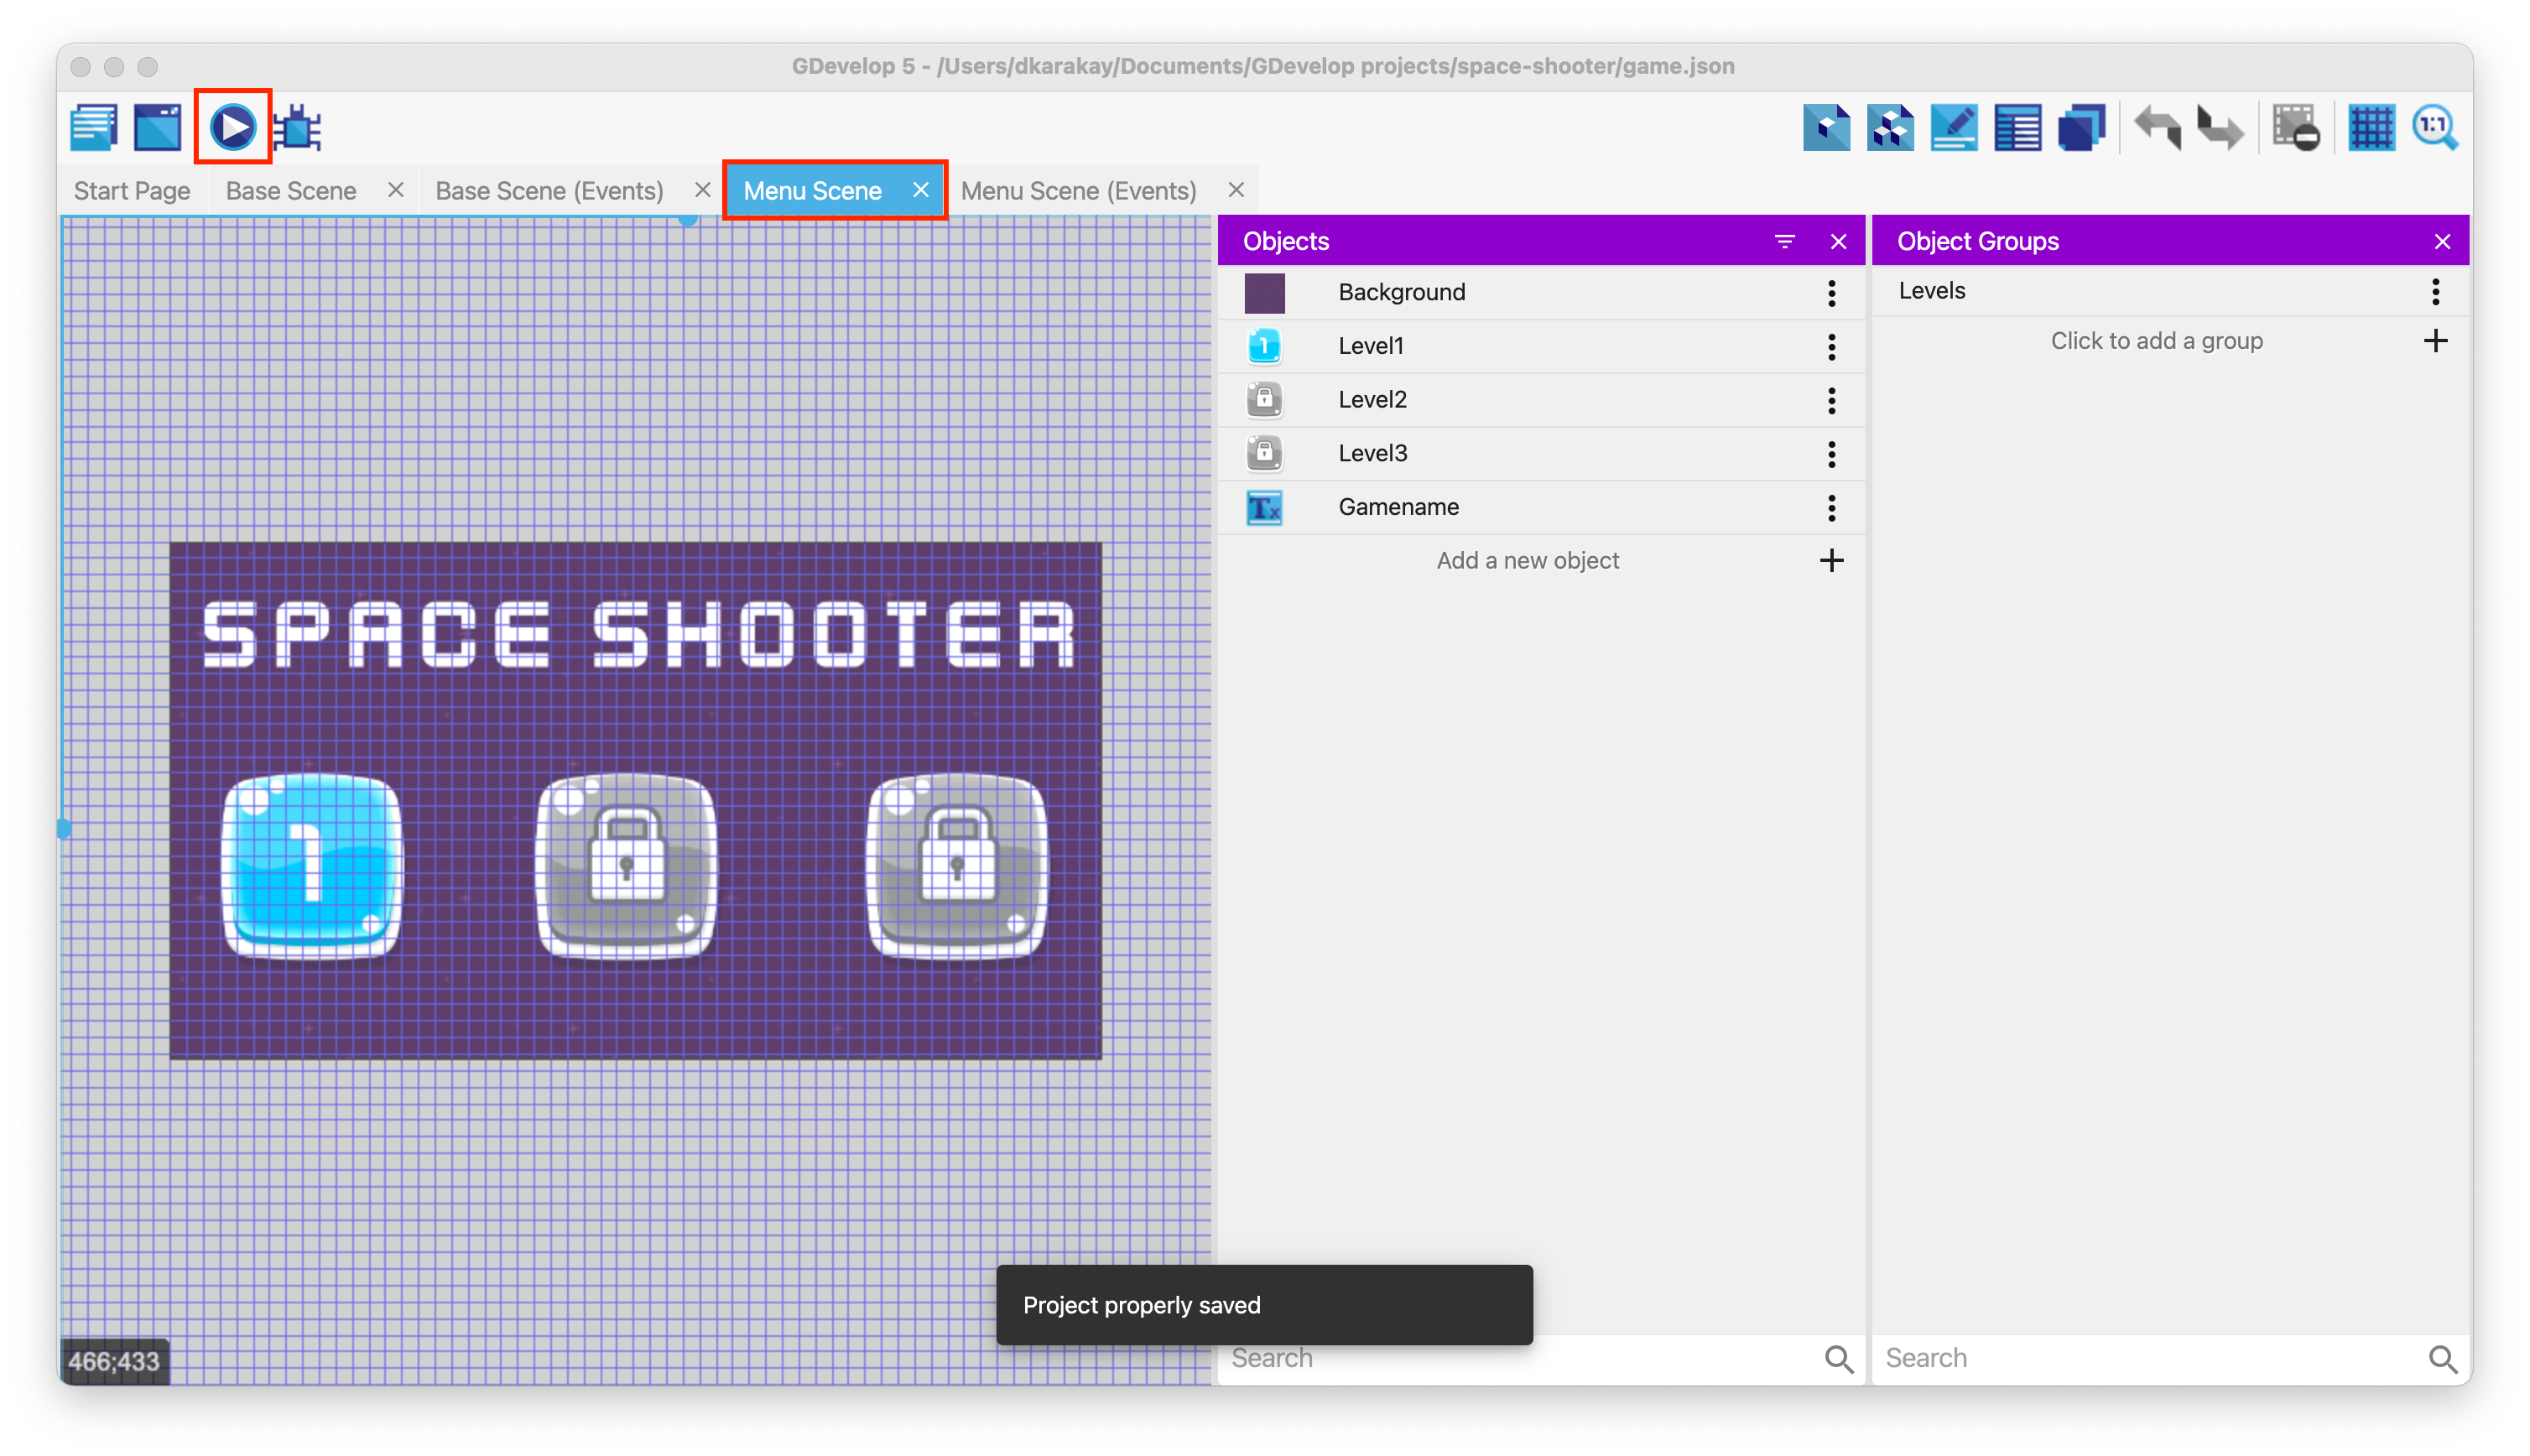
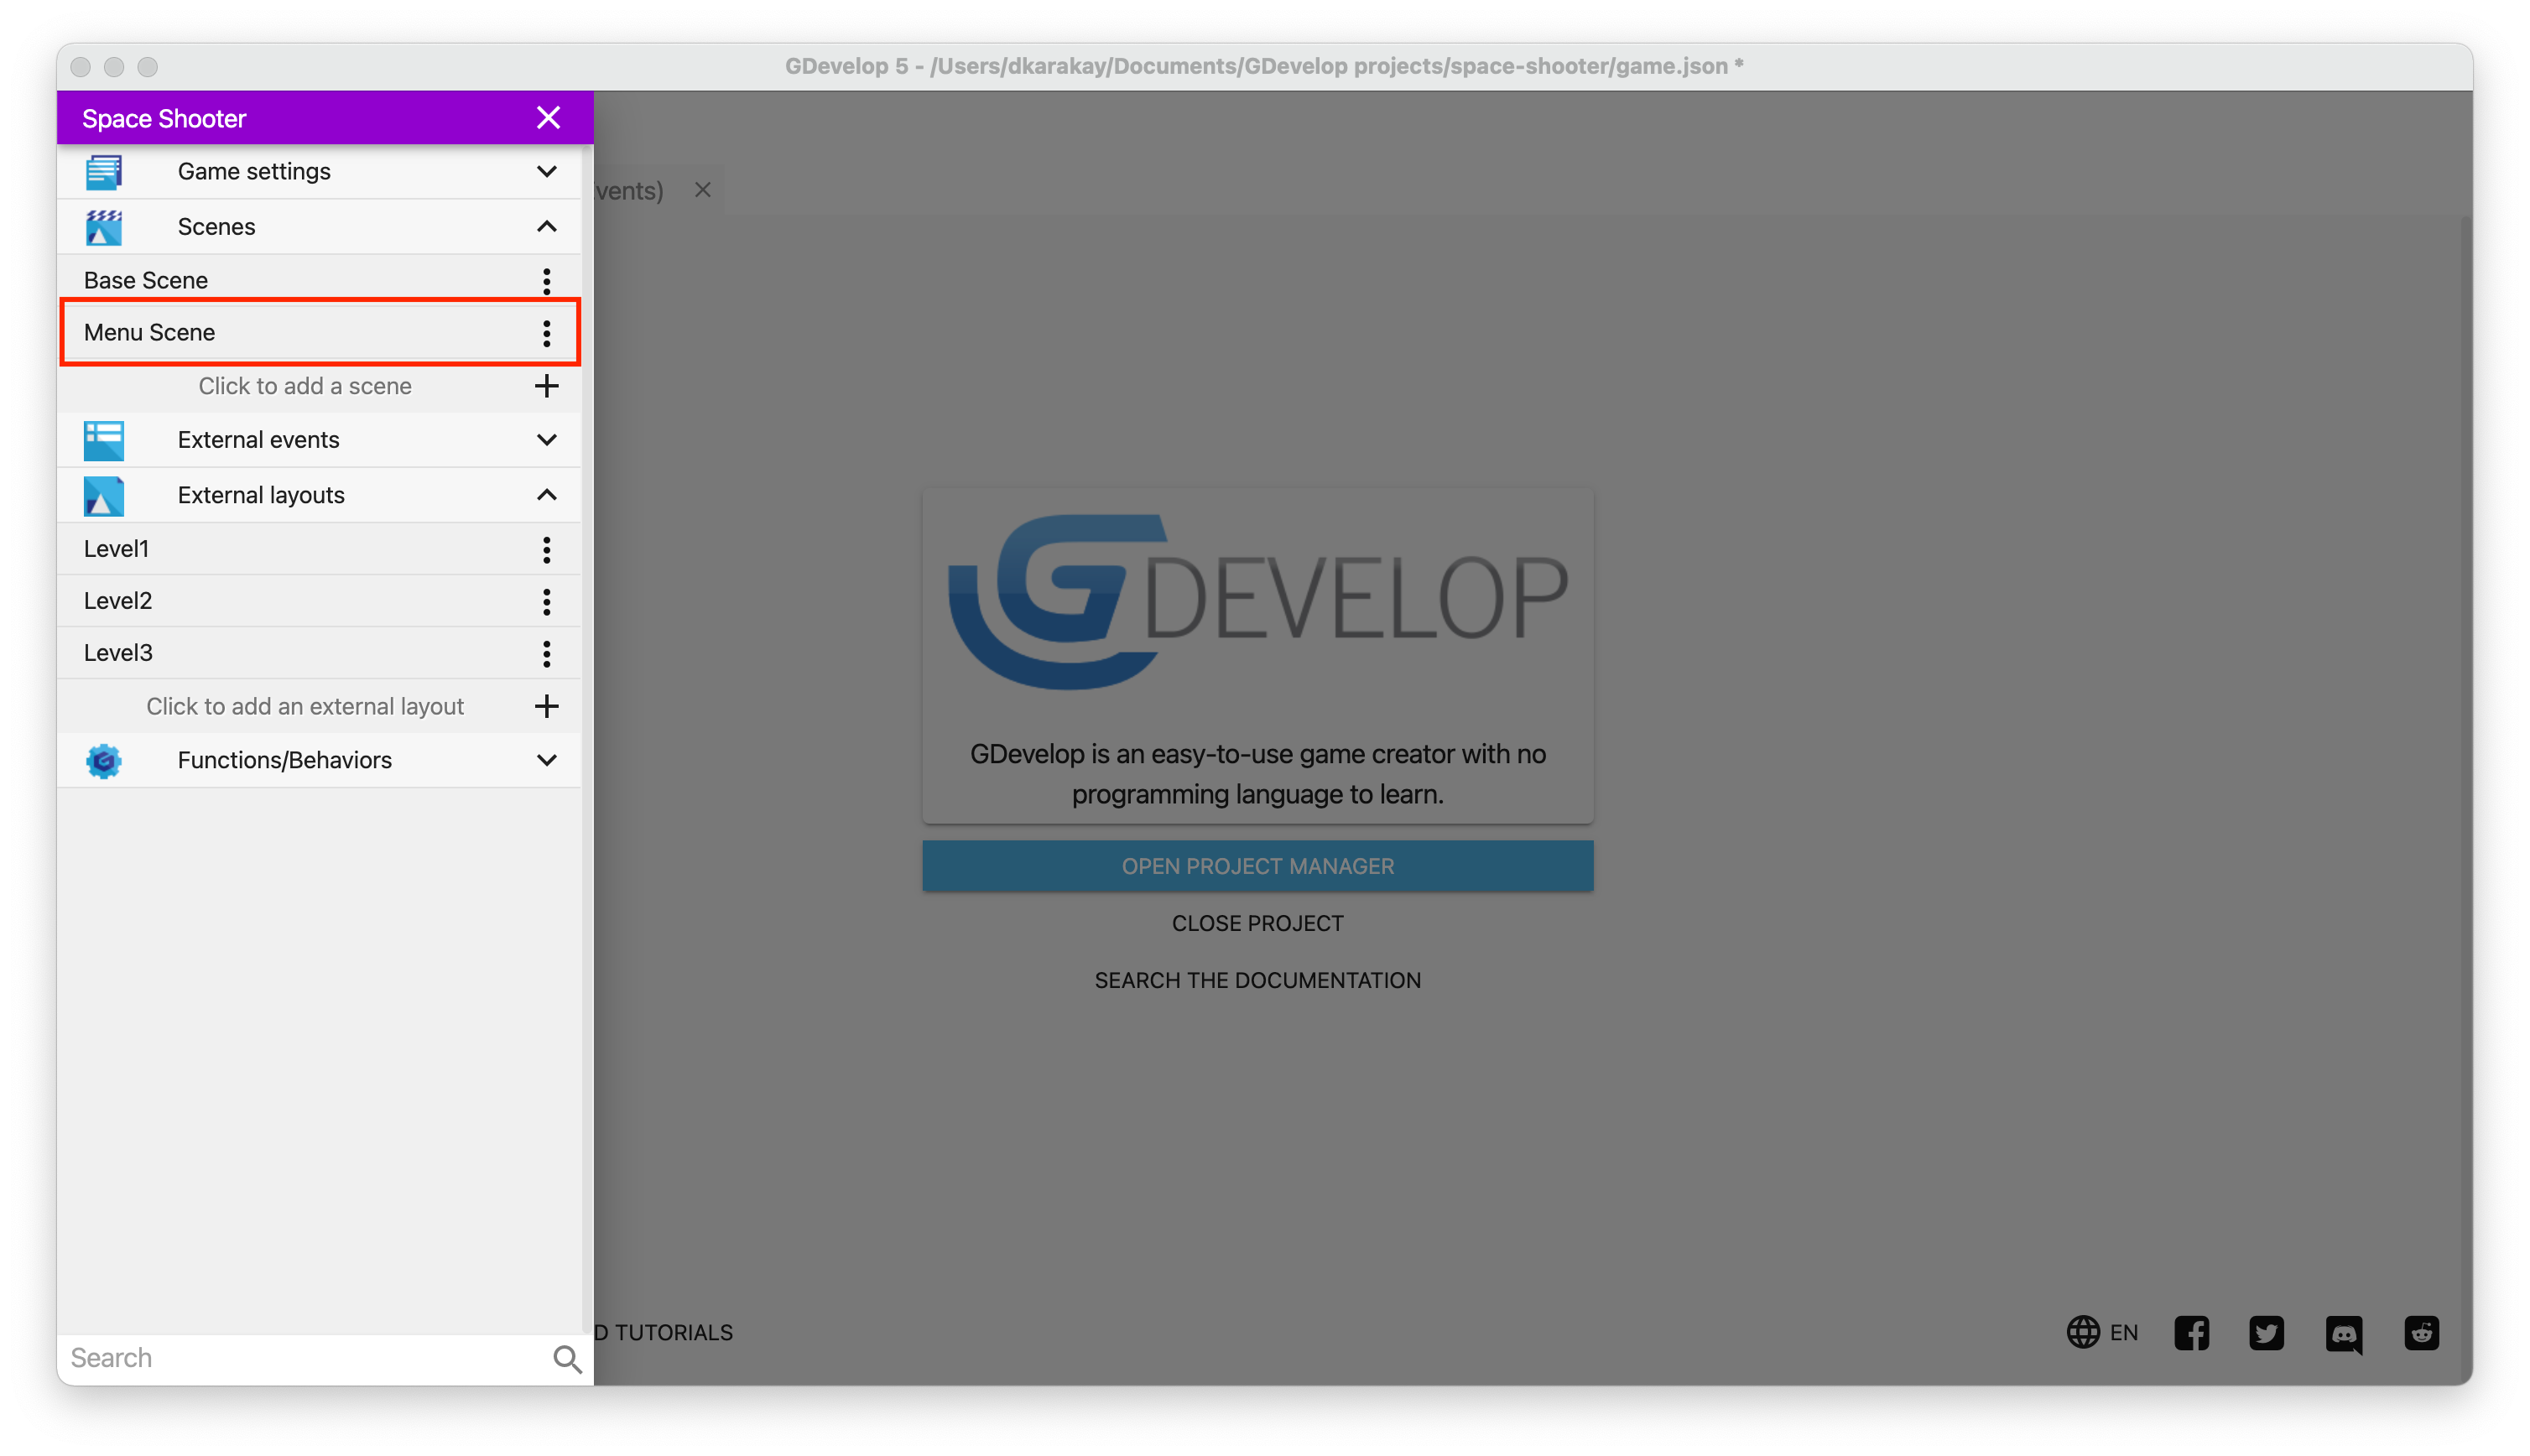
Open the project manager from the upper right corner, and create a new scene called Main Menu.
Follow the same steps in Chapter 1 and Chapter 12 to enable grid settings, then your scene should look like this:
![]()
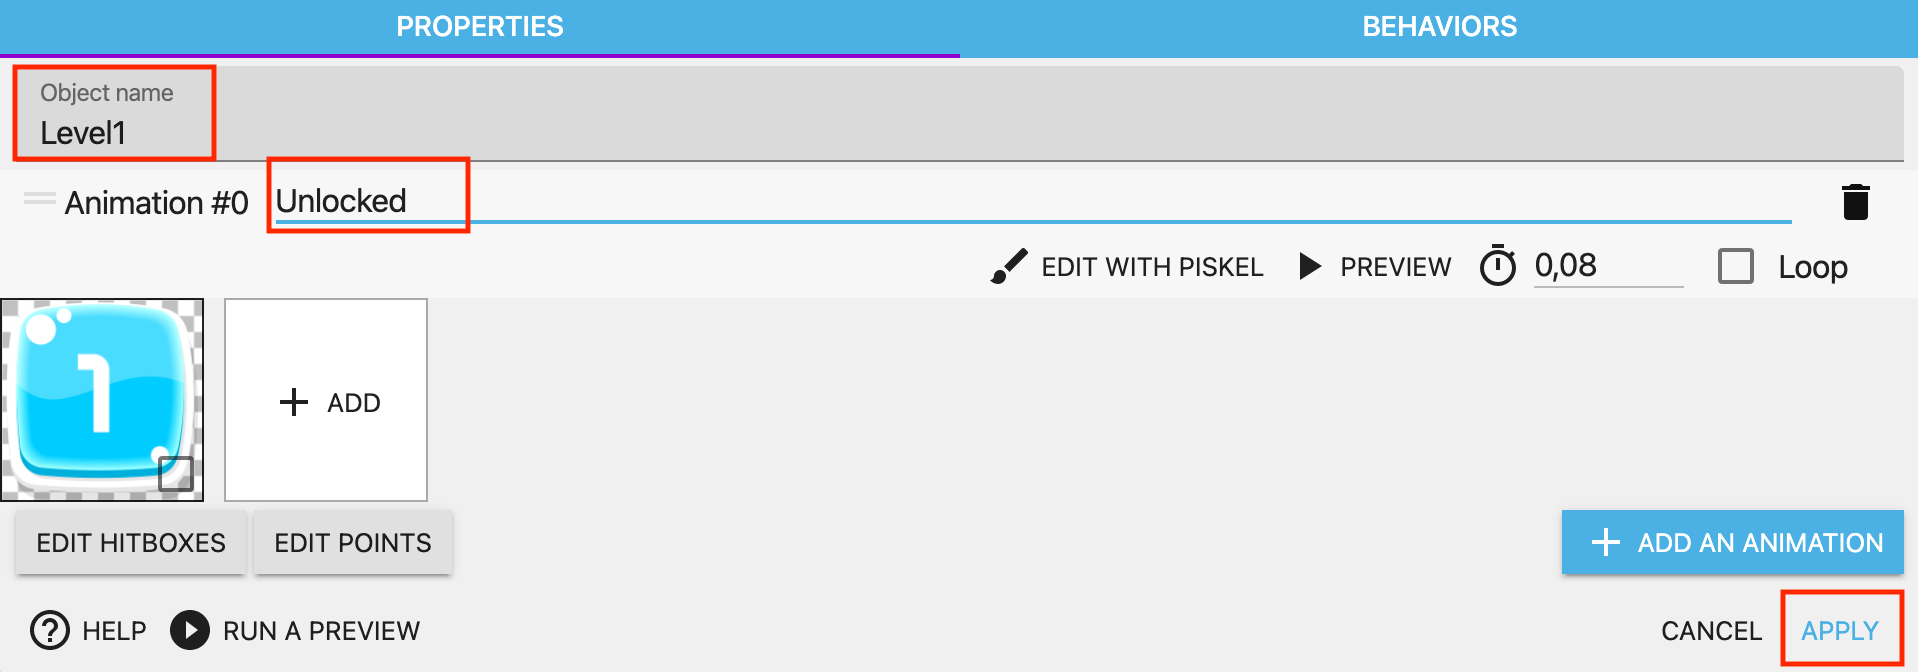
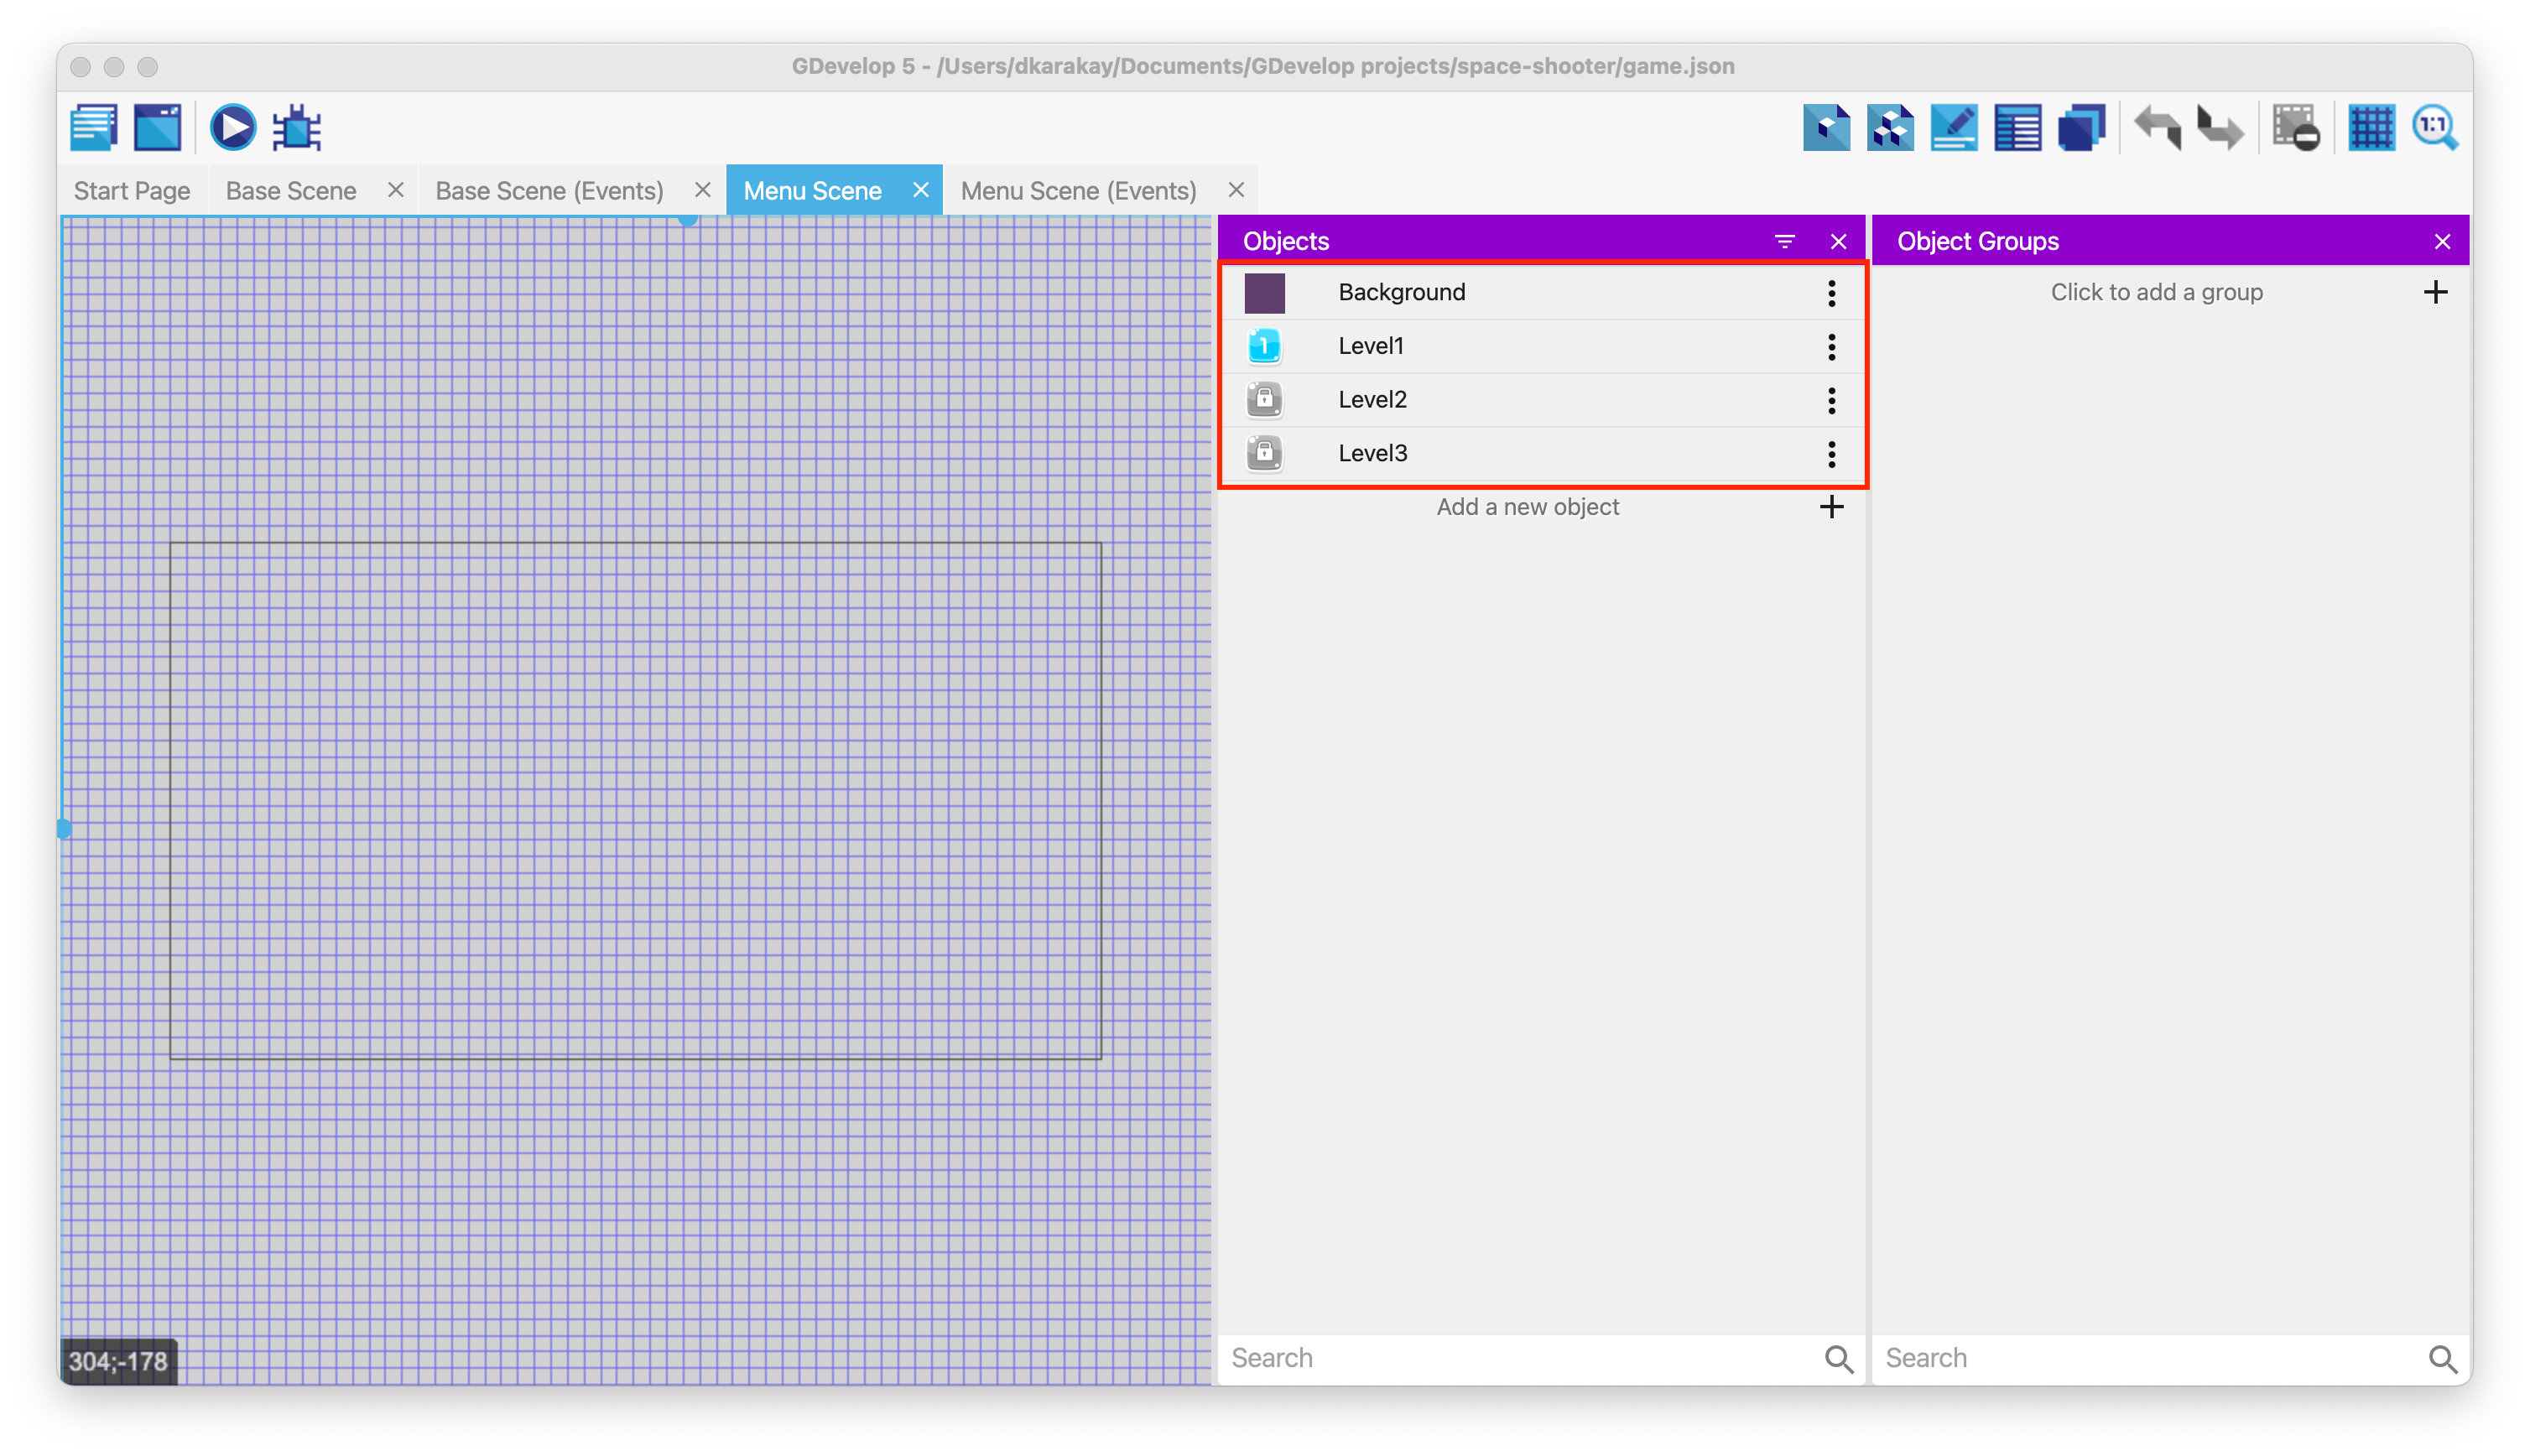
Create a new object called Level1 and select the image button_level_1.png from the assets folder. Set the animation name to "Unlocked".
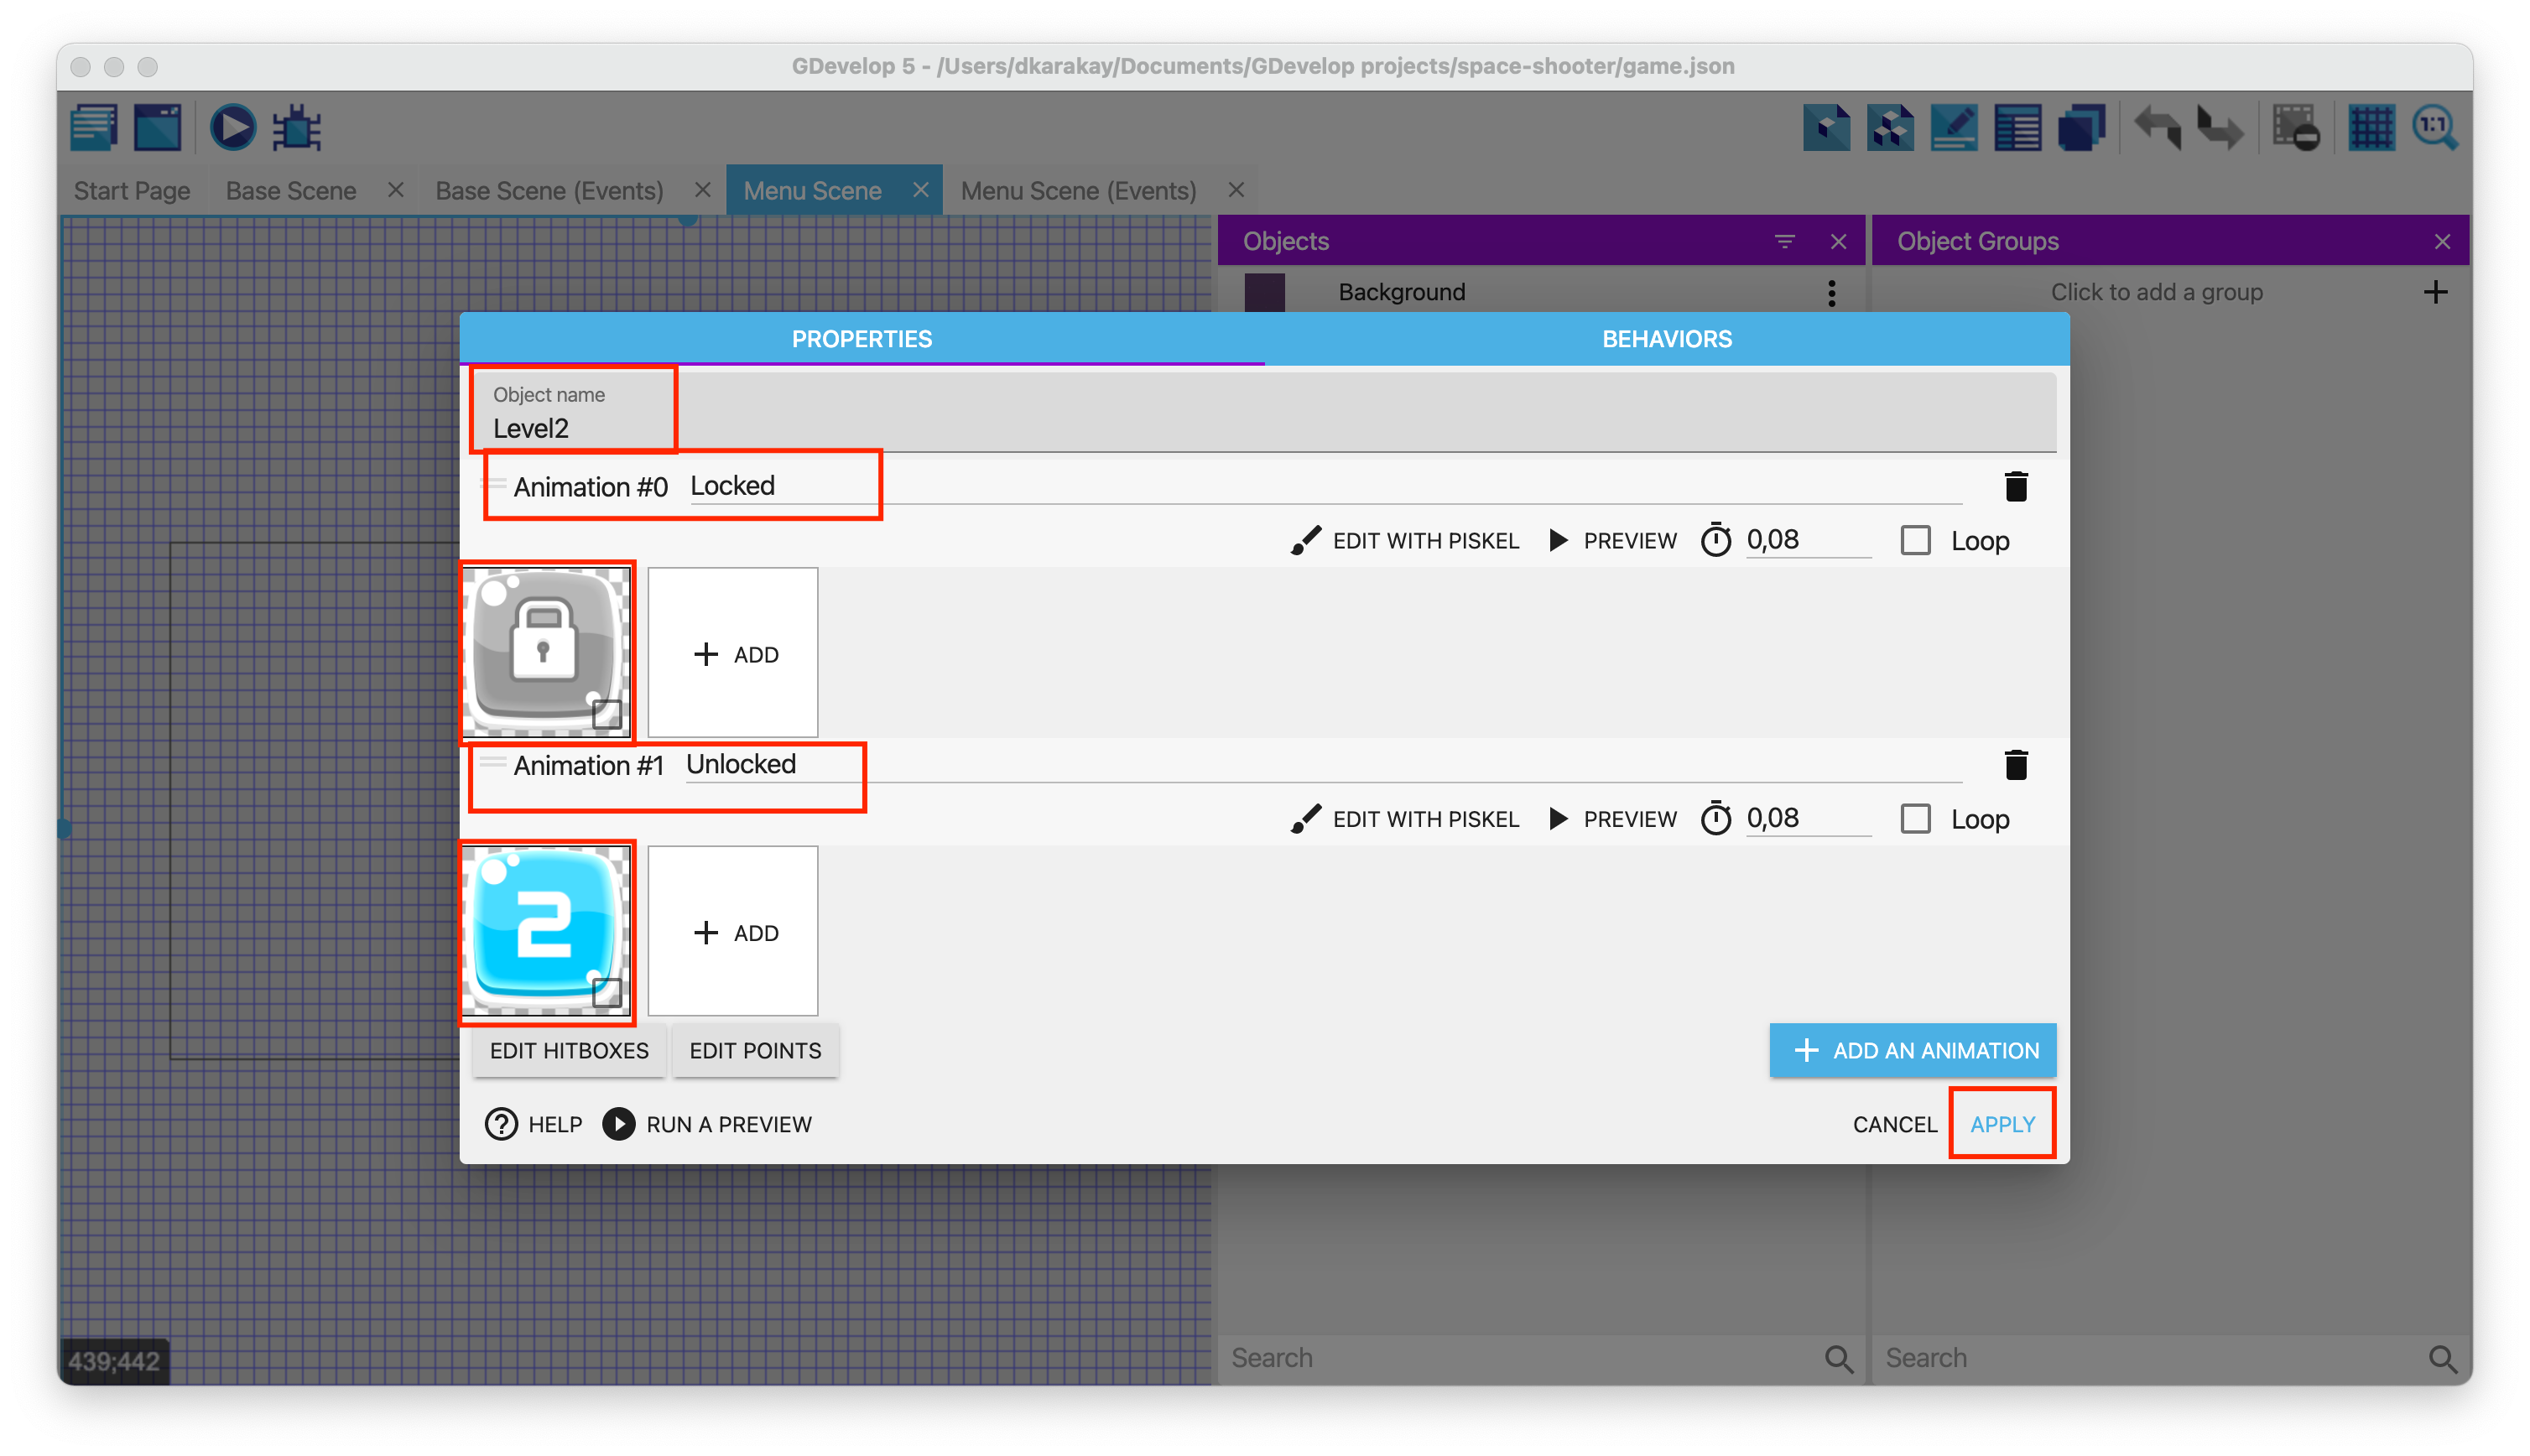
Add a new object called Level2 select the image button_locked.png from the assets folder. Set the animation name to "Locked". To create a new animation, select the image button_level_2.png, and use "Unlocked" in the name field.
Repeat the last process to add Level3. Then, copy the Background object from Base Scene, as we did in chapter 11 to create explosion effects. In the end, your objects should look like this:
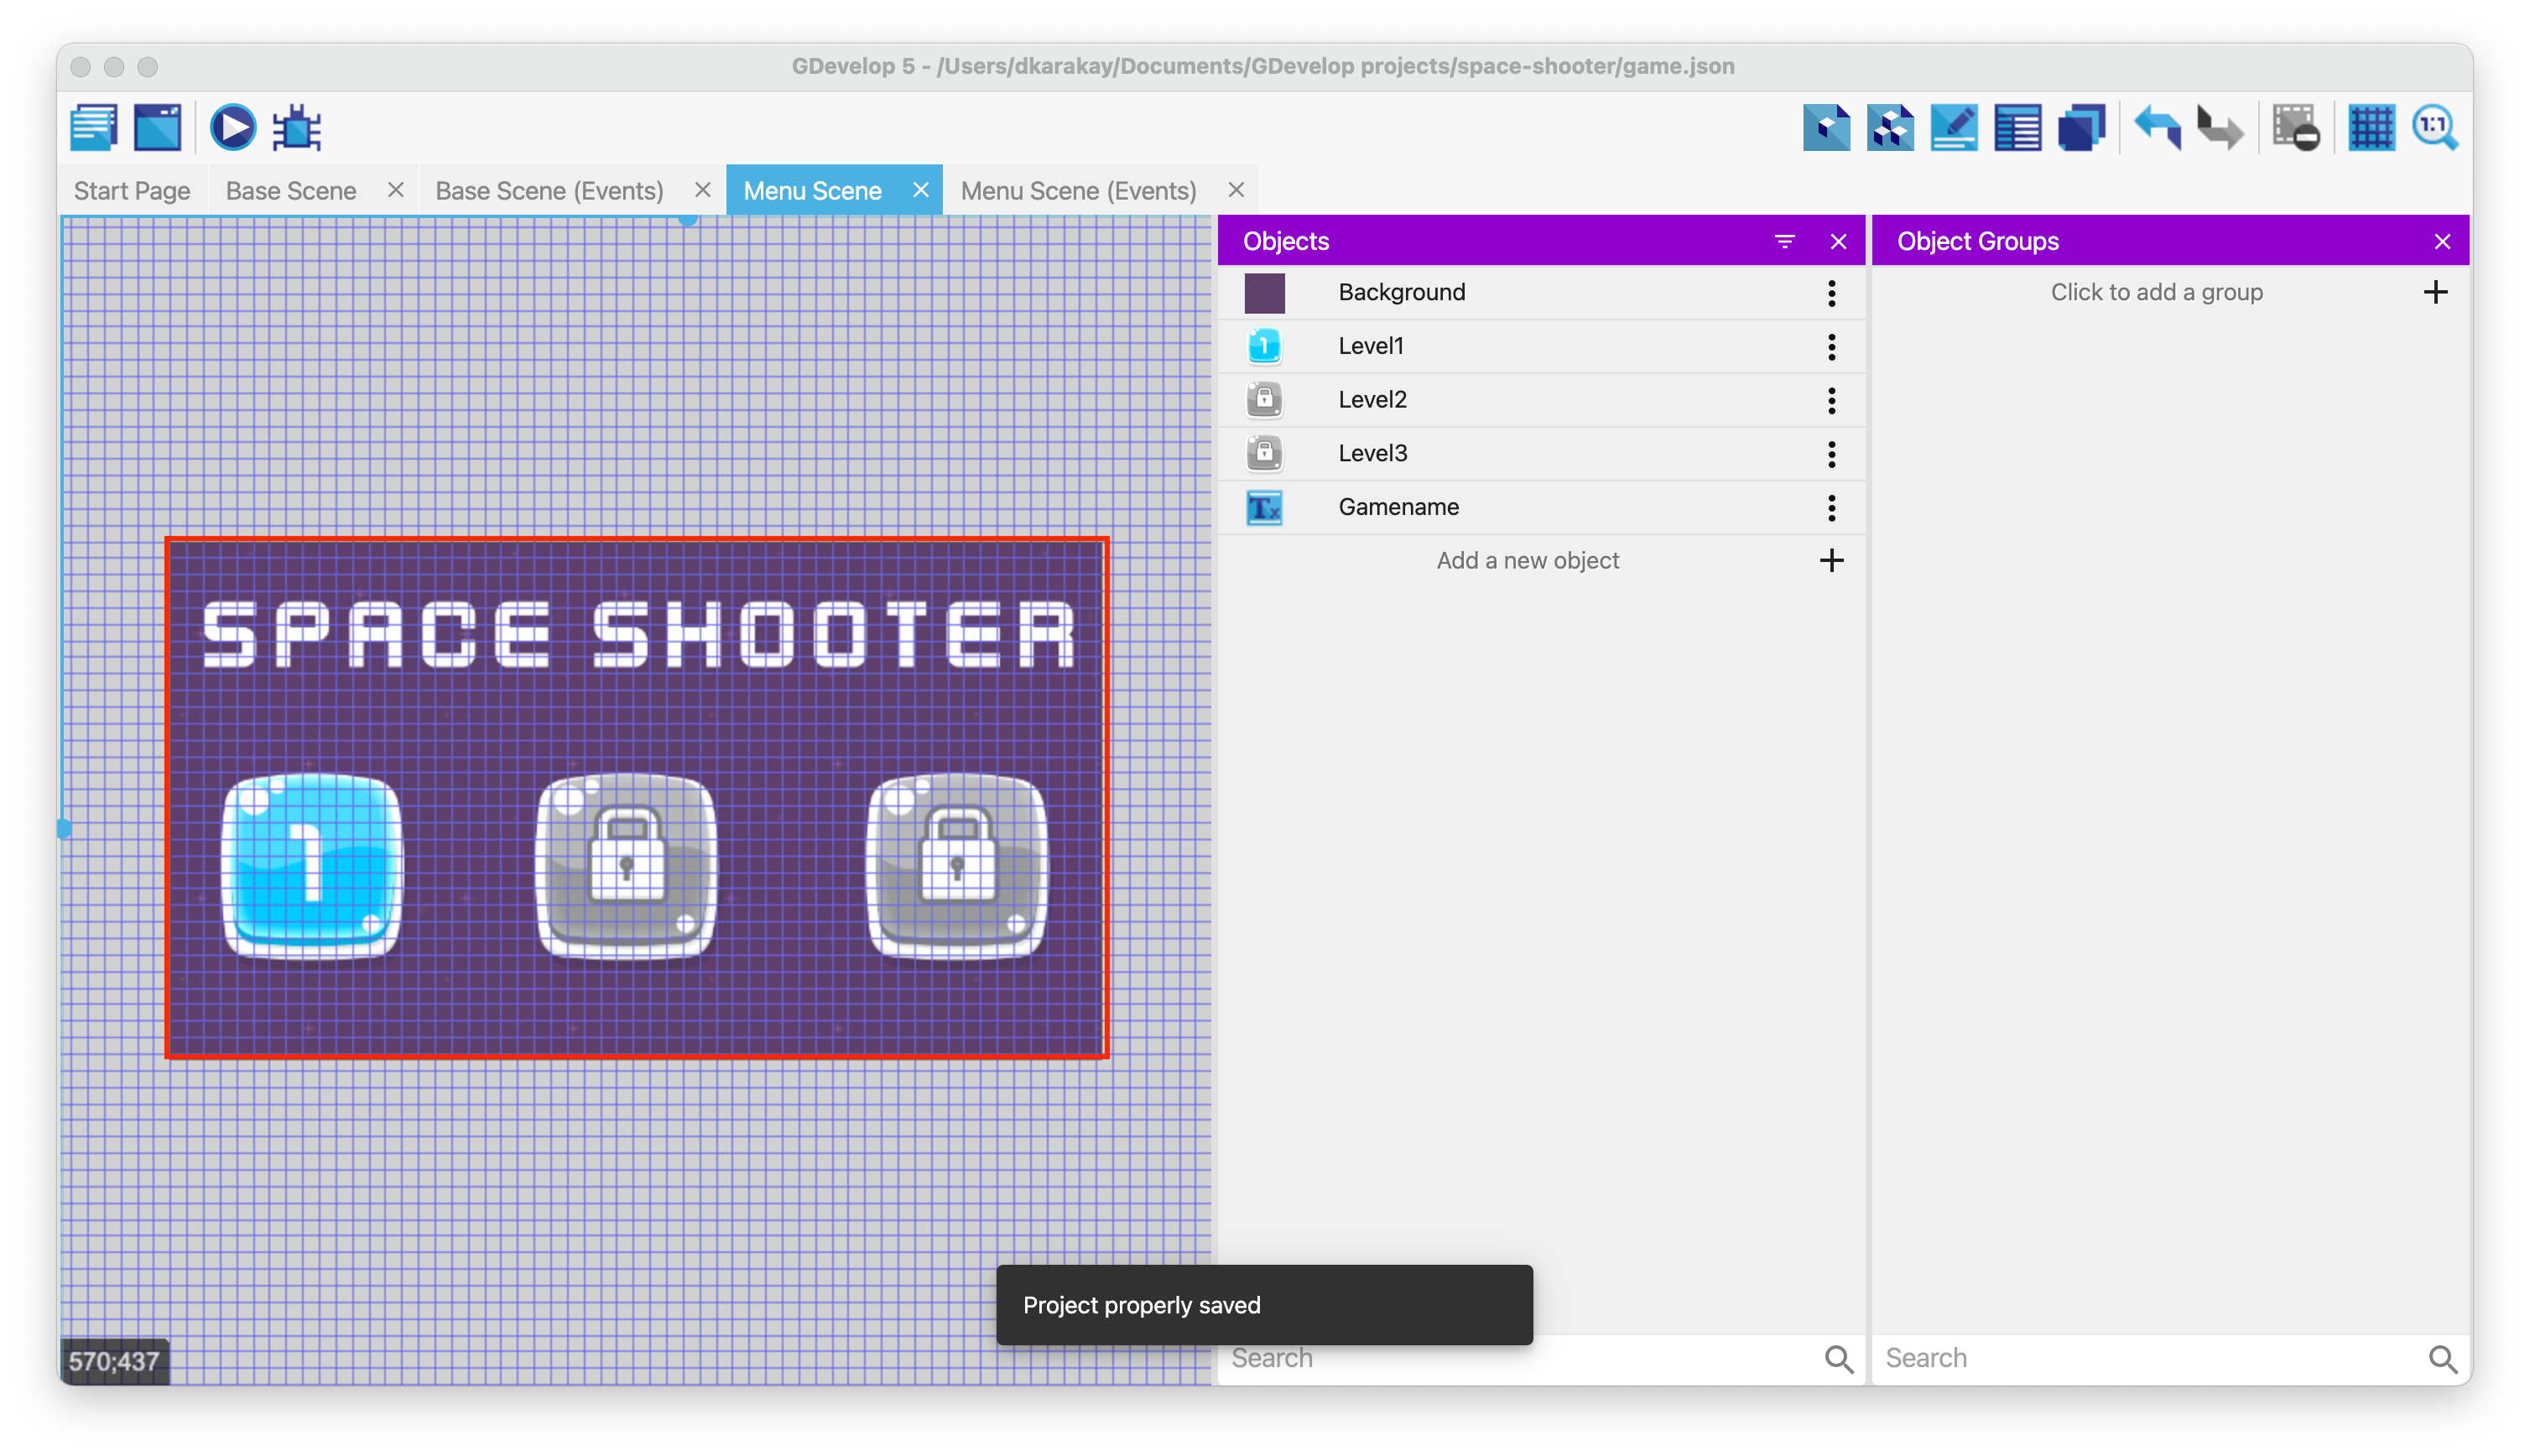
Then, create a new object called Gamename to show the game's name in the scene view. Fill the text with "Space Shooter", set the font Kenney Future Narrow, and change the size 100.

Drag and drop the objects to the scene view, and prepare your scene view.
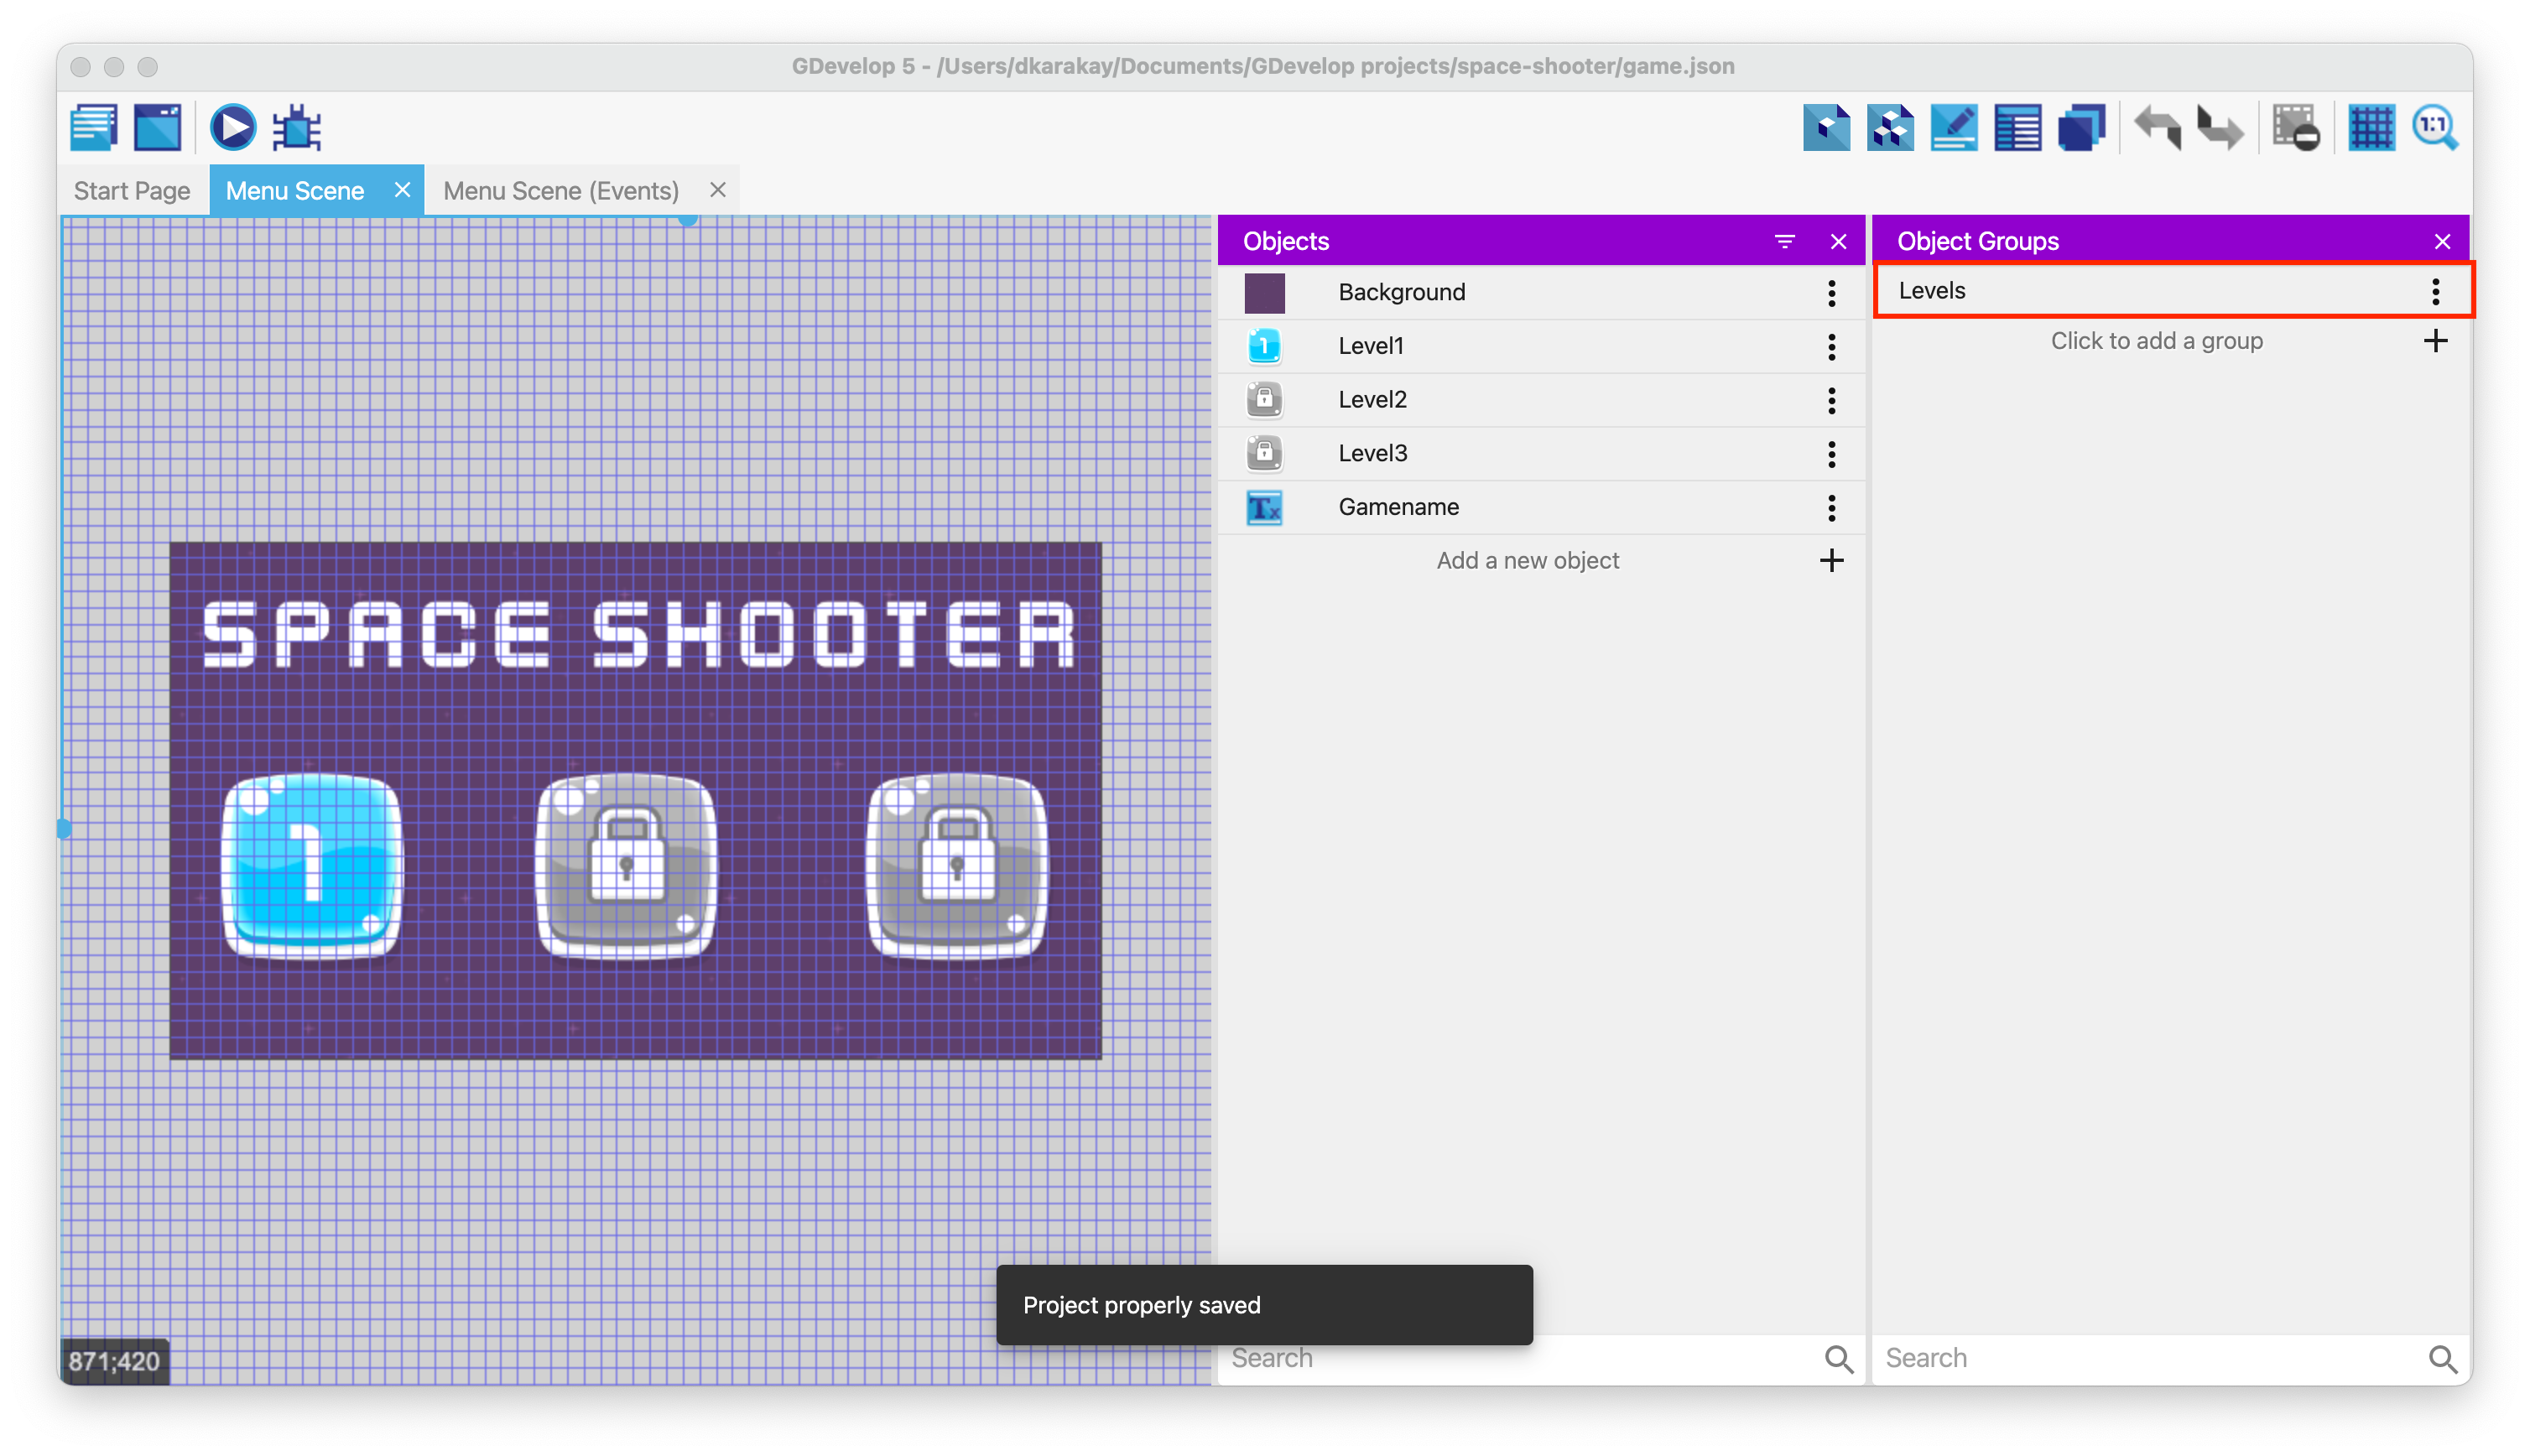
Then, create an object group for level objects called Levels.
Connecting the main menu to the levels
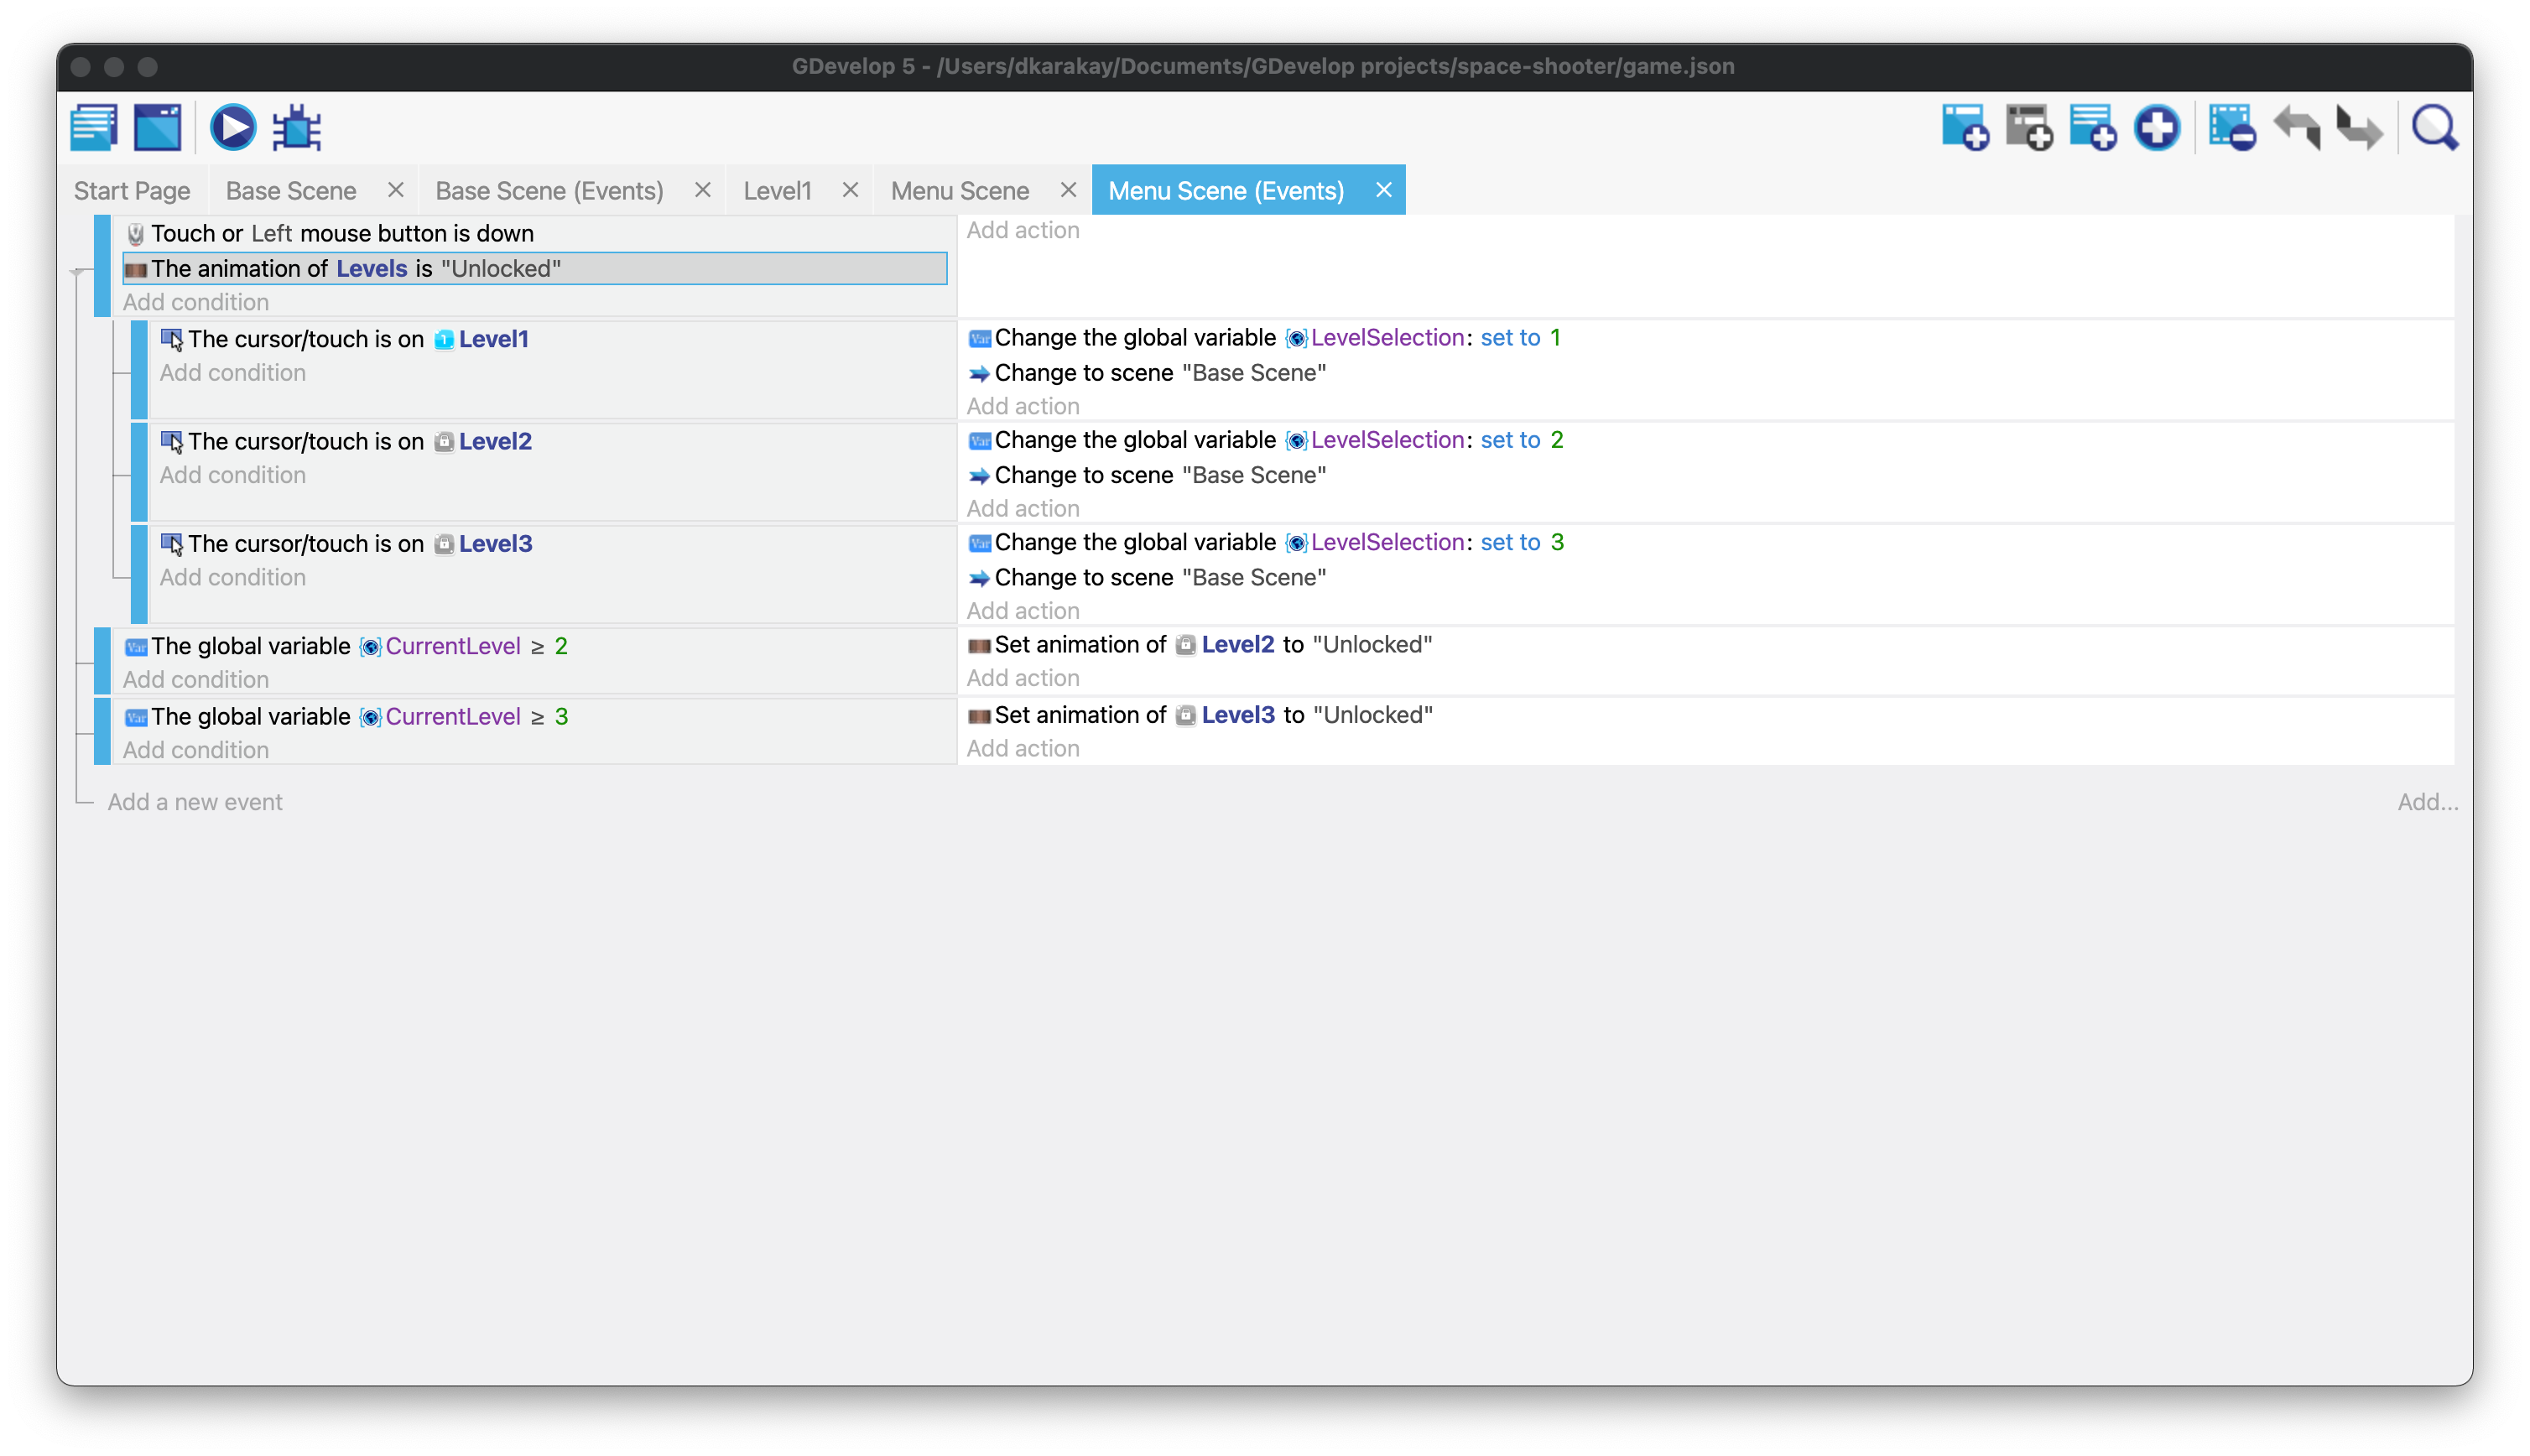
Open the events tab, and add a new event to check if the left button of the mouse has been pressed or not. We will use this to select level buttons.
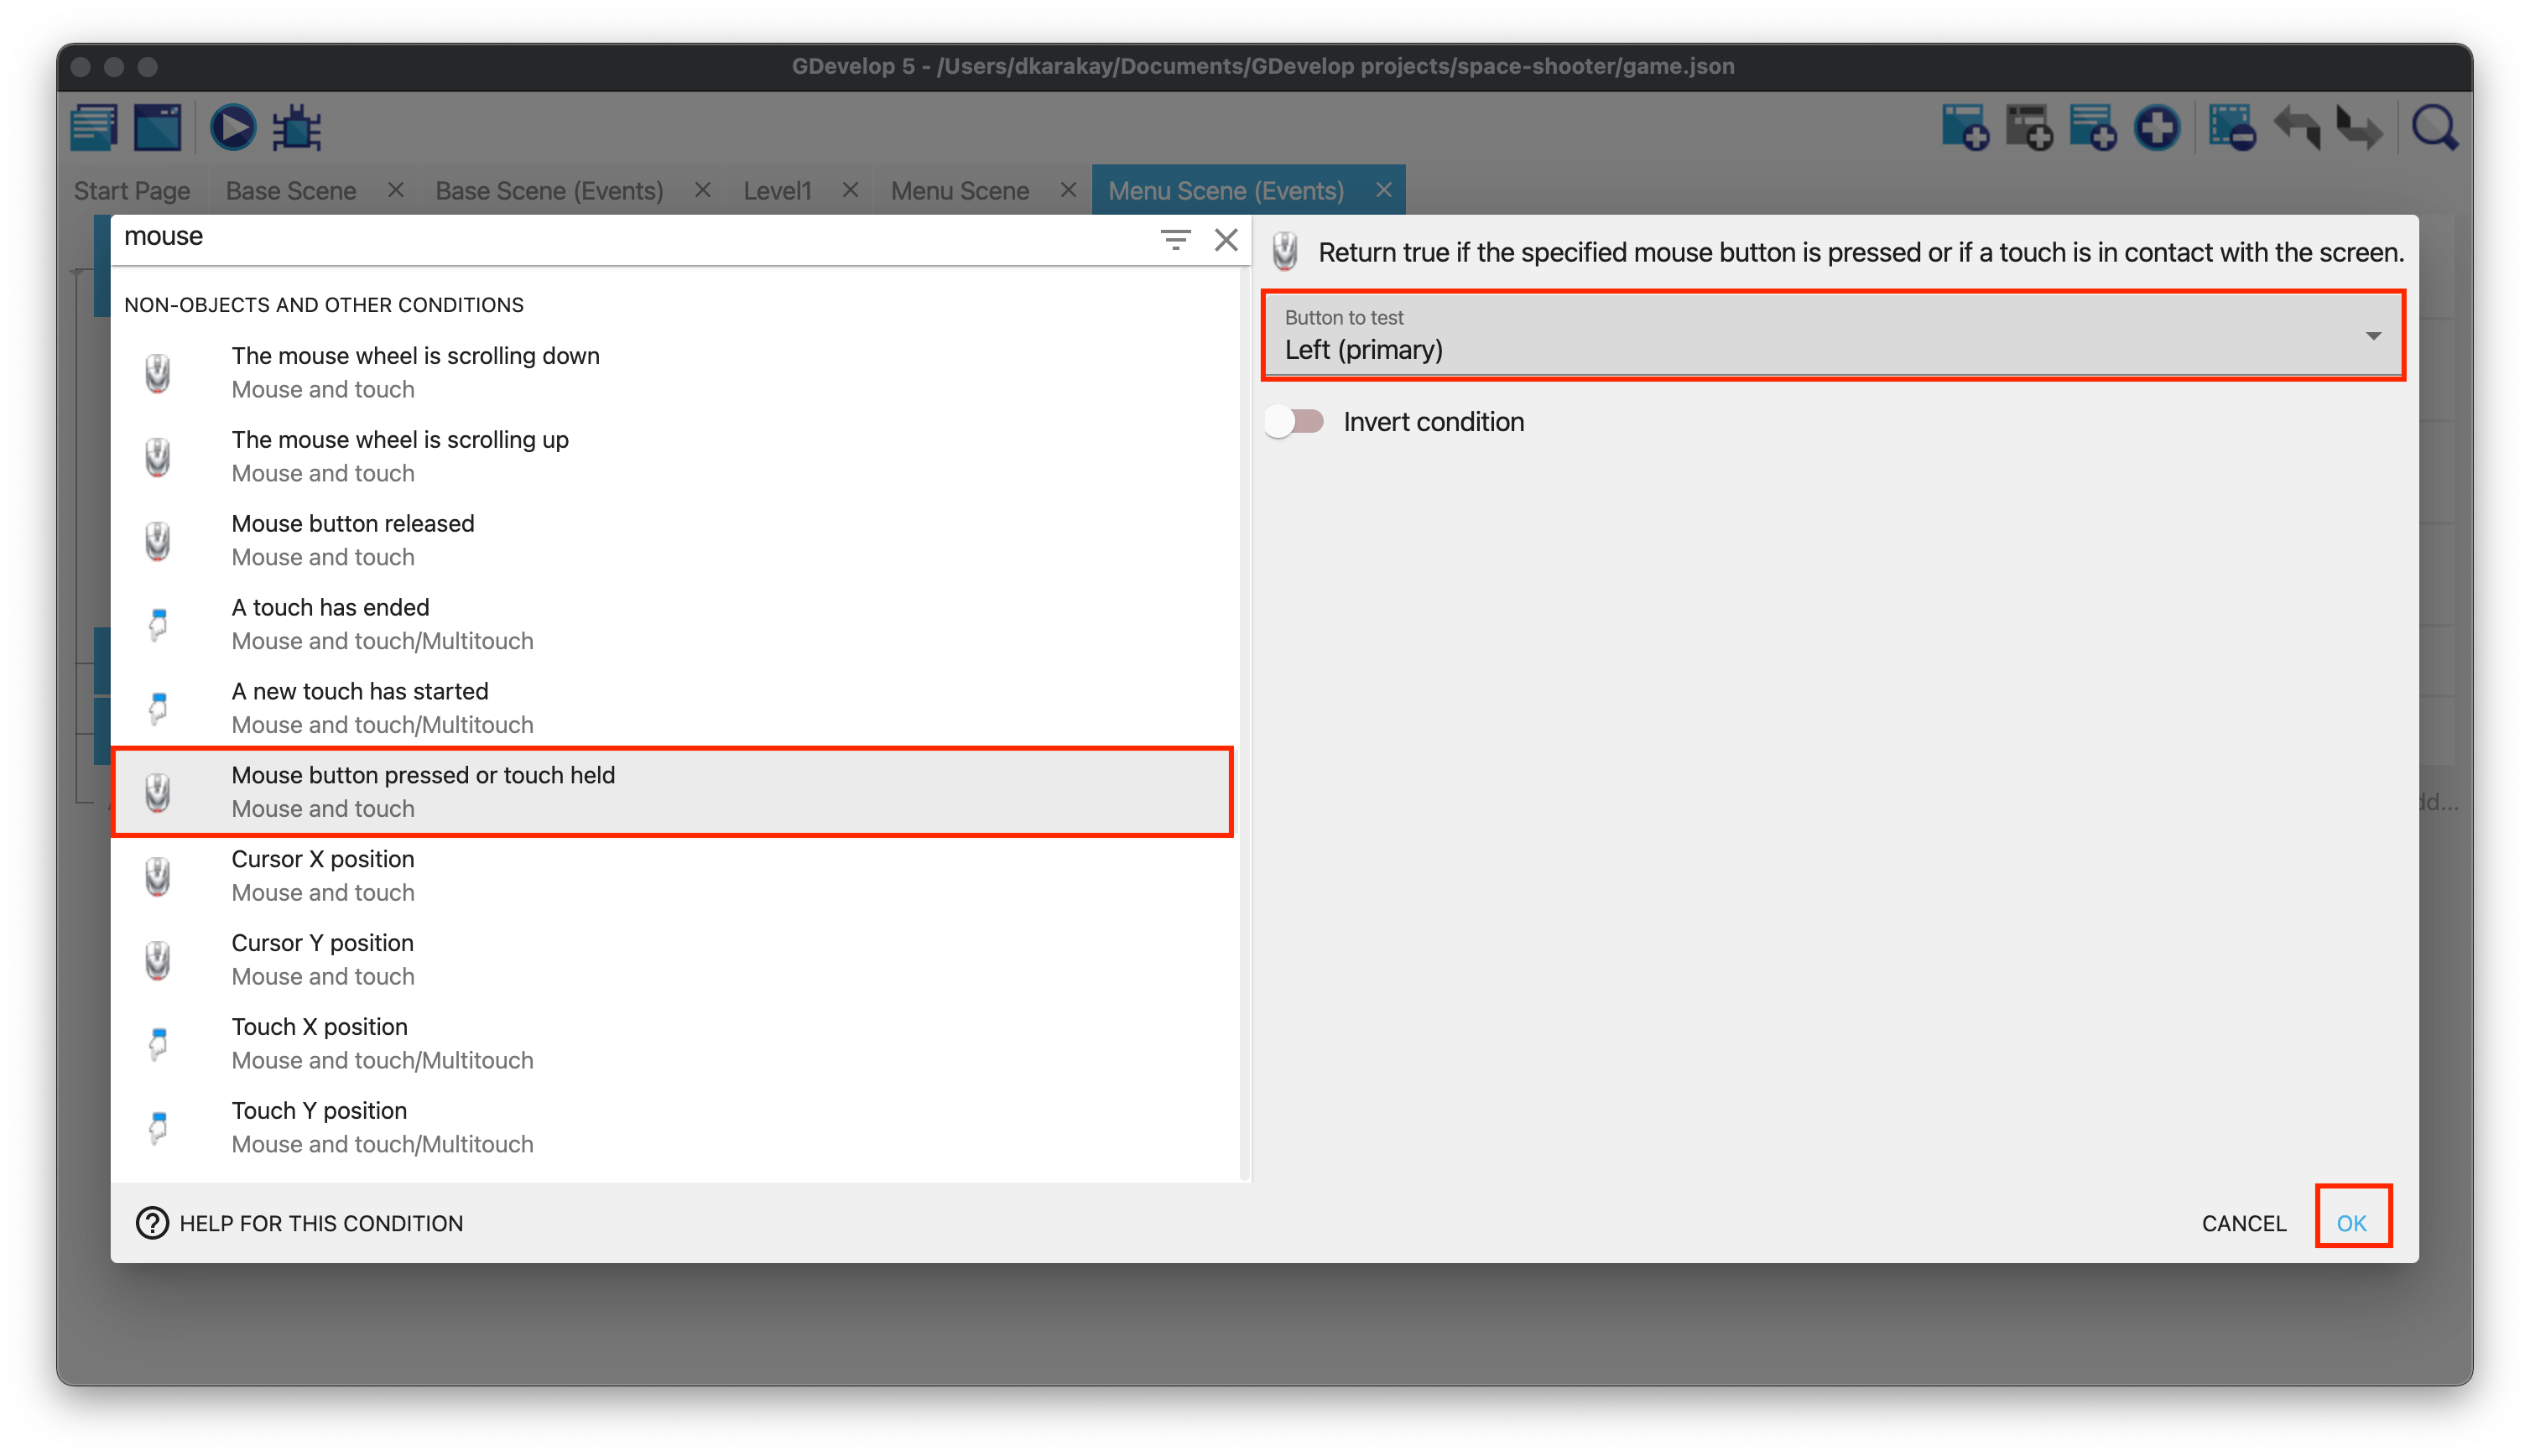
Add a new condition under the previous one to detect if the levels are unlocked or not. Select Levels object group, choose Current animation name option and enter Unlocked in the name field. Hence, we are preventing any problems regarding playing locked levels.
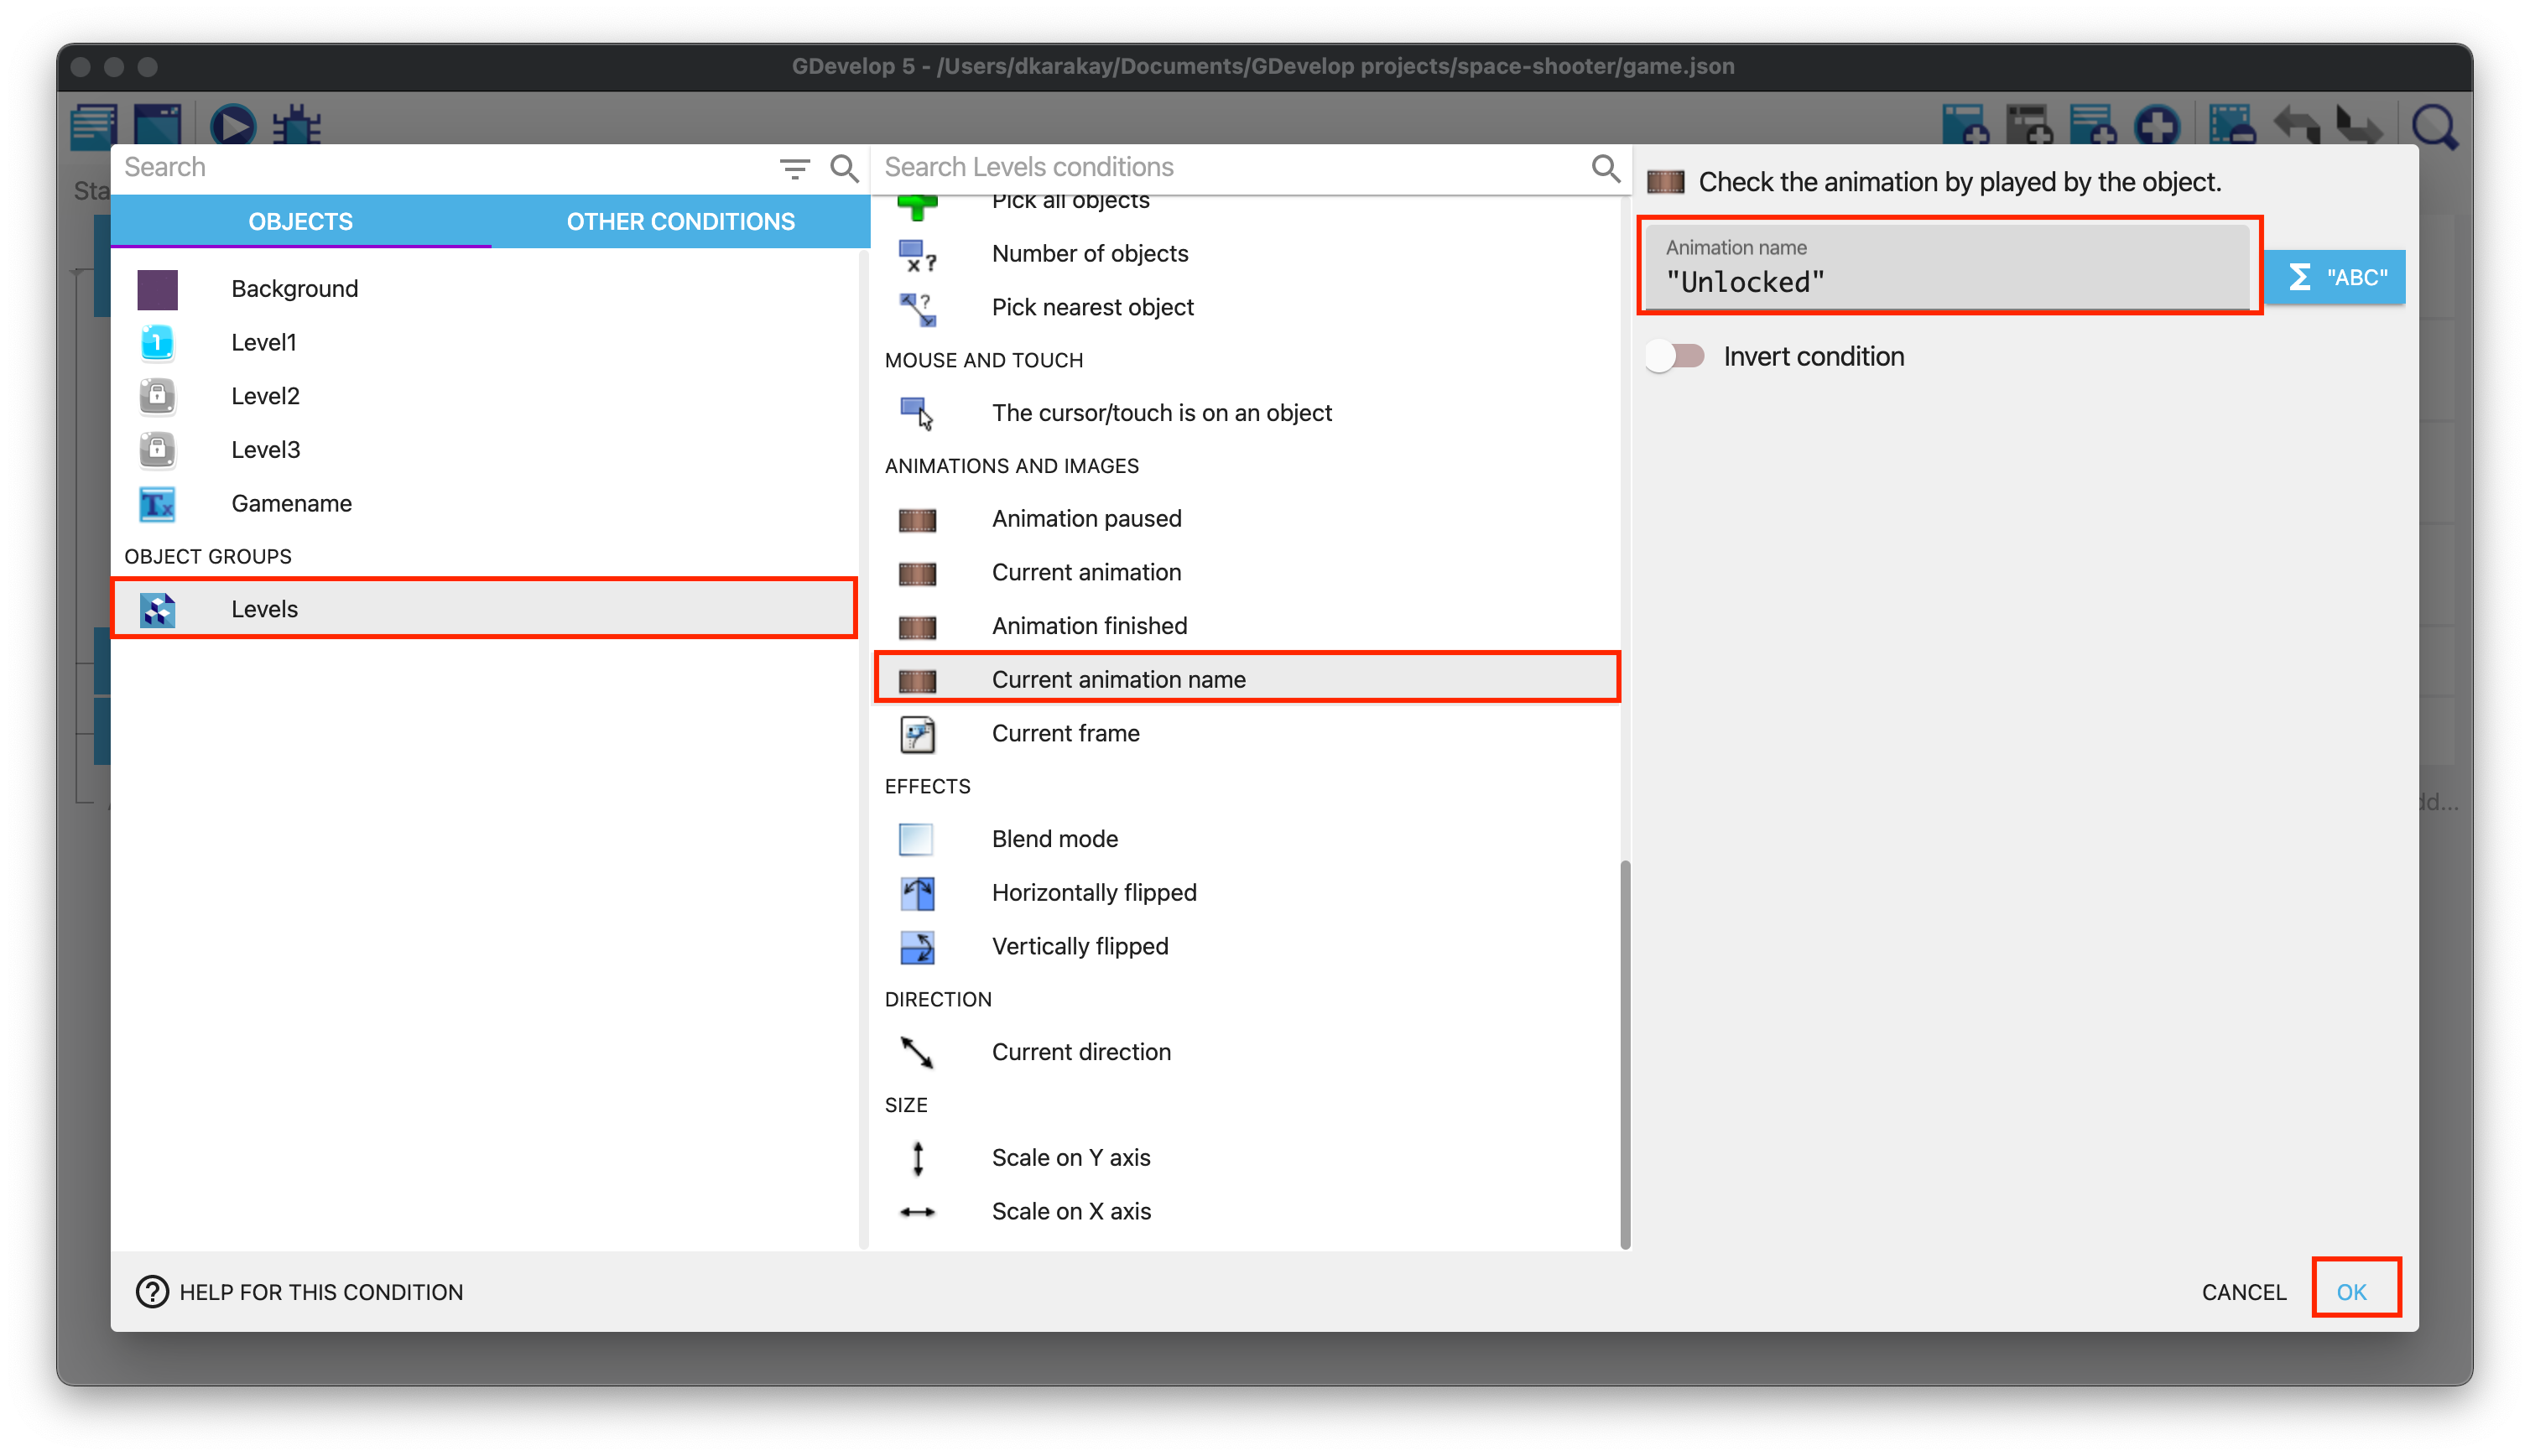
Then, add a sub-event. Choose Level1, and select The cursor/touch is on the object option.
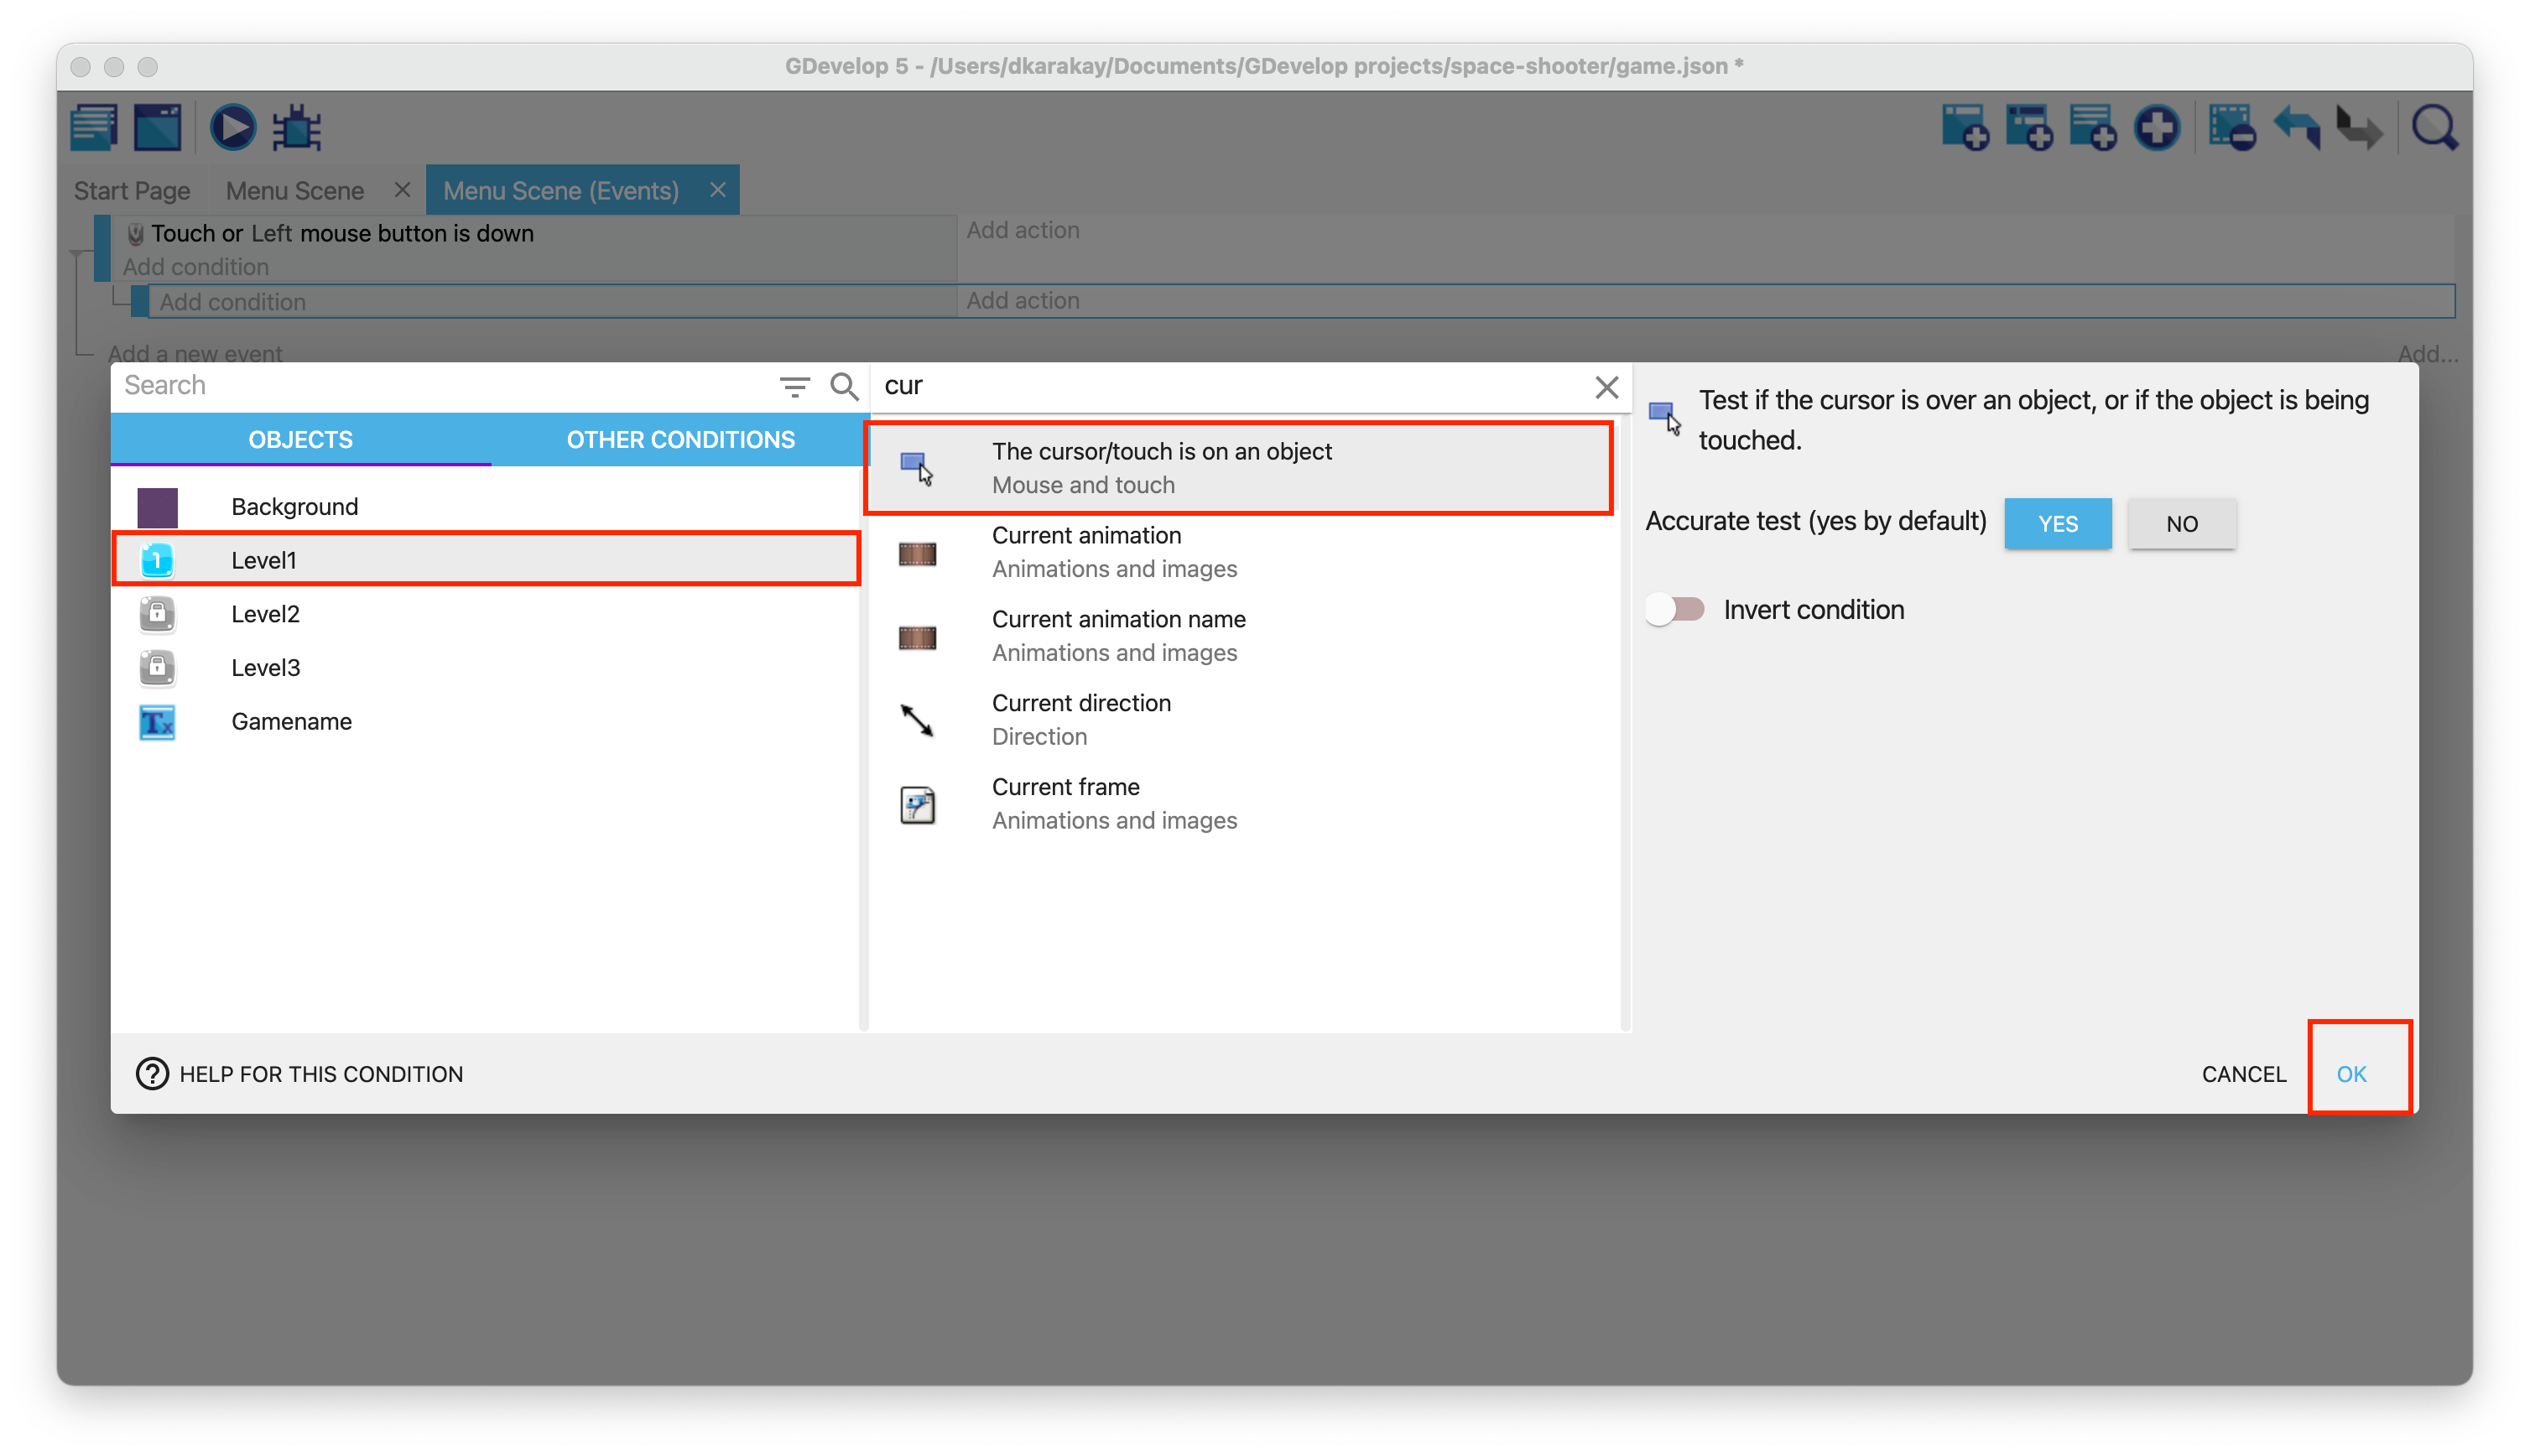
Follow the same procedure to check all buttons.

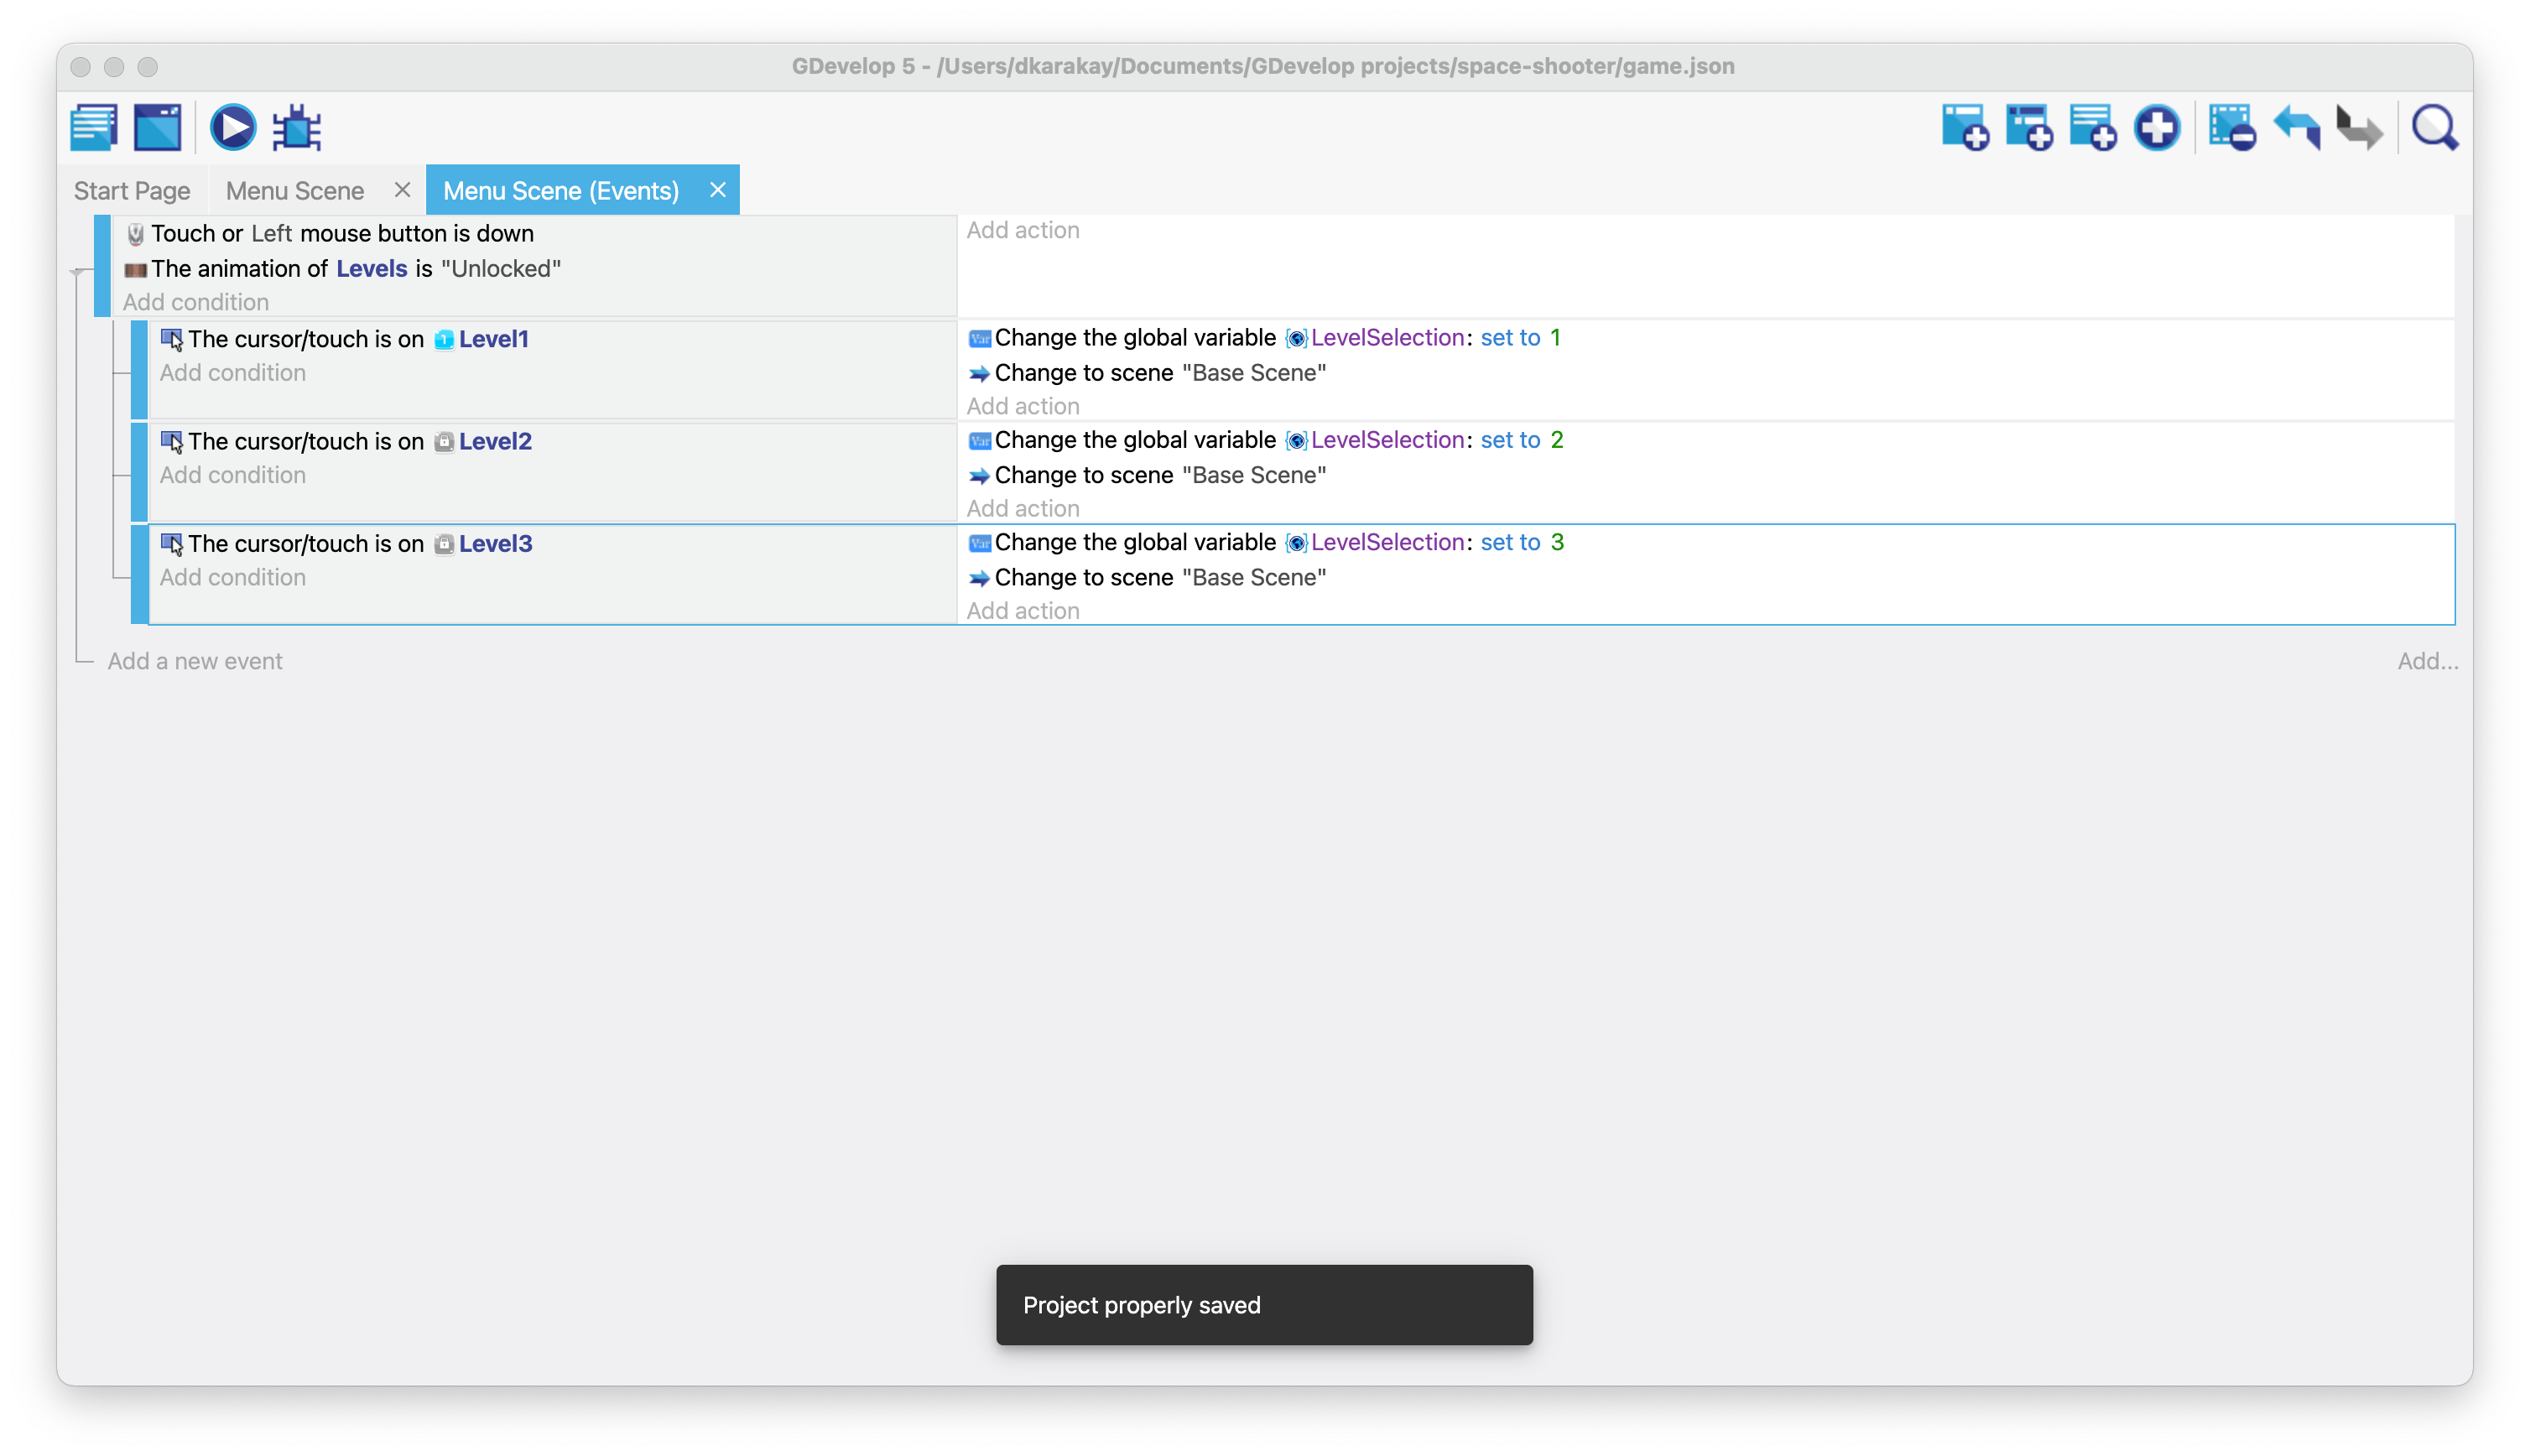
Create a new global variable called "LevelSelection" and set its initial value to 1. Then, change this variable to open the specific level (e.g., change it to 2 to load Level 2). Then add an action to run Base Scene. In the end, your events should look like this:
We will add a new event to check if the CurrentLevel is greater than or equal to 2. If this is the case, then we can set the animation of Level2 to Unlocked.
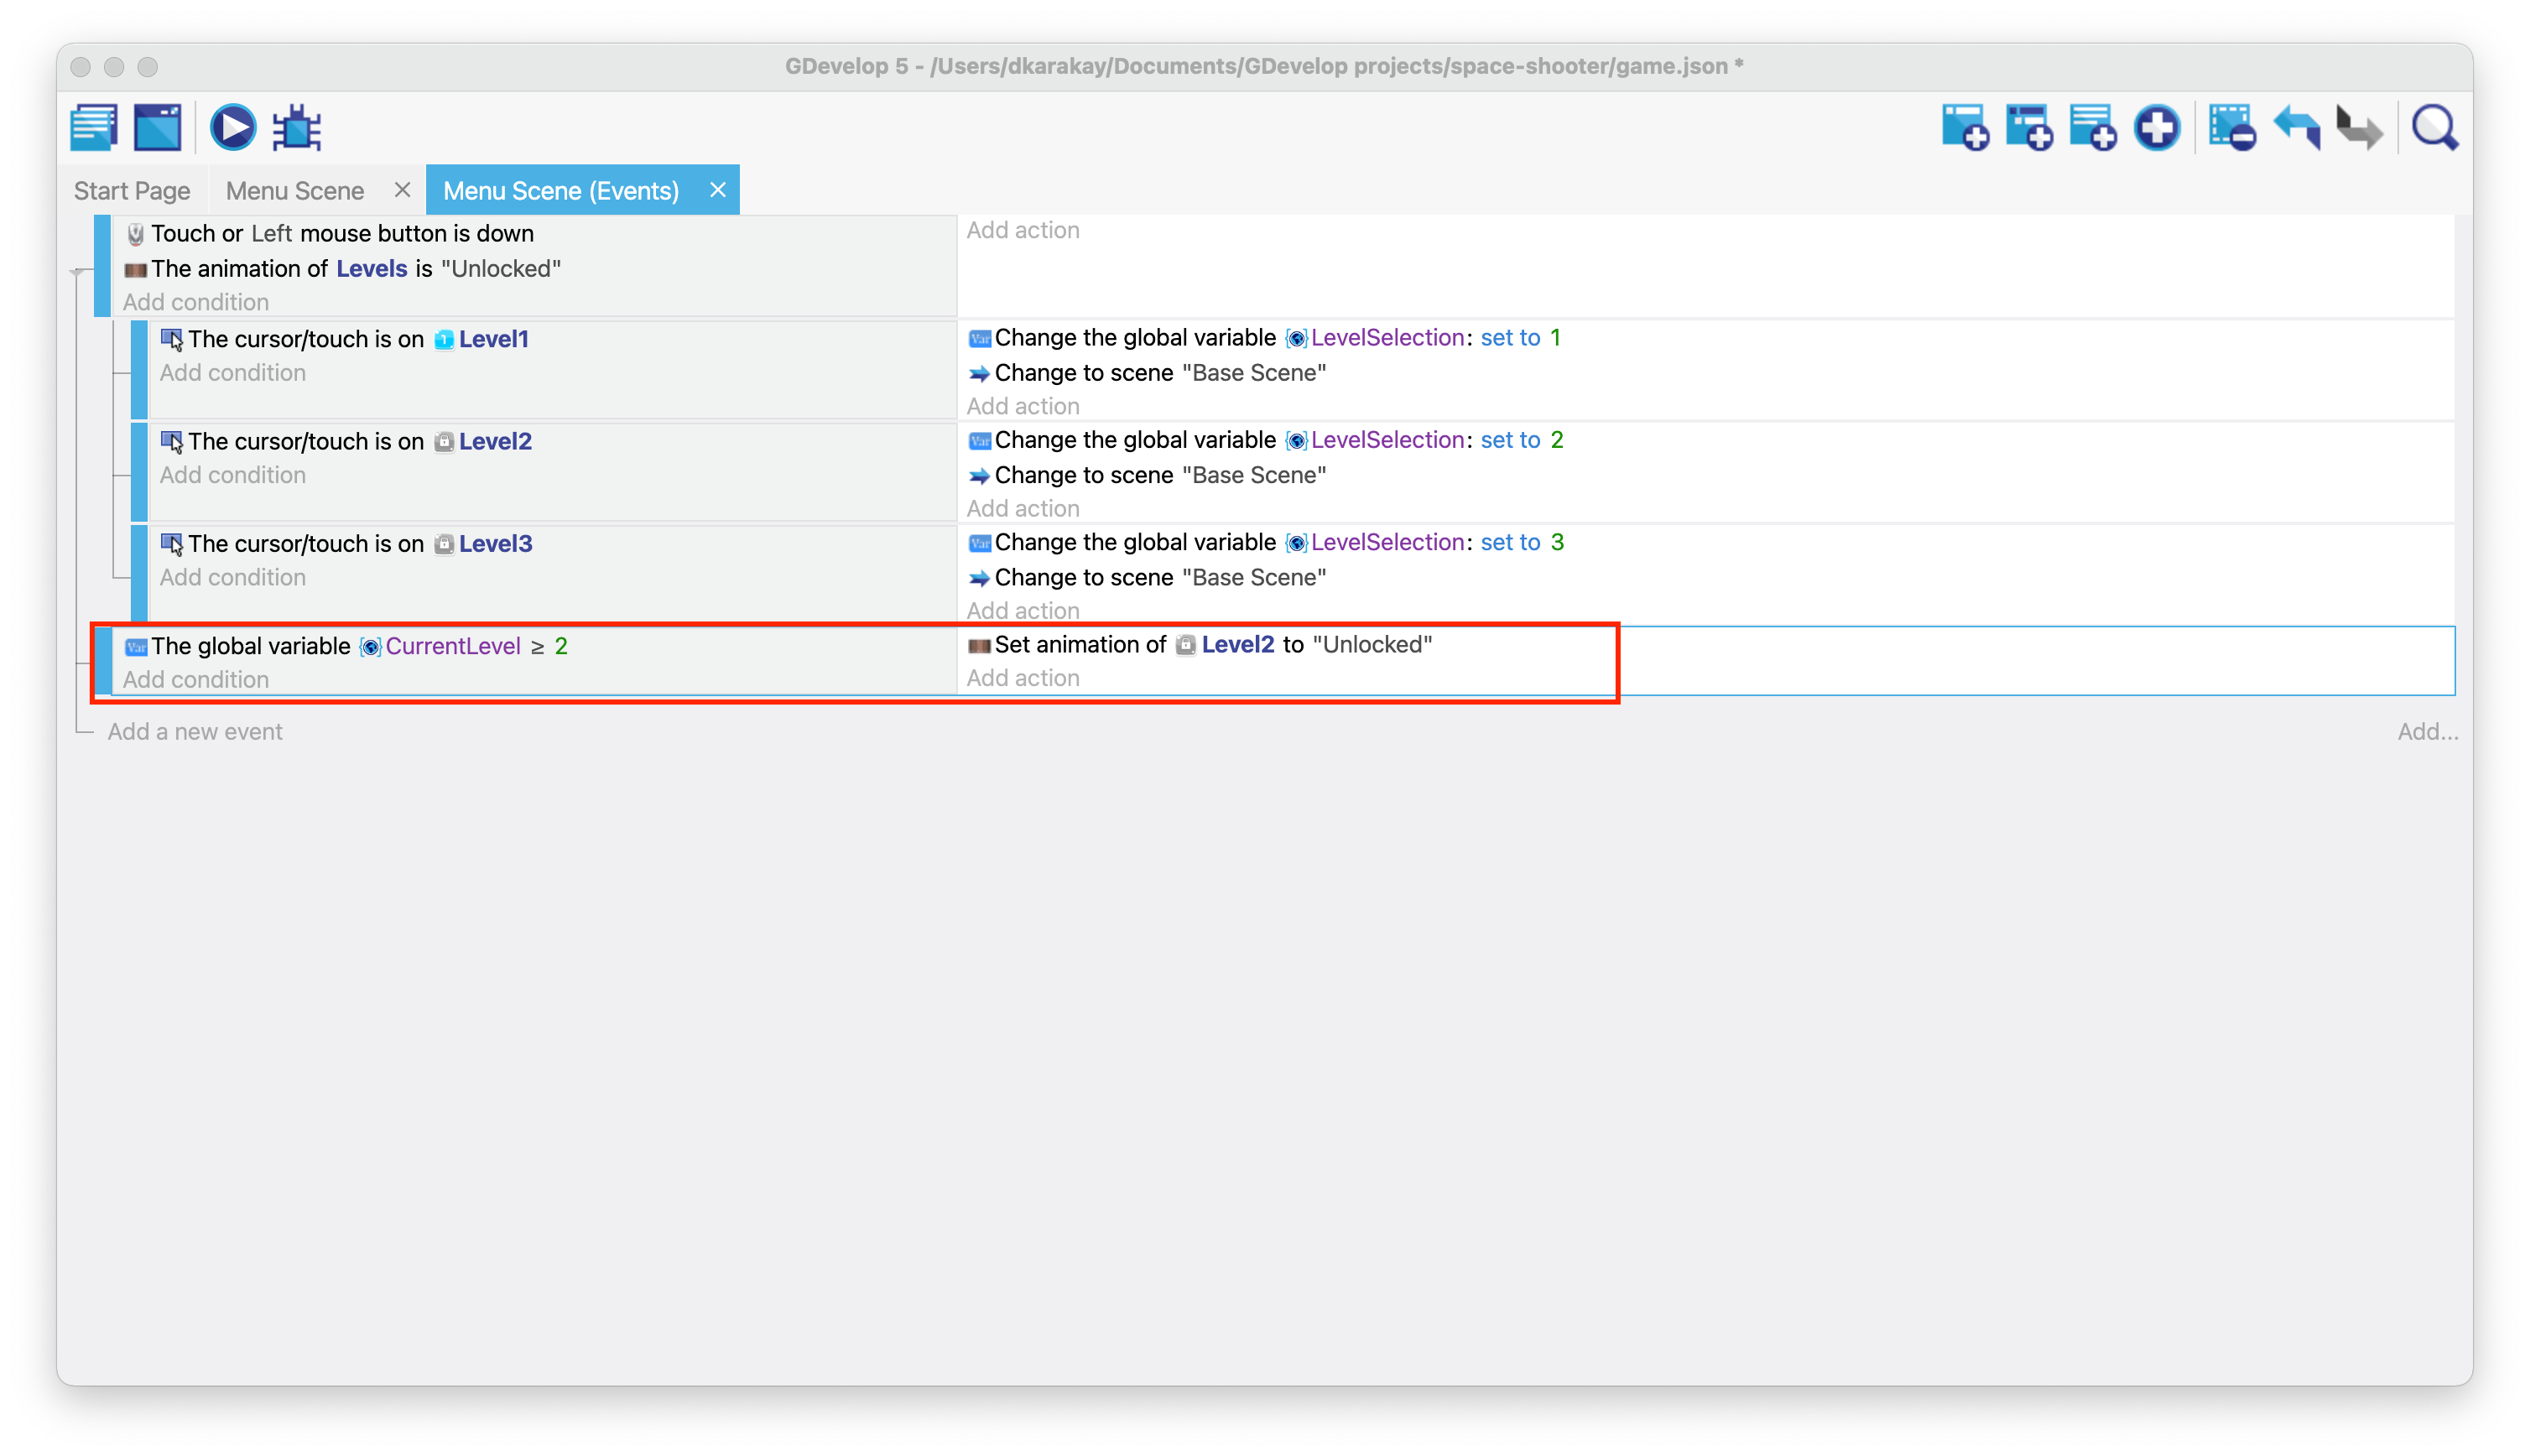
In the end, your events should look this:
Finishing the game
Open the events of Base Scene and find the event to create objects from external layouts.
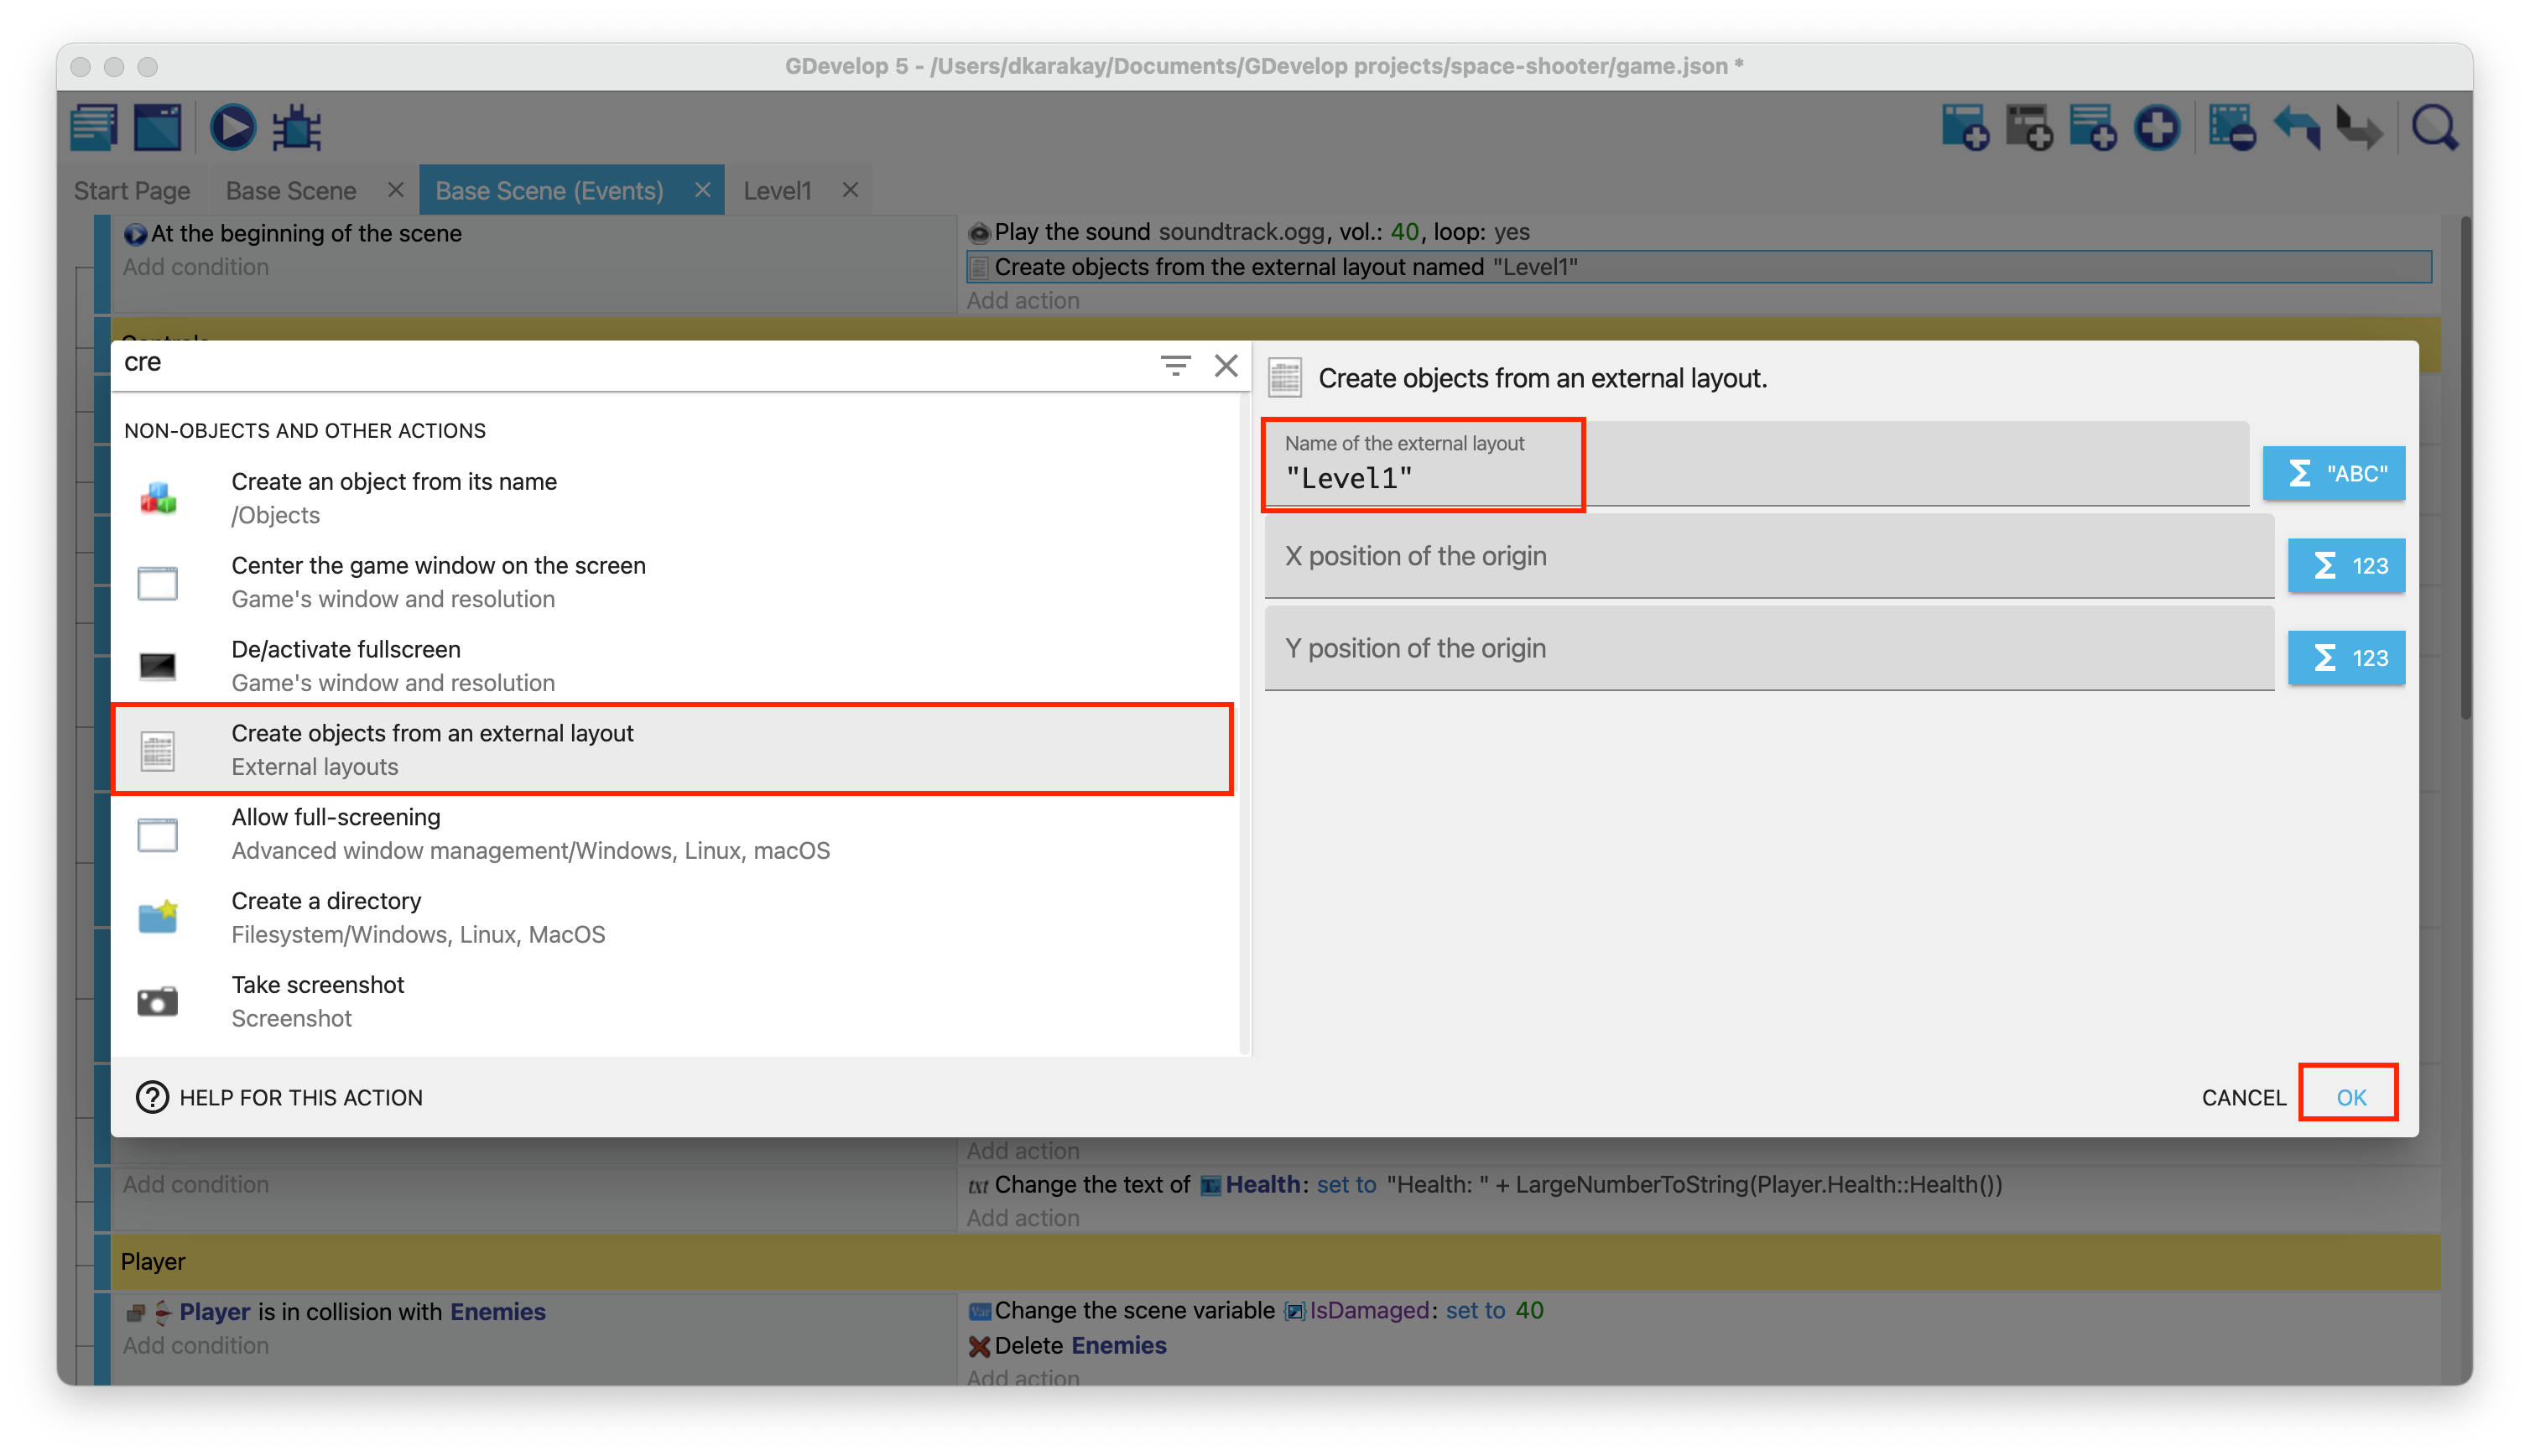
Change the name of the external layout to "Level" + GlobalVariableString(LevelSelection).
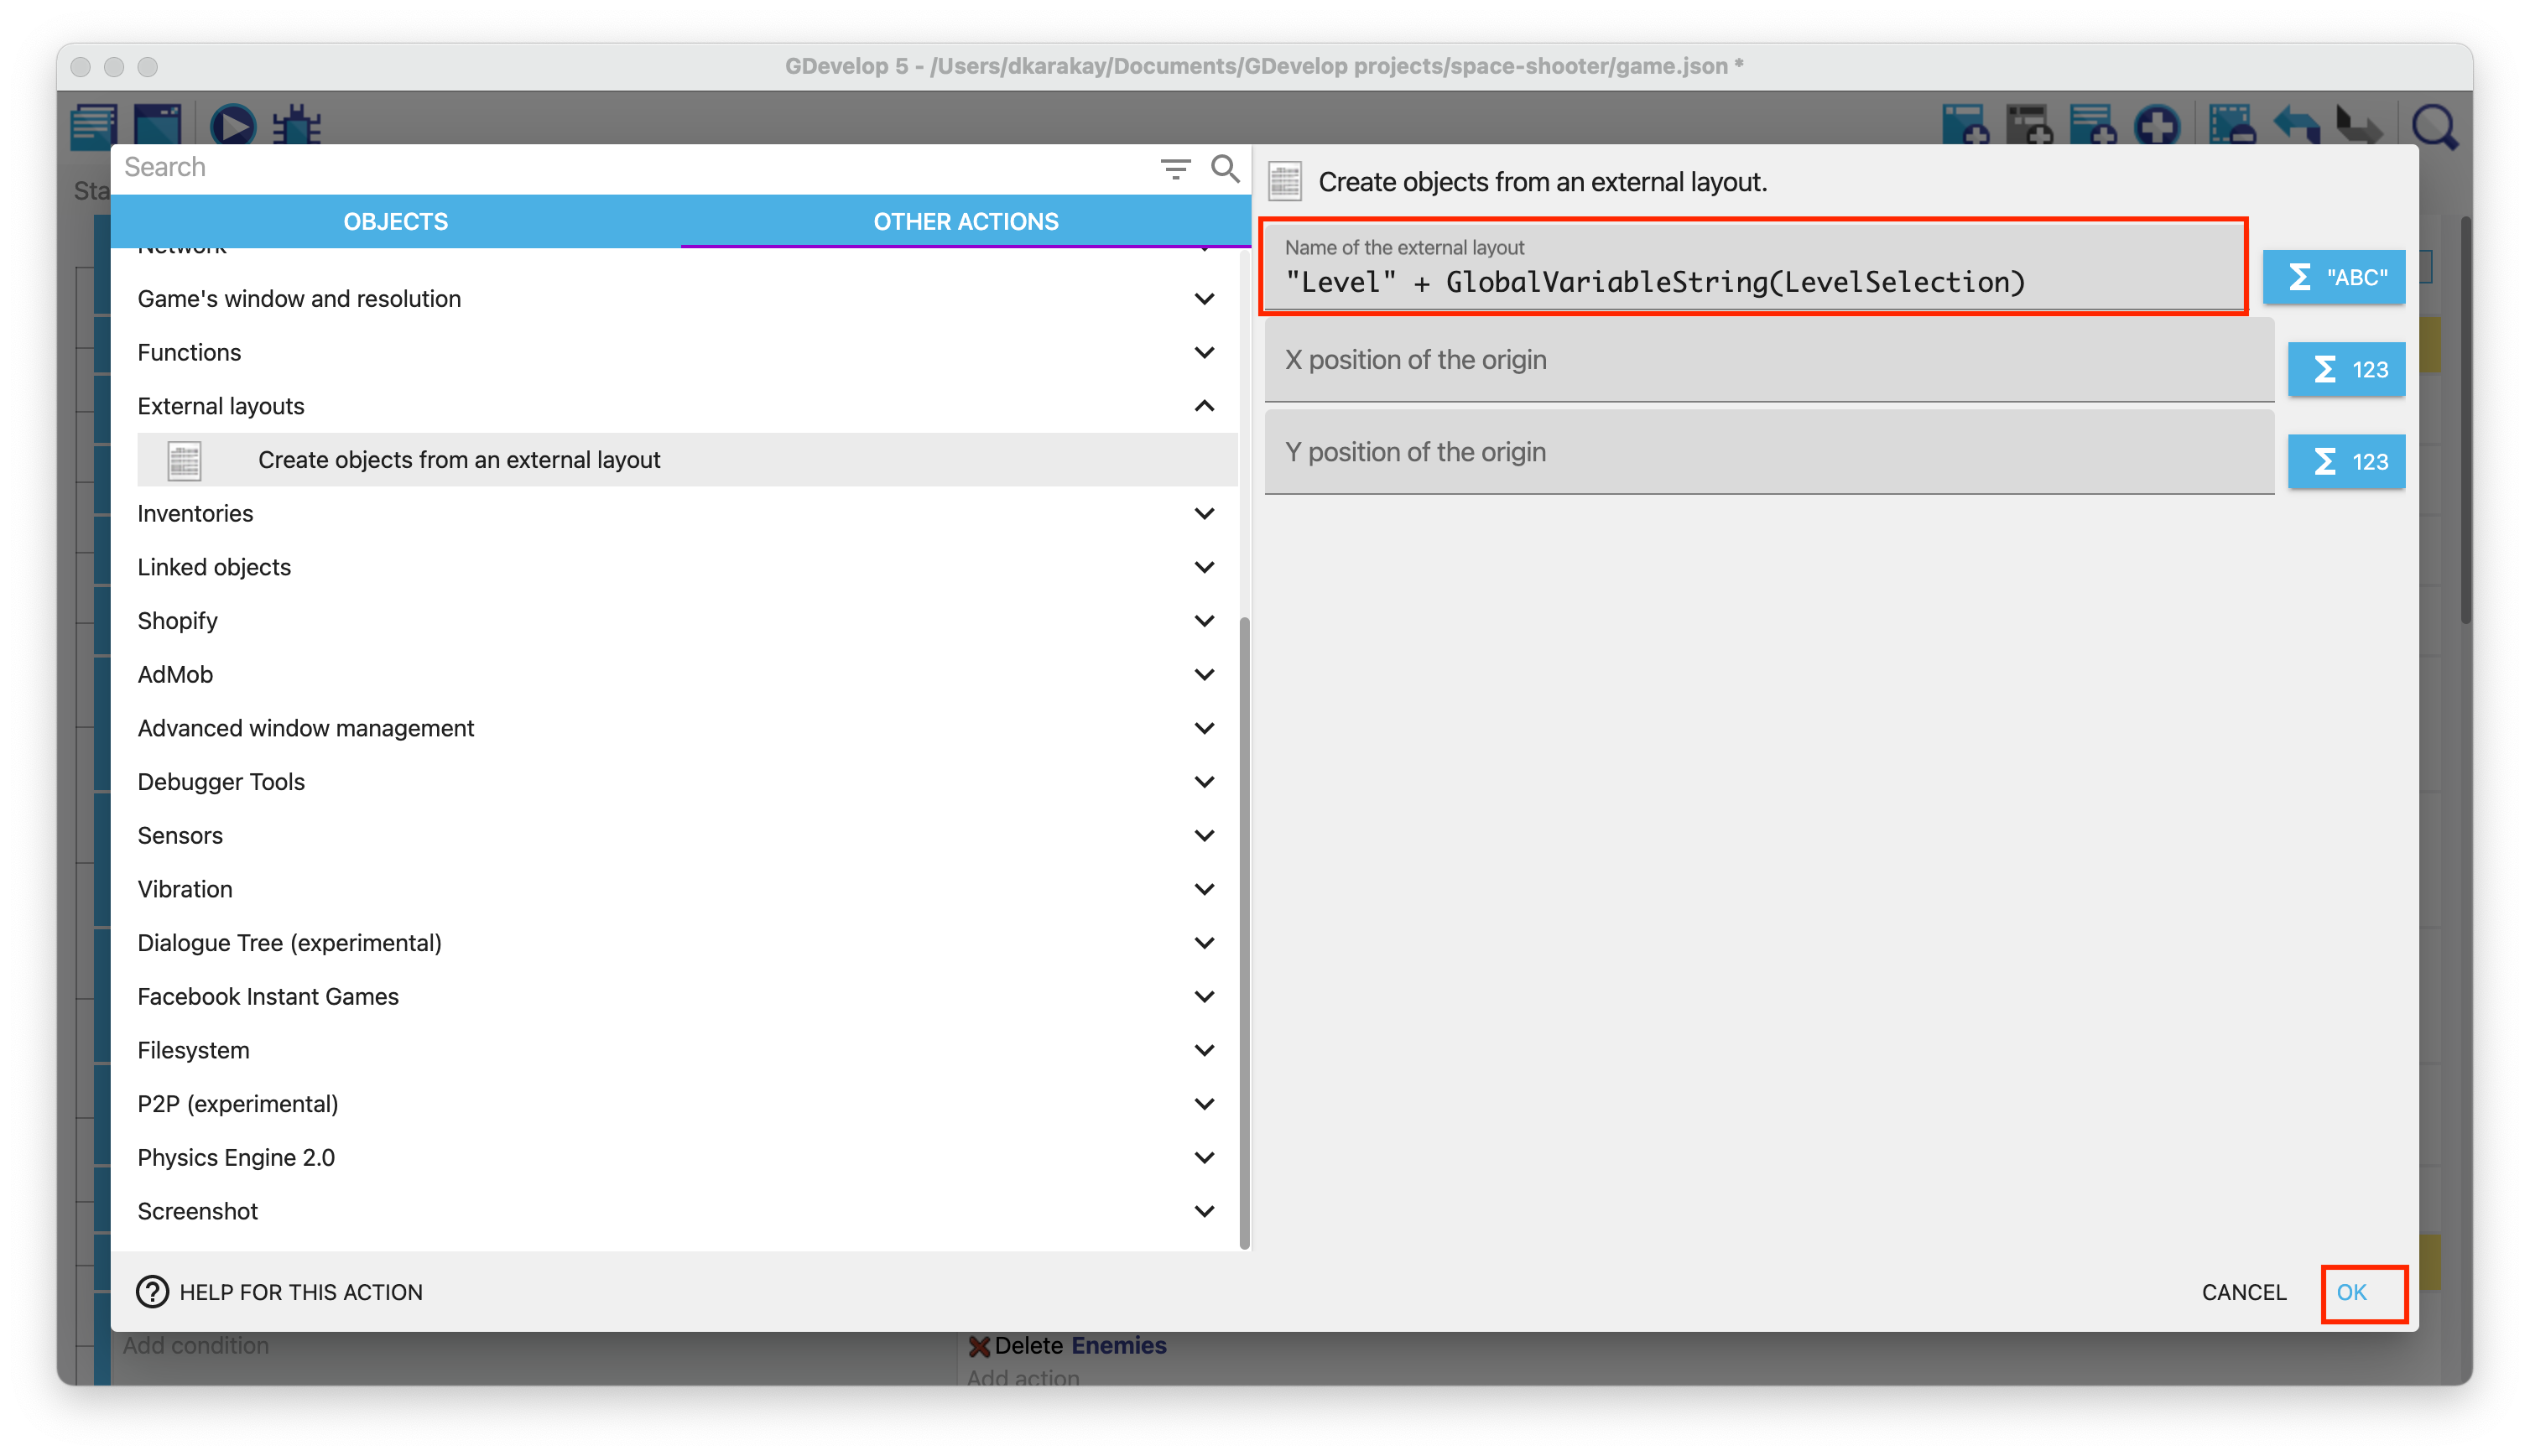
In the end, your event should look like this:

As a final step, find the event about detecting the collision between the Player and the FinishLine. Then, add an action to change the scene to Main Menu Scene.
The End
Now, we are ready to play our game. Open the Main Menu Scene and run the game. Enjoy!