Layer Effects
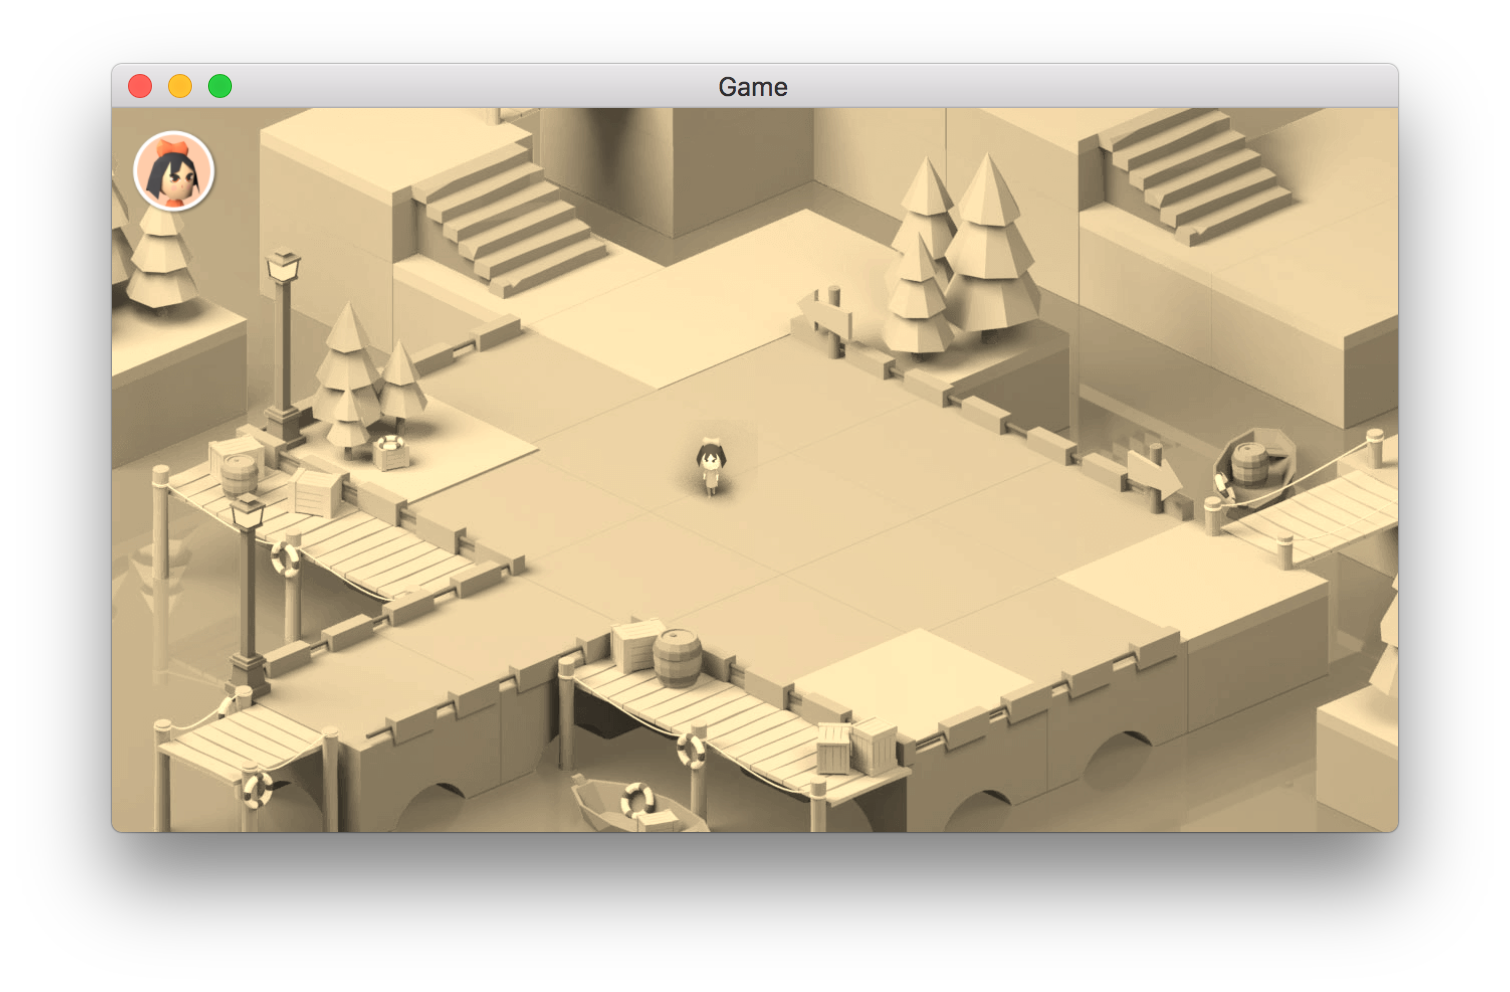
You can add effects to the layers of your scene. These effects allow you to quickly change the atmosphere and rendering of your game. For example, here is the sepia effect added to the isometric-game example:
Tip
You can also add effects to objects on the screen - useful to create advanced visual effects in your game.
Adding an effect to a layer
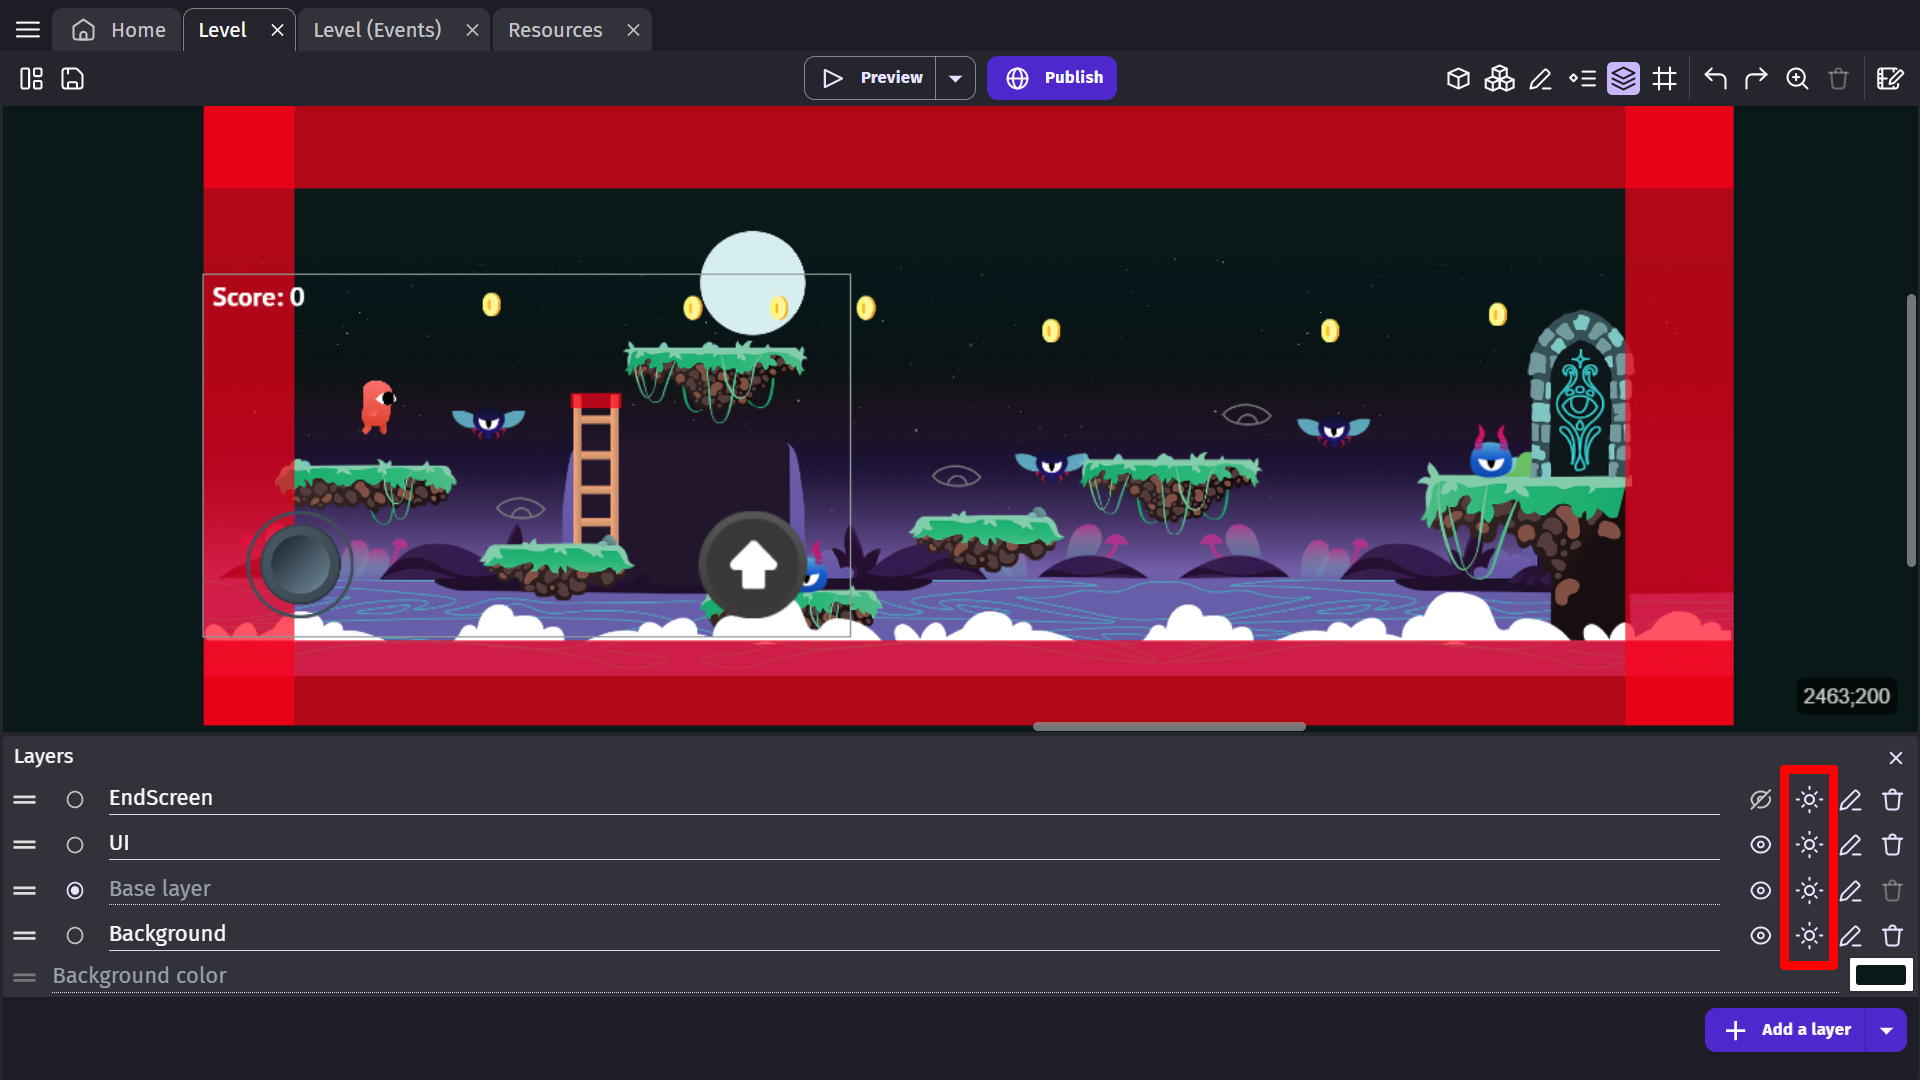
In the scene editor, open the Layers panel. Choose the Base Layer, or another layer, and click on the Edited effects button to edit and add effects to that layer.
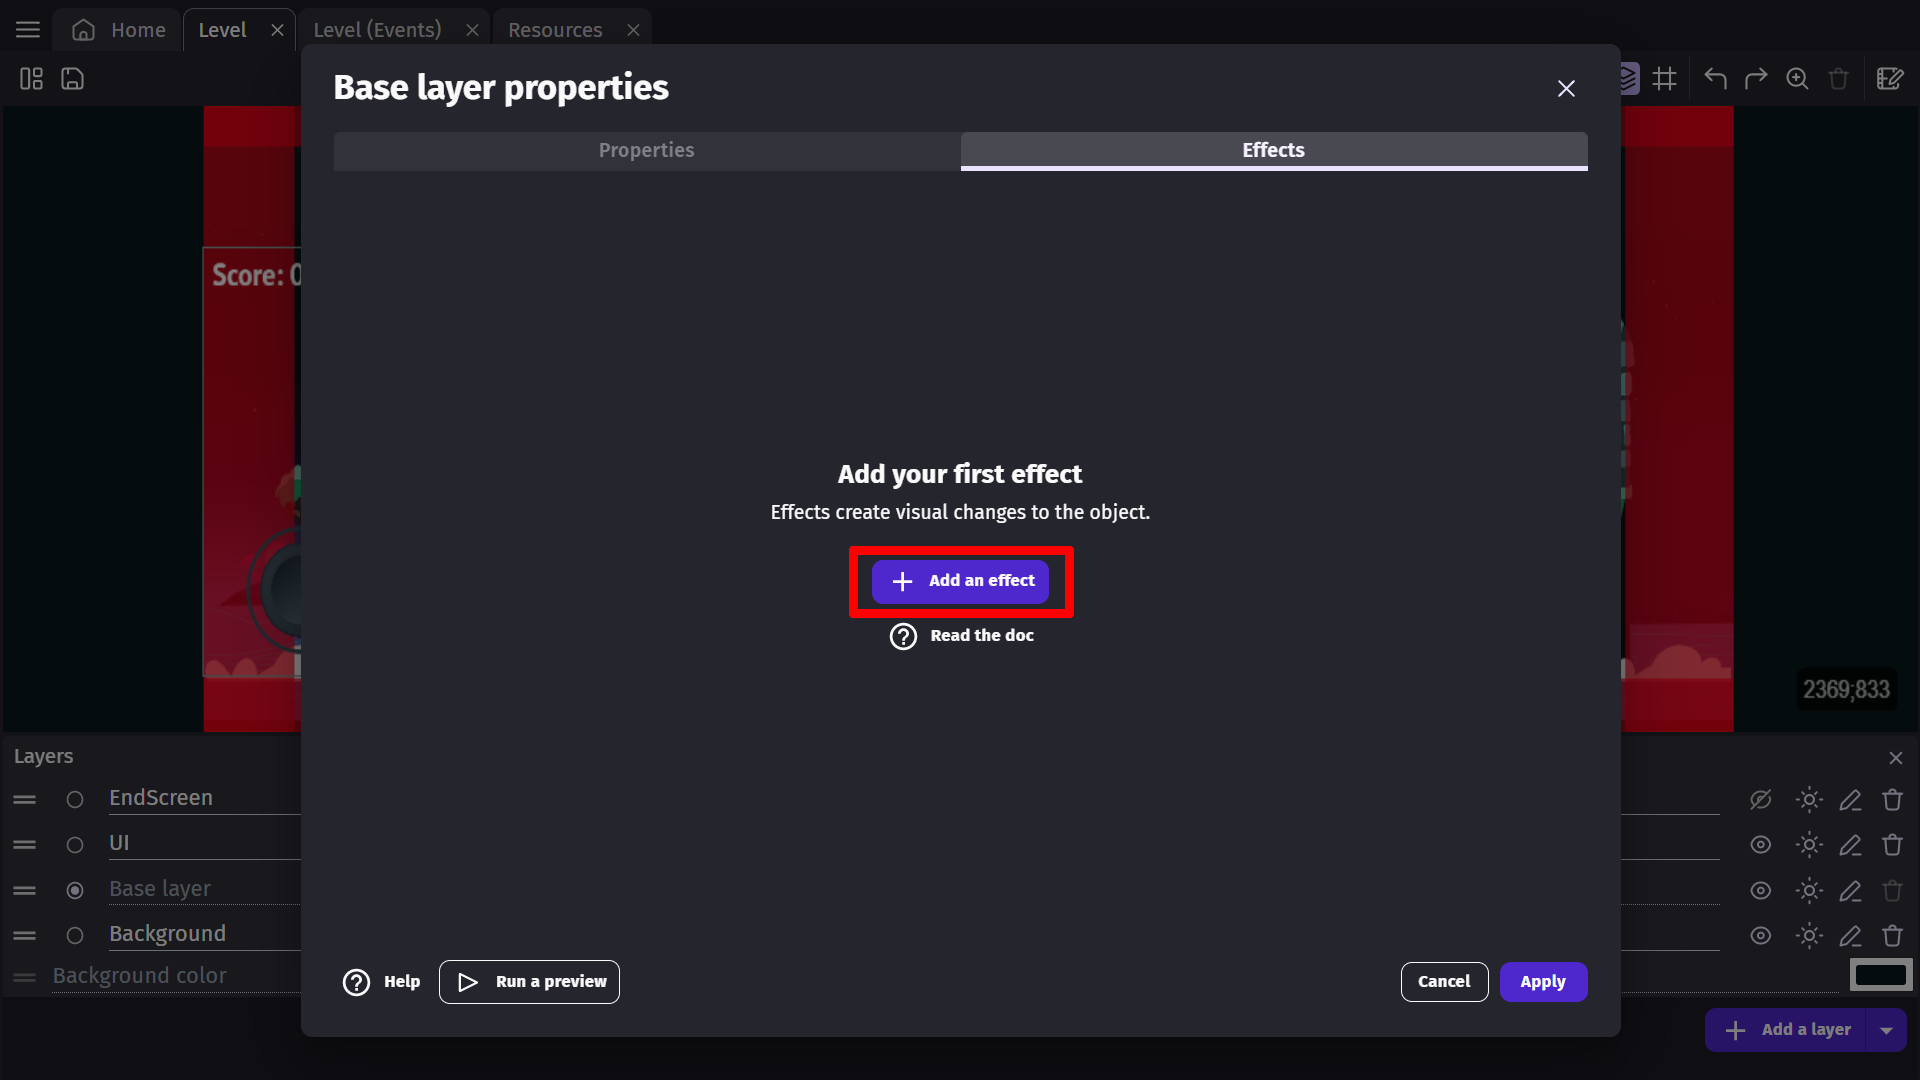
The window that opens will prompt you to Add an effect. If you click on this button you'll add a new effect to your layer.
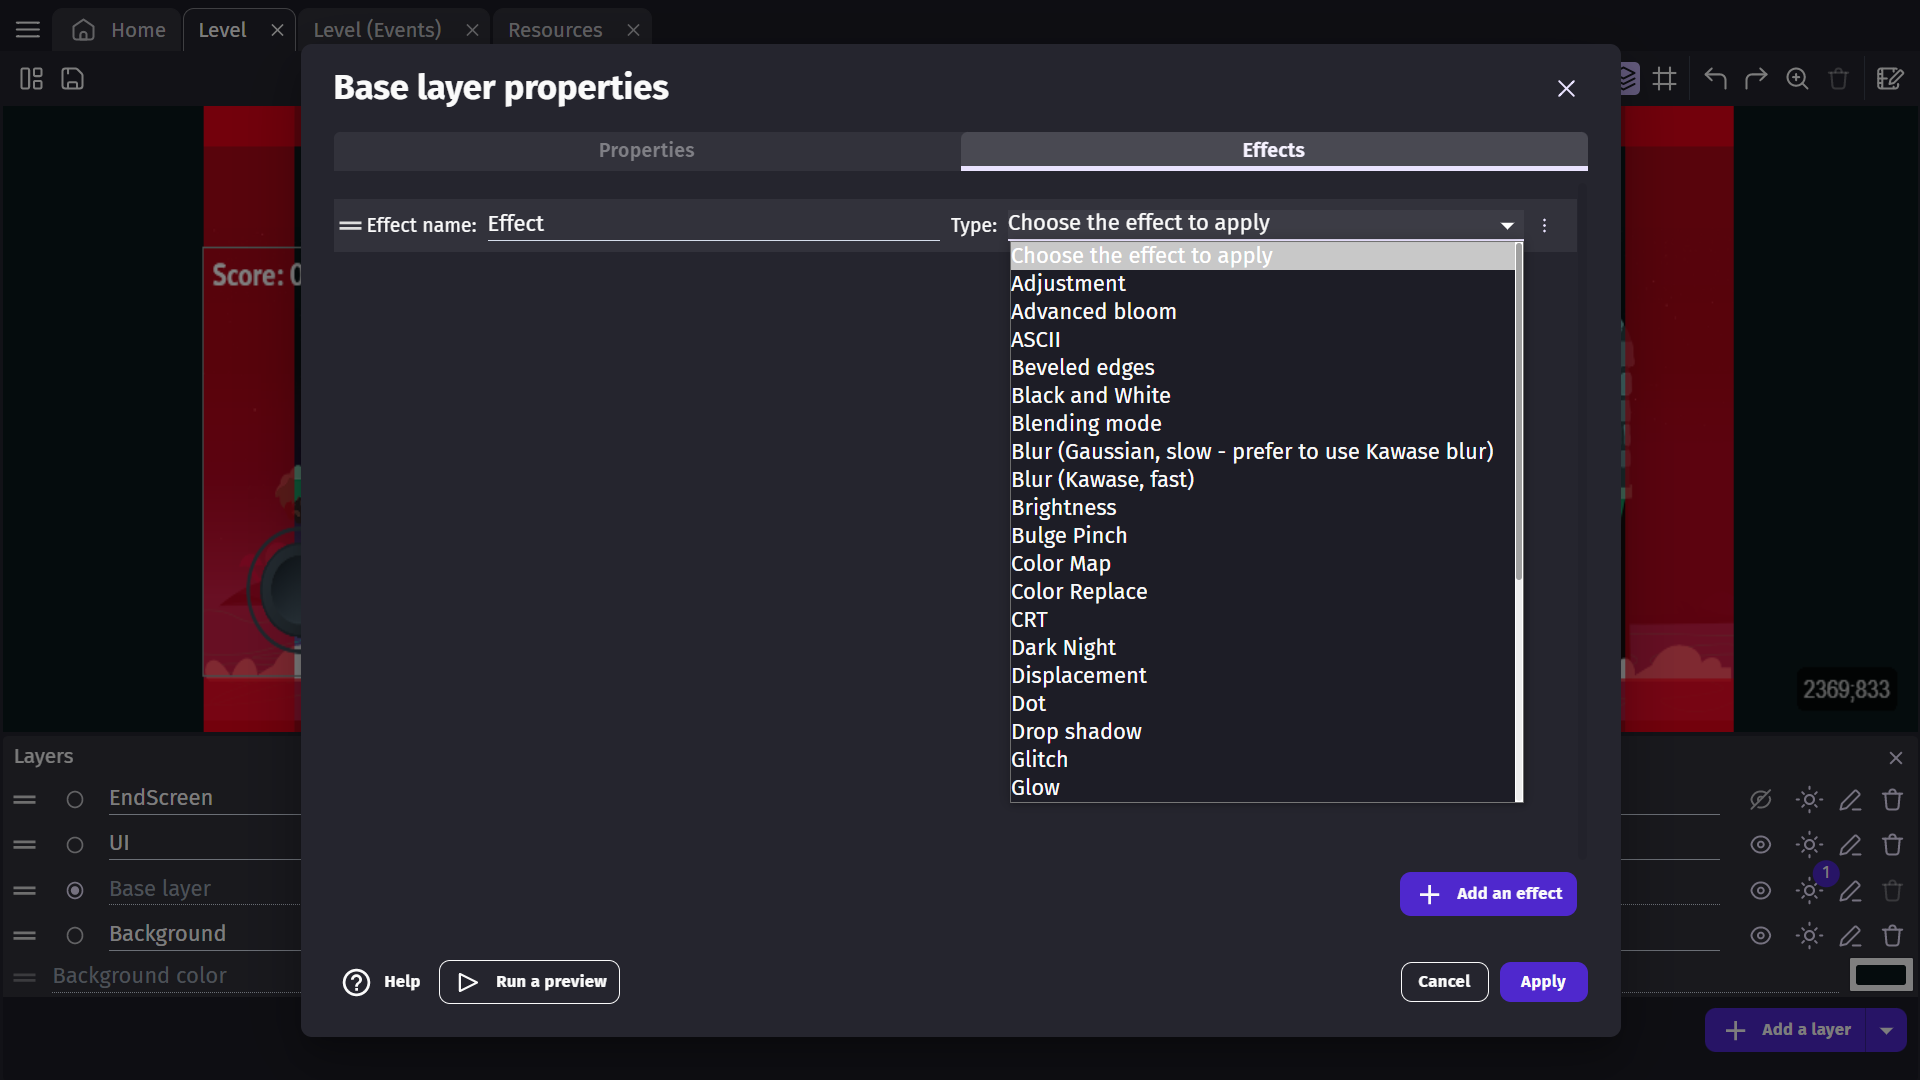
A new layer effect is named "Effect" when created. This name will be useful later for modifying the parameters of the effect during the game.
From the drop-down menu, you can choose the type of effect you'd like to have on your layer.
The window will then show the parameters for the effect - these parameters depend on the effect type that was chosen.
You can leave the default parameters as they are or change them from this window.
Try the game with the effect
Launch a preview to see the effect applied. The effect is applied on the whole layer, so all the objects on the layer will be part of the effect.
If a preview is already running, you can see the changes you've made in real-time by clicking on Apply changes to preview. Read more about Live Previews here.
If you have multiple layers, you can add the same effect to all of your layers.
Note
For example, if you have a Background layer, the base layer and a UI layer (showing the interface of the game), you might want to add effects to the Background layer and the base layer - but not to the UI layer.
Warning
The background color of the scene cannot have any effect applied. For a background that is more than a single color, you can use a Tiled Sprite and apply an effect to the layer that object is on.
Enabling or disabling an effect during the game
You can toggle an effect on or off without removing it entirely. Use the Enable effect on a layer action, specifying the layer name, the effect name, and whether to enable or disable it. The Layer effect is enabled condition lets you check the current state of an effect.
This is useful for gameplay feedback — for example, enabling a color-distortion effect when the player takes damage, then disabling it a moment later.
Changing effect parameters during the game
Using events, you can manipulate a layer effect's parameters during the game. It can be useful for different situations: a day-night cycle, a flashback effect, etc...
First, check out the name of the effect and the name of the parameter to change in the Layers panel. For this, open the Layers panel, then click to edit the effects of the layer. Then from the drop-down menu, toggle the display of parameter names.
In this example, the Advanced bloom effect is called "Effect" and has several parameters, but one of them is called "bloomScale".
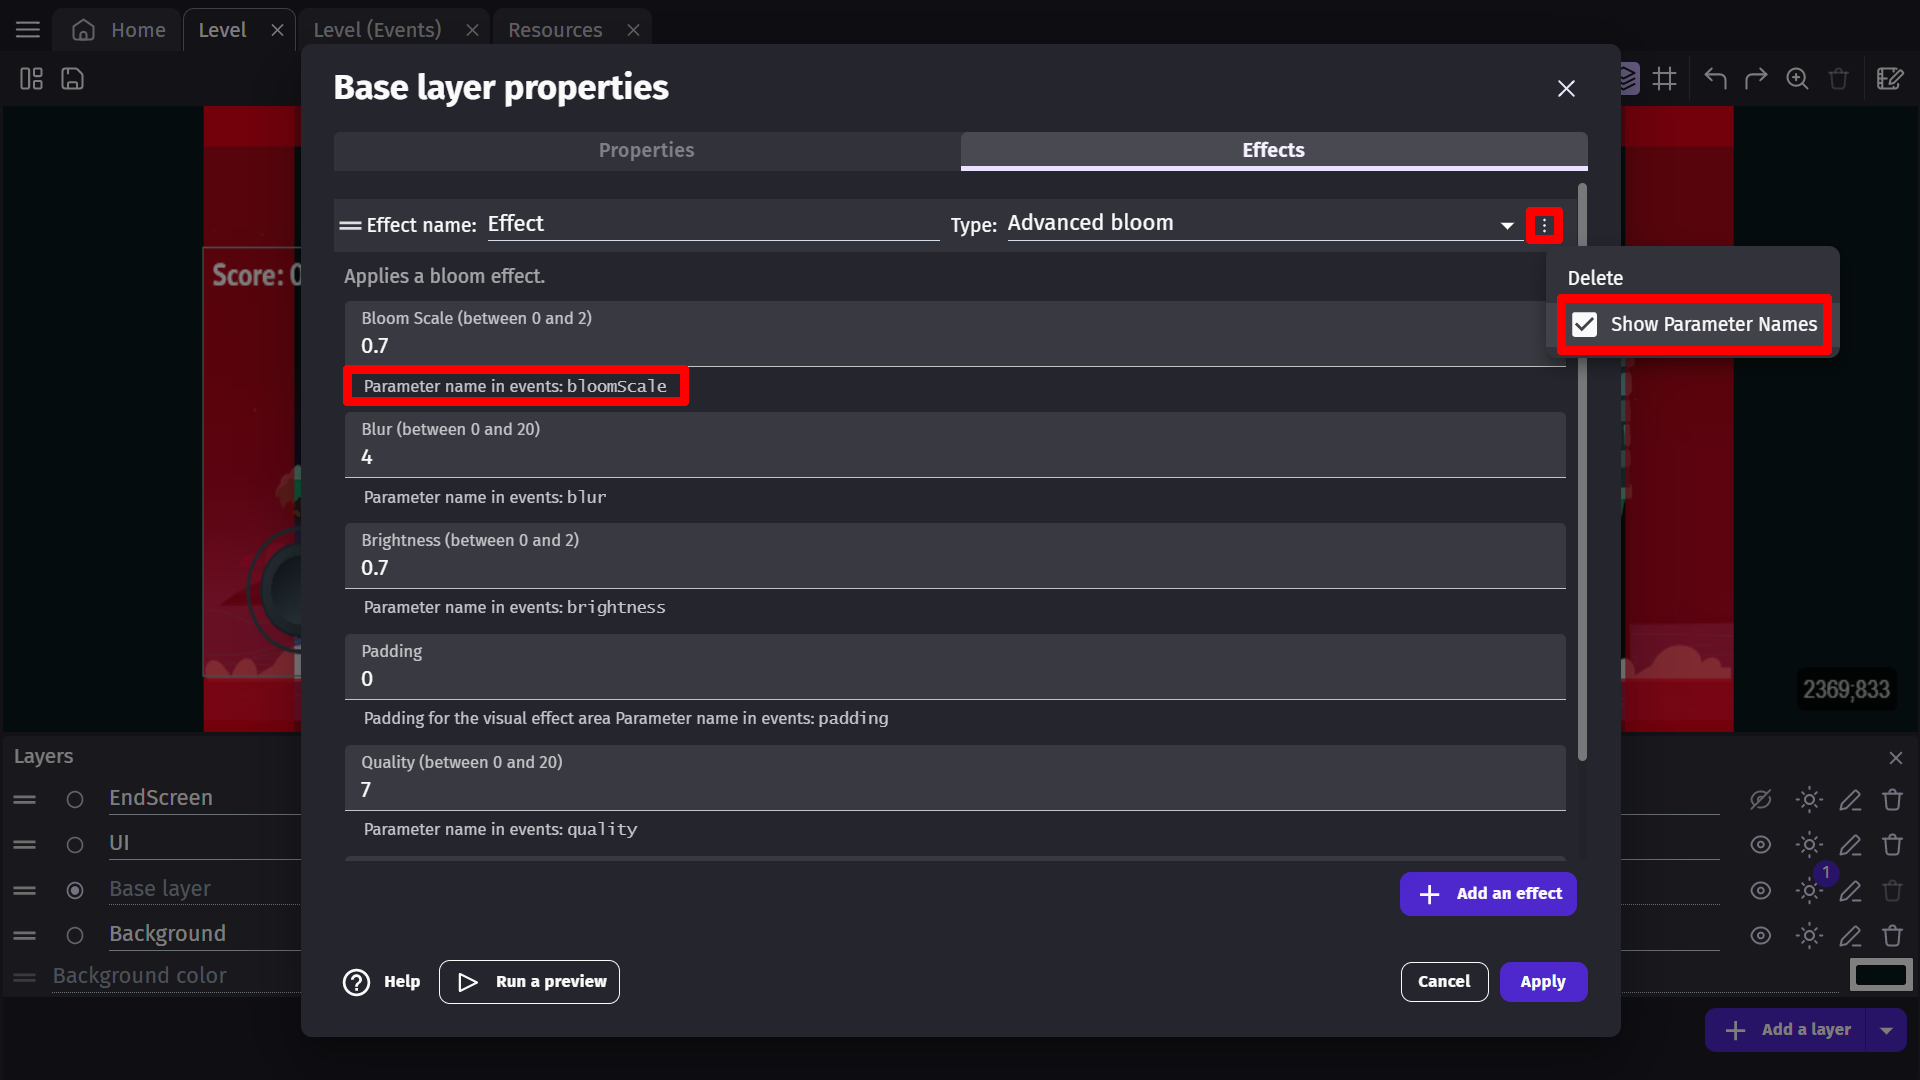
You can then add an event with an action called "Effect Parameter":
- Enter first the layer name (be sure to add quotation marks). For the base layer, enter an empty string (
""). - Enter the name of the effect, in this case
"Effect". - Enter the name of the parameter, in this case
"bloomScale". - Finally, enter the new value to be set for this parameter.
Danger
All of these names are case-sensitive. Be sure to double-check the name of your effect and parameters.
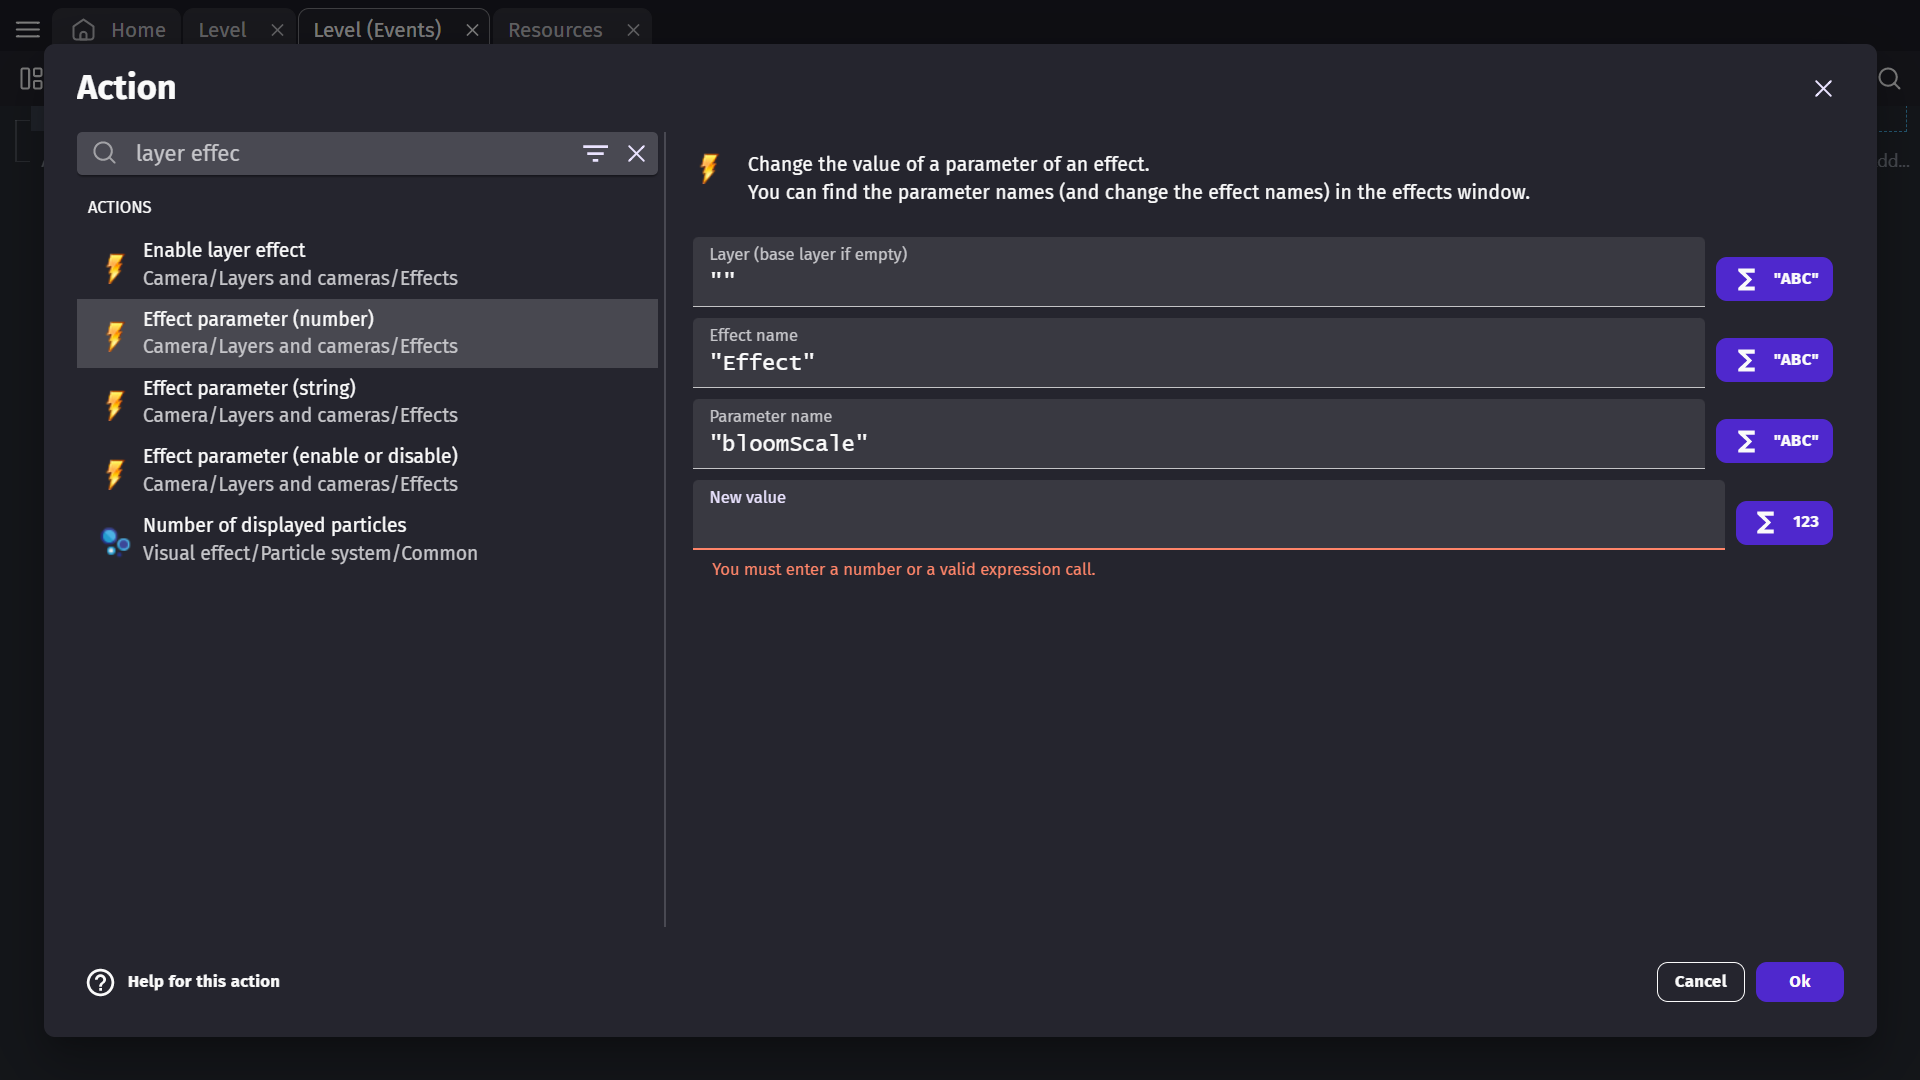
There are three different actions depending on the type of parameter you want to change:
- Effect property (number) — for numeric values such as blur strength or brightness.
- Effect property (string) — for text values such as the texture file path used by the Displacement effect.
- Effect property (boolean) — for yes/no toggles exposed by some effects.
Advanced effects usage
Warning
While most effects are intuitive enough to be used directly, some might require a bit more knowledge to understand what they do. This section explains some of the advanced effects.
Color map
Applies a color-map effect on an object or layer.

This works by modifying a reference "color image map" containing all possible colors.
- Download the reference color map image below, or create your own.
- In an image editor (like Photoshop or GIMP), tweak the color balances of the reference color image map.
- e.g. In an image editor, using the invert colors function on the reference map will also invert all of the colors of the objects on the layer that the Color Map effect is used.
- Save it as a new file, then use this resulting file as the color image map for the effect in GDevelop. Download the image file below and use it as the color map in GDevelop:
color-map-original-template.png (reference color map image): 
Note
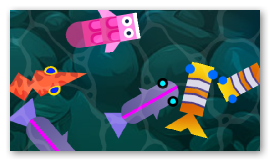
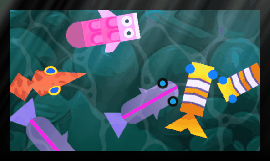
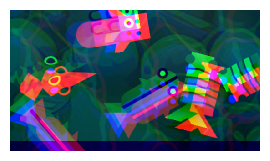
Each example color map below relates to the images above with the same name. By shifting the original template's colors, it shifts the colors of all of the objects on that layer.
color-map-model-1.png :  color-map-model-2.png :
  color-map-model-3.png :
Note
Don't forget to make changes to the colors of this file using an image editor. Otherwise, no changes will be visible (as the original colors won't be changed).
CRT
Applies a CRT effect, simulating an old cathode-ray tube television.
Displacement
This effect uses the pixel values from the specified texture (called the displacement map) to perform a displacement of an object or layer.
You can download this example of a displacement map file and use it in GDevelop when setting up the effect:
You can use this effect to apply all manner of warping effects. Currently, the r (red) property of the texture is used to offset the x-axis and the g (green) property of the texture is used to offset the y axis.
It uses the values of the displacement map to look up the correct pixels to output. This means it's not moving the original. Instead, it's starting from the original output and displays the screen differently based on the displacement map. For example, if a displacement map pixel has red = 1 and the filter scale is 20, this filter will output the pixel approximately 20 pixels to the right of the original.
Drop shadow
Add a drop shadow under your object's visible on the layer.
God rays
Cast rays of light from the top of the screen. This won't work well if shown on top of the background color of the scene. Be sure to use an object acting as a background or a floor.
Kawase blur
This is a faster version of the traditional "Blur" effect. It's recommended that you use this one rather than the "Gaussian" blur effect.
Outline
Add an outline on all objects of the layer having the effect. This won't work well if shown on top of the background color of the scene. Be sure to use an object acting as a background or a floor.

Pixelate
Applies a pixelated effect, making display objects appear 'blocky'.
![]()
Note
For pixel-perfect or 8-bitgames, you can change the Scale mode options in your game properties instead of using this effect.
RGB split
Separate each component's RGB(red, green, blue) colors and display them on the screen with an offset:
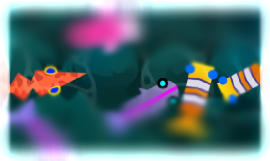
Tilt shift
Add blur to the top and bottom of the entire layer or object. Perfect to simulate a tiny world or a camera focus effect.
Reference
N/A